Direct answer: A pilates calves workout built from slow heel raises, single-leg balance, foot and ankle articulation, shin-strengthening toe raises and wall-supported stretches can train lower-leg strength and ankle control in about 15 minutes, with nothing more than a wall and a patch of floor. Start with two or three sessions a week, move at a tempo slow enough to feel your whole foot working, and stop any move that brings on sharp pain or pain in the Achilles tendon area. The routine below gives you the minute-by-minute plan, the cues for each move, a three-week progression and the red flags that mean it is time to ask a clinician.
This guide is for adults who already move comfortably through daily life and want steadier ankles and stronger lower legs, whether they come from Mat Pilates classes, reformer studios or home workouts. It is general fitness education, not individualized medical advice or a rehabilitation program. It is a research-based, expert-informed guide built from published anatomy references, orthopedic and public-health pages and a clinical practice guideline, with Pilates technique drawn from instructor education sources. We did not run hands-on testing, and a certified Pilates instructor can tailor the routine to a specific body or injury history.
What Your Calves, Ankles and Feet Actually Do
Before you add a single heel raise, it helps to know what is doing the lifting. The lower leg is a compact system of muscles, tendons and joints, and each part has a different job. A little anatomy makes the cues later in this guide feel logical instead of arbitrary.
The two calf muscles: gastrocnemius and soleus
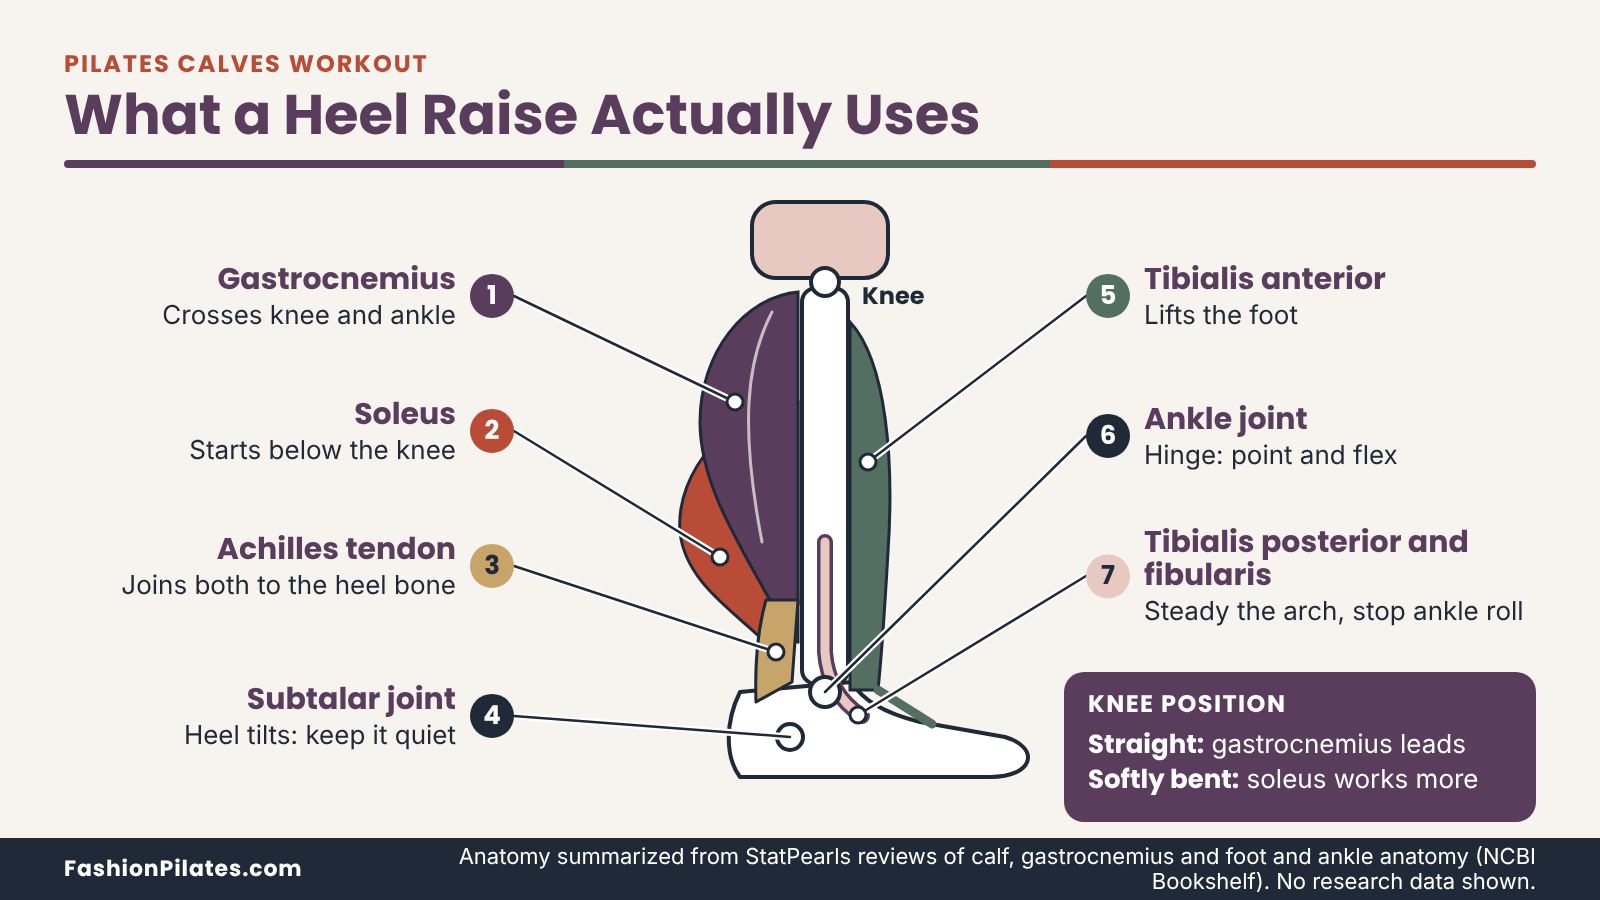
Together the two big calf muscles are called the triceps surae, and both pull on the heel through the Achilles tendon. A StatPearls anatomy review of the calf region describes the gastrocnemius as the more superficial muscle and the soleus as the deeper one that lies beneath it.
Gastrocnemius: the two-joint muscle
The gastrocnemius is the rounded muscle you can see and feel on the back of the lower leg. It has two heads that start on the lower end of the thigh bone, so it crosses both the knee and the ankle. According to a StatPearls review of the gastrocnemius muscle, that two-joint design is why knee position changes how the muscle behaves, and the same review notes it is recruited strongly in explosive actions such as sprinting. For your routine, the practical takeaway is simple: the gastrocnemius is best challenged with the knee straight.
Soleus: the deeper standing muscle
The soleus sits under the gastrocnemius and starts below the knee, so it does not care much whether your knee is straight or bent. The same calf anatomy review describes it as active during sustained work such as standing or walking uphill. That is why a heel raise performed with the knees softly bent is generally described as shifting more of the effort toward the soleus, and why this routine includes both a straight-knee and a bent-knee version. Training only one position leaves half of the calf story untold.
The ankle, foot and shin muscles that share the job
Calf strength does not work alone. A heel raise only looks like a calf exercise; the ankle joint, the foot arch and the muscles at the front and inside of the shin all decide how smoothly it goes. If you have ever wobbled at the top of a raise, the calf was probably not the weak link.
The ankle joint and the subtalar joint
A StatPearls review of foot and ankle anatomy explains that the ankle proper is formed where the talus bone sits in a socket made by the shin bones. Pointing the foot down is plantarflexion, performed by the calf muscles through the Achilles tendon, and pulling the foot up is dorsiflexion, performed by the tibialis anterior. Just below the ankle, the subtalar joint lets the heel tilt inward and outward, which helps the foot adapt to uneven ground. Ankle control in Pilates terms means keeping that tilting movement quiet while the foot presses straight up and down.
Tibialis anterior, tibialis posterior and the arch
The tibialis anterior runs down the front of the shin and lifts the foot, which is why toe raises train it. The tibialis posterior sits deep in the back of the leg, and the same review credits it with turning the foot inward and helping support the inner arch. Together with the fibularis muscles on the outside of the leg, these muscles keep the ankle from rolling during a raise. The review also describes the foot as acting like a rigid lever for push-off, with the arches helping to spread load, which is the quality you are quietly training when you rise onto the balls of your feet without collapsing inward or rolling outward.
The Achilles tendon: the shared cable
Both calf muscles hand their force to a single thick tendon at the back of the heel. Because that tendon is a common site of overuse pain, it deserves its own short introduction before you start loading it.
How muscle and tendon work as a team
The gastrocnemius and soleus merge into the Achilles tendon, which attaches to the back of the heel bone. When you rise onto your toes, the muscles shorten and the tendon transmits that pull to the heel, then stores and returns some of the load as you lower. Muscles usually adapt to a new training demand faster than tendons do, which is one reason this guide keeps the early weeks slow, low in volume and honest about tempo. Rushing a tendon is rarely rewarded.
Why gradual loading matters
The American Academy of Orthopaedic Surgeons patient page on Achilles tendinitis lists a sudden increase in exercise intensity, a change of footwear and tight calf muscles among the common contributors to Achilles irritation. None of that means a calf routine is risky for healthy adults. It means the sensible plan is to build repetitions, range and difficulty in small steps, which is exactly how the three-week progression later in this guide is structured.
What Pilates Footwork Brings to the Lower Leg
Footwork is the exercise that opens most reformer classes, and it is the closest thing Pilates has to a built-in lower-leg lesson. You do not need a reformer to borrow its ideas, but knowing what footwork asks of the foot makes the mat and standing versions in this routine make sense.
How reformer footwork positions train the foot and ankle
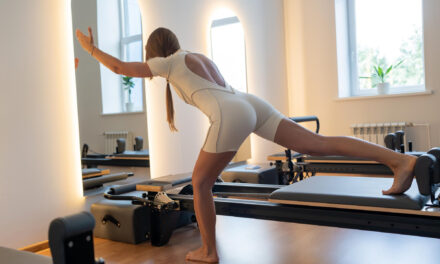
On a reformer, footwork usually means lying on your back with your feet on the footbar and pressing the carriage away, then returning it with control. The position of the feet changes the emphasis, and instructors use a short vocabulary for it. Spring tension is not standardized across brands, so any resistance setting should come from your instructor and the manufacturer’s manual rather than from an article.
Parallel, Pilates V, heels and arches
An IDEA Health and Fitness Association article on Pilates alignment mentions footwork in parallel, on the heels, on the arches, in Pilates V and in turnout as a way to observe how a client’s feet, knees and hips line up. Parallel means the feet point straight ahead, hip-width apart. Pilates V means the heels stay together and the toes turn out slightly, with the knees tracking over the toes. Neither position is the right one for every person, and the point of switching between them is to notice how the ankle and knee behave, not to collect positions. Yes, the name sounds like a rock band, but it is only a stance.
Heel raises and lowers on the footbar
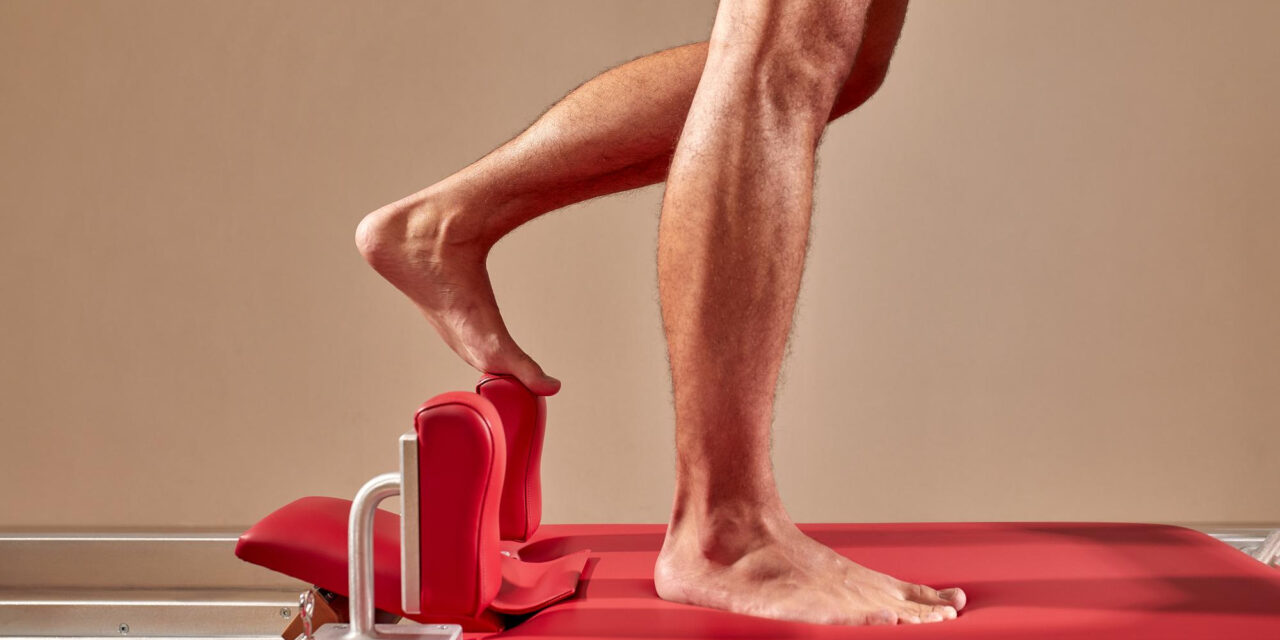
Many studio sequences also include a heel-lowering and heel-lifting variation, where the balls of the feet stay on the bar while the heels drop below it and then rise. This asks the calf to lengthen under tension and then shorten again, which is the same pattern as a standing heel raise with the body weight replaced by spring resistance. Because the load comes from springs rather than from your body weight, the comfortable range and resistance differ from person to person. Ask your instructor to set both, and treat any pinching at the front of the ankle or pulling at the Achilles as a reason to adjust.
Carrying the footwork lessons to a mat and a wall
Most people practicing at home do not own a reformer, and that is fine. The principles that make footwork useful travel well to the floor and the wall, as long as you keep the same quality of attention.
What carries over and what does not
The same IDEA article describes an alignment cue that translates directly: treat the springs as gravity, stand on your feet and return the carriage with your own effort instead of letting the springs yank you back. On a mat, that becomes lowering your heel with control rather than dropping it. What does not transfer is the supported, lying-down body position and the adjustable spring load. A standing heel raise places your full body weight on the calf and demands balance, so it is a different, usually harder, challenge than reformer footwork.
Pilates principles applied to the foot
Pilates is often taught through principles such as breath, concentration, control and precision, and the lower leg is a good place to practice all of them. Breath sets the pace, for example an exhale as the heel lifts and an inhale as it lowers. Control means no bouncing at the bottom. Precision means checking where the weight sits on the foot: roughly even between the big toe, little toe and heel, with the arch lifted rather than collapsed. These cues cost nothing and tend to improve a basic movement more than extra repetitions do.
Strength, Flexibility or Endurance: Choose the Goal First
A “pilates calves workout” can mean three different things, and each one calls for a different way of training. A person who wants to push off the floor with more power is not training the same quality as a person who wants to stand through a long studio class without their lower legs burning. Naming your goal first keeps the routine from turning into a random collection of ankle moves.
The goals side by side
The table below separates the goals so you can see what each one asks of the calf, then the two sections after it explain how this routine leans on each. Most people want a bit of all three, and that is a reasonable plan as long as you know which one a given move is serving.
| Goal | What it asks of the calf | How the routine trains it | A sign of progress |
|---|---|---|---|
| Strength | Producing more force per repetition | Slow tempo, single-leg raises, a longer pause at the top | A controlled single-leg raise through full range |
| Endurance | Repeating moderate effort without fading | More repetitions, steady breathing, consistent range | The last rep looks like the first |
| Flexibility | Moving through a comfortable range at the ankle | Wall stretches in straight-knee and bent-knee positions | The heel stays down with less pulling at the back of the leg |
| Ankle control | Keeping the foot steady while the body moves | Single-leg balance, even weight across the foot | Less wobble and less rolling to the outer edge |
Strength: more force, fewer and slower repetitions
Strength work asks the muscle to produce a high effort, which in a bodyweight routine means making each repetition harder rather than adding weight. Slowing the lowering phase, pausing at the top and moving from two feet to one foot all raise the demand without any equipment. A clinical practice guideline on midportion Achilles problems, published in the Journal of Orthopaedic and Sports Physical Therapy, describes tendon loading with loads as high as tolerated as a first-line treatment for that condition, which shows how central progressive calf loading is in rehabilitation. That recommendation is for clinician-guided care of a diagnosed problem, not for a general fitness plan, so use it as context rather than as a prescription.
Endurance: staying power through repetitions
Endurance is the ability to keep repeating a moderate effort, and it matters for standing through a long class, walking hills and holding balance on one leg. The same guideline recommends the single-leg heel-raise endurance test as one way clinicians track function over time, meaning the number of controlled raises a person can complete. You can borrow that idea in a gentle way by counting your clean single-leg raises each week, as long as you stop when form slips and not when you hit a target number. Counting is a progress marker, not a pass-or-fail exam.
Flexibility and ankle range of motion
Flexibility is the quietest of the three goals, and it is often the one people reach for first because tight calves are easy to feel. Range at the ankle matters for squatting, stepping and landing, and it is worth maintaining. It is not a substitute for strength, though, and treating it that way is a common mistake.
What limits ankle range of movement
Restricted ankle bend, called limited dorsiflexion, can come from tight calf muscles, a stiff joint, past injuries or simply individual anatomy, and you cannot tell which from the outside. The orthopedic patient pages cited in this guide list tight calf muscles among the factors tied to Achilles irritation and recommend calf stretching for related heel problems. That supports including gentle stretches but does not mean more stretching is always better. If your ankle feels pinched at the front when you bend it, or one side is far stiffer than the other, a physical therapist can sort out the cause better than a stretching routine can.
Why stretching and strengthening do different jobs
A stretch asks the calf to tolerate length. A strengthening move asks it to produce force through a range. A calf can be flexible and weak, or strong and stiff, and the two qualities do not predict each other reliably. Pilates practice tends to combine them by asking for strength at the end of a long range, which is why the heel lowering in this routine is as important as the lifting. Think of the stretches as the closing part of the conversation, not the whole of it.
Setup and the 15-Minute Routine at a Glance
This section covers what to wear, where to stand and how the 15 minutes are divided. Skim it once before your first session, then use the table as a reference card on later days.
Footwear, floors and space
Lower-leg exercises are one of the few workouts where the surface under your feet changes how the move feels. A little setup makes balance work calmer and lets you tell the difference between effort and instability.
Barefoot, grip socks or shoes
Many Pilates studios ask for bare feet or grip socks, and for this routine bare feet have a practical advantage: you can see your toes spread and feel how weight moves across the foot. Grip socks help on a slick floor, though the rubber dots can make it harder to feel the floor and, with the wrong fit, can bunch under the arch. Supportive athletic shoes are a sensible choice if the floor is cold or hard or if you have a history of heel pain. The National Health Service plantar fasciitis page advises people with that condition to wear supportive shoes with cushioned heels and to avoid prolonged barefoot walking on hard surfaces, which is one example of why footwear should follow your foot history. If sock marketing promises a transformation, remember that grip is the only feature that really matters here.
Floors, mats and wall space
A firm, flat floor with a thin mat is the most stable choice for heel raises and single-leg work. A thick, soft mat feels comfortable but can make balance harder because the surface compresses under the ball of the foot. Carpet is usually acceptable if it is low and even, and a bare hardwood or tile floor works well with a thin mat for the supine work. If you are deciding on equipment, the general principles in choosing a Pilates mat cover thickness, grip and firmness. You also need about an arm’s length of clear wall space and a sturdy chair or countertop nearby for light hand support.
How the 15-minute Pilates calves workout is built
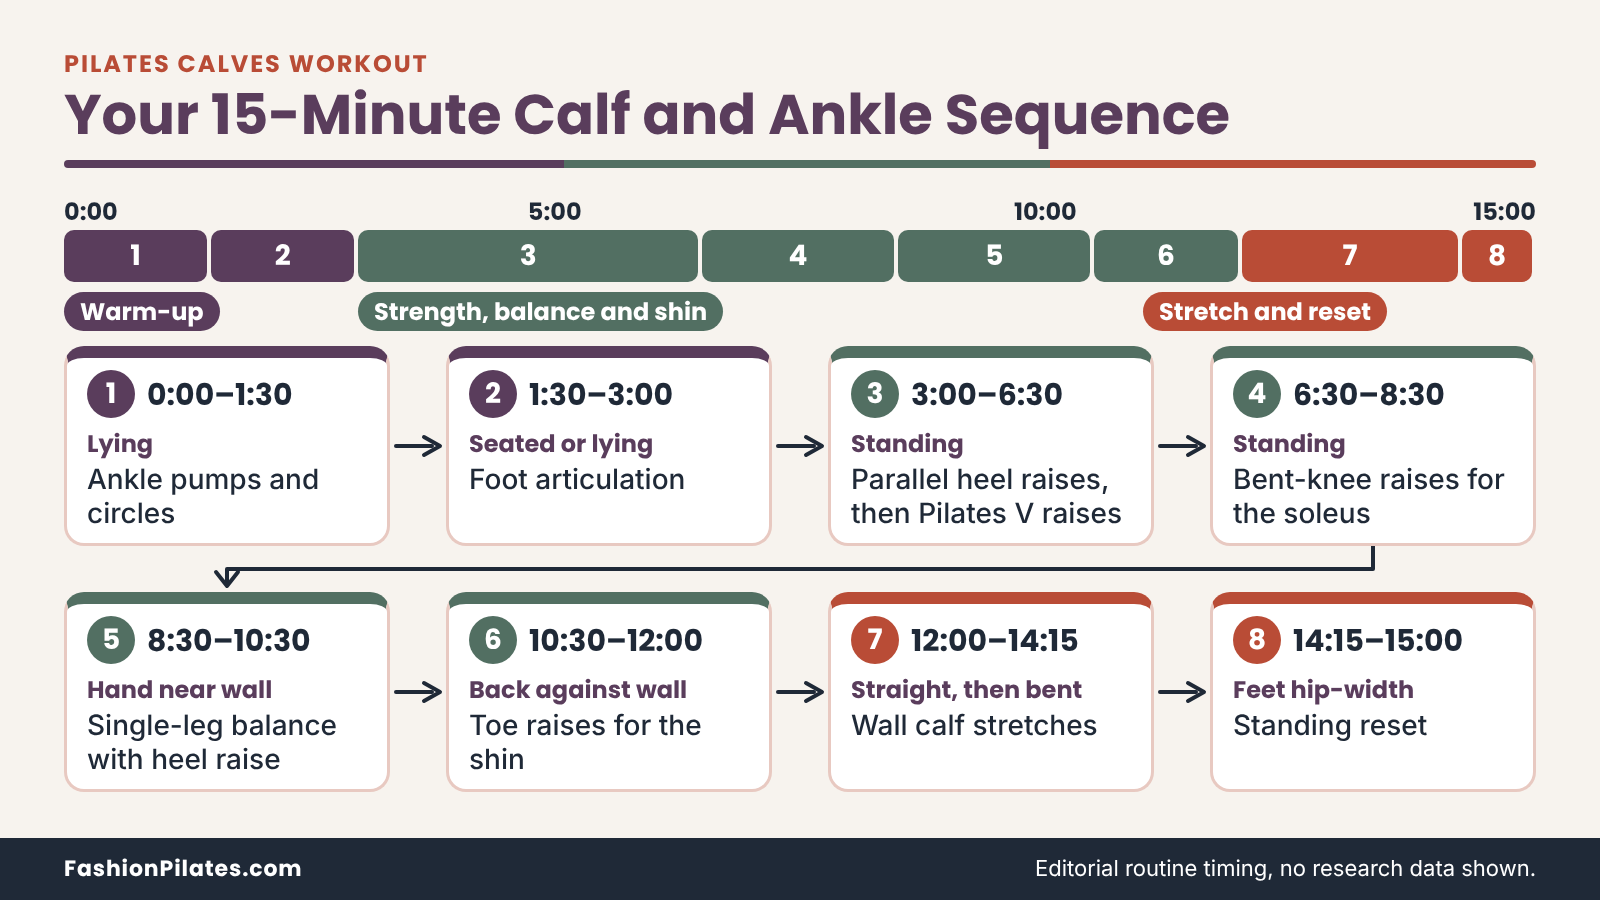
The sequence moves from low-load joint work to standing strength, then finishes with stretches while the muscles are warm. Putting the stretches last also keeps you from lengthening the calf before you ask it to stabilize a single-leg balance.
Order and logic
The first two moves are done lying or sitting, so the ankle and foot can warm up without carrying your body weight. Next come three standing raises that move from two feet to a bent-knee version, then one foot, with the single-leg balance placed late because it is the most demanding. The shin work sits between the raises and the stretches so the front of the leg is not neglected, and a short standing reset closes the session. Each move appears once, so the clock is spent on new work.
Reading the timed table
The table gives a target time and a simple work-to-rest pattern for each move, and the total is 15 minutes once you know the moves. Your first run-through will probably take longer while you learn the cues, and that is normal. Move the clock, not the quality: if the time runs out mid-set, finish the rep you are on and move to the next block.
| Time | Move | Position | Work and rest | Main focus |
|---|---|---|---|---|
| 0:00 to 1:30 | Ankle pumps and circles | Lying on back | 10 pumps, then 5 circles each way per foot | Warm-up for the ankle joint |
| 1:30 to 3:00 | Foot articulation | Seated or lying | 4 slow rounds per foot | Control through the whole foot |
| 3:00 to 5:00 | Parallel heel raises and lowers | Standing, fingertips on wall | 2 sets of 8, 20 to 30 seconds rest | Calf strength, even weight on the foot |
| 5:00 to 6:30 | Pilates V heel raises | Standing, heels together | 1 set of 10, then reset | Alignment of heel, knee and hip |
| 6:30 to 8:30 | Bent-knee heel raises | Standing, knees softly bent | 2 sets of 8 with a short rest | Soleus emphasis |
| 8:30 to 10:30 | Single-leg balance with heel raise | Standing on one foot, hand near wall | Per leg: 20 second balance, then 4 to 6 raises | Ankle control and calf strength |
| 10:30 to 12:00 | Tibialis anterior toe raises | Standing, back against wall | 2 sets of 10 to 12 | Front-of-shin strength |
| 12:00 to 14:15 | Wall calf stretches | Standing, hands on wall | 30 seconds each, straight knee then bent knee, both legs | Comfortable calf length |
| 14:15 to 15:00 | Standing reset | Standing, feet hip-width | Shift weight, slow breaths, gentle shake-out | Notice how your feet feel |
The Moves, Step by Step
Each move below lists the starting position, the action, a breathing cue and the volume from the timed table. Do one action at a time, keep the pace slow, and treat the numbers as a ceiling for the first week, not a goal to chase. If a step makes sharp pain appear, skip the move and see the soreness section later in this guide.
Floor block: wake up the ankle and foot
The first block takes your body weight out of the equation so the joints can move through their range gently. It is also where you can check whether one ankle is noticeably stiffer than the other before standing work begins.
Ankle pumps and circles
Lie on your back with your legs long and your heels resting on the mat, or with your knees bent if that is more comfortable for your back.
- Keep your legs still and flex both feet, drawing the toes toward your shins.
- Point both feet, lengthening the toes away without curling them. Move only at the ankles.
- Repeat for 10 slow pumps, breathing naturally.
- Lift one foot slightly and draw a circle with your big toe, keeping the leg quiet. Do 5 circles in each direction, then switch feet.
Aim for the largest circle the ankle makes without the knee swinging along.
Foot articulation
Sit tall on the mat with your legs extended, or lie back if sitting rounds your back. This move trains control through the foot instead of treating it as one block.
- Start with one foot flexed, toes pulled back toward the shin and heel reaching away.
- Press the ball of the foot forward while the toes stay pulled back. Then lengthen the toes into a full point.
- Reverse the order: draw the toes back first, then the ball of the foot, then the heel to the flexed shape.
- Complete 4 slow rounds per foot, exhaling as you point and inhaling as you flex.
The aim is a smooth, rolling quality, as if the foot were a hinged hand you were opening one joint at a time.
Standing block: heel raises and lowers
Standing heel raises are the heart of the routine, and each variation changes the question the lower leg is asked. Use a wall for light fingertip support, not for pulling yourself up.
Parallel heel raises and lowers
Stand with your feet hip-width apart and parallel, with your toes pointing straight ahead and your fingertips resting on a wall at about chest height. Spread your weight evenly across the ball of the big toe, the ball of the little toe and the heel.
- Exhale and rise over a count of two, lifting the heels straight up without letting the ankles roll outward.
- Pause for one count at the top, with your ribs stacked over your hips and your weight over the big-toe side of each foot.
- Inhale and lower over a count of three until the heels lightly touch the floor.
- Complete 2 sets of 8 with 20 to 30 seconds of rest.
Keep your knees straight but not locked, so you can feel the gastrocnemius working without pressing the joint back.
Pilates V heel raises
Bring your heels together and turn your toes out only as far as your hips allow while your knees still point over your toes. The turn should come from the hips, not from twisting at the knees or letting the arches collapse.
- Exhale and lift the heels together over a count of two.
- Keep the heels meeting at the top and avoid rolling onto the outside edges of the feet.
- Inhale and lower over a count of three.
- Complete 1 set of 10, then rest 30 seconds before the next move.
If your knees complain, narrow the V until they track comfortably.
Bent-knee heel raises for the soleus
Return to parallel feet and soften your knees into a small, steady bend that you can hold for the whole set. Your fingertips stay on the wall for balance.
- Keep the bend in your knees constant, with your hips staying at the same height.
- Exhale and lift the heels over two counts, even though the range will be smaller than in the straight-knee version.
- Pause briefly, then inhale and lower over three counts.
- Complete 2 sets of 8, resting 20 to 30 seconds between sets.
This version is where the soleus has a chance to take a larger share of the work, which is why the range feels short and the effort feels deep.
Balance and shin block
These two moves are the most demanding in terms of control, so they come late in the routine but before the stretches. They also show you where the weak links are, whether that is the ankle, the arch or the front of the shin.
Single-leg balance with a heel raise
Stand beside the wall with one hand lightly on it, with your weight over one foot and the other foot lifted only slightly off the floor, or its toes touching down if you need the support.
- Hold the single-leg stance for 20 seconds, watching for the standing ankle rolling in or out.
- Exhale and rise onto the ball of the standing foot over two counts.
- Pause for one count, then inhale and lower over three counts.
- Complete 4 to 6 raises, then repeat on the other leg.
If balance gives way before the calf tires, slow down or return to two feet for the same count. Progressing to a single-leg raise is the largest jump in this routine.
Tibialis anterior toe raises
Stand with your back to the wall, hips resting against it, and your heels about a foot (30 cm) away from the baseboard. Keep your knees soft.
- Keep your heels planted and lift the front of both feet up toward the shins over one count.
- Lift all of the toes evenly, without letting the ankles roll in or out.
- Lower the feet over two counts, then repeat.
- Complete 2 sets of 10 to 12, with a short rest.
This move trains the muscle that lifts the foot, which balances the calf’s work at the back of the leg.
Closing block: stretch, reset and optional band work
The stretches use the same wall as the toe raises, so the transition costs you no time. Stretches should be steady, mild to moderate and never sharp.
Straight-knee wall stretch for the gastrocnemius
Stand facing the wall with your hands at shoulder height and step one foot back, with both feet pointing straight ahead. The Orthopaedic Surgeons’ patient page on plantar fasciitis describes this same wall calf stretch, with the back knee straight and heel on the floor, and notes that clinician-given plans for that condition use more repetitions of shorter holds. Our 30 seconds is a practical choice for general routines, not a research-based prescription.
- Keep the back knee straight and the back heel pressed down.
- Bend the front knee and move your hips toward the wall until you feel a pull in the upper calf.
- Breathe slowly for 30 seconds without bouncing.
- Switch sides.
Bent-knee wall stretch for the soleus
From the same stance, bring the back foot a little closer to the wall, about the length of your foot, and keep your heel down.
- Bend both knees, driving the back knee forward over the middle toes.
- Keep the heel on the floor and your arch lifted.
- Look for a milder stretch lower in the calf, closer to the Achilles tendon, and hold for 30 seconds.
- Switch sides, then finish with the reset in the table.
If the stretch is felt mostly at the Achilles tendon itself rather than in the muscle belly, ease off and shorten the range.
Optional band work
A light resistance band adds a seated option for people who want more load or who cannot stand for the full routine. It is not part of the 15-minute plan, and you should choose the lightest band that gives a clear but comfortable effort. Resistance labels vary across brands, so go by how the band feels rather than by color.
- Sit with one leg extended and loop the band around the ball of the foot, holding both ends.
- Point the foot against the band over two counts, then return over three counts.
- Do 10 repetitions per foot, and stop if you feel a pulling pain in the Achilles area.
For the shins, a secure anchor and a band looped over the top of the foot let you flex against resistance in the same slow pattern.
Tempo, Reps and a Three-Week Progression
How you move matters at least as much as how many repetitions you collect. The same heel raise can be a quick bounce or a slow strength exercise, and the difference is mostly tempo, range and the discipline to progress one thing at a time.
Tempo, range and breathing
The routine uses one tempo across the standing raises so you can focus on form instead of keeping score. A steady count also makes it easier to notice when the movement starts to speed up, which is usually the first sign that the muscle is tiring.
A count of two up, one pause, three down
The 2-1-3 tempo means two counts to rise, one count to pause at the top and three counts to lower. Lengthening the lowering phase makes the calf work as it lengthens under load, which is the same principle behind the supervised heel-drop exercises that the Orthopaedic Surgeons’ Achilles tendinitis page mentions as part of therapy for some tendon problems. In a general fitness routine the point is simpler: slow lowering is harder to fake than fast lowering, and it keeps the heel from dropping onto the floor. Pair the rise with an exhale and the lowering with an inhale, or breathe in whatever rhythm keeps your ribs and shoulders relaxed.
How high to go and when to stop short
The best height for a heel raise is the highest point where your weight stays even across the ball of the foot and the ankle does not tip. For many people that is not the maximum possible height. If the ankle starts to roll to the outside, lower your target by a half inch and try again. Pushing into a bigger range at the cost of control trades calf work for ankle wobble, and the wobble is the part you are trying to train out.
The three-week progression
The plan below builds in small, predictable increases. Week 3 matches the full 15-minute table, so you reach the complete session without a jump in difficulty at any one point.
Change one variable at a time
You can make a calf routine harder by adding repetitions, slowing the tempo, adding a pause, reducing hand support, moving to one leg or adding resistance. Change only one of these at a time and hold it for at least a few sessions. If you add two changes at once and your Achilles area complains the next morning, you will not know which one caused it. The table spells out the weekly changes for people starting from scratch, and anyone with a history of lower-leg problems should check the plan with a clinician or a certified Pilates instructor first.
| Week | Sessions | Two-foot raises | Single-leg work | Shin work and stretches | Check before moving on |
|---|---|---|---|---|---|
| Week 1: learn the moves | 2 non-consecutive days | Parallel 2 sets of 6, Pilates V 1 set of 6, bent-knee 2 sets of 6 | 15 second balance each side, 3 assisted raises with the other toes touching down | Toe raises 1 set of 10, stretches 20 seconds | No sharp pain, and no unusual Achilles stiffness the next morning |
| Week 2: build repetitions | 2 to 3 days | Parallel 2 sets of 8, Pilates V 1 set of 8, bent-knee 2 sets of 8 | 20 second balance each side, 3 to 4 raises with fingertip support | Toe raises 2 sets of 10, stretches 30 seconds | Tempo stays steady through the last repetition |
| Week 3: full session | 2 to 3 days | Parallel 2 sets of 8, Pilates V 1 set of 10, bent-knee 2 sets of 8 | 20 second balance each side, 4 to 6 raises with minimal support | Toe raises 2 sets of 12, stretches 30 seconds | Even weight on the foot, no rolling to the outer edge |
Week-by-week notes and when to repeat a week
Repeating a week is not a failure. If you feel more than mild muscle fatigue the day after a session, or the tempo falls apart before the end, hold at the current week for another week. In week 1 the single-leg balance is deliberately forgiving, because the other foot is allowed to touch down for support. By week 3 the support should be fingertip-light, and you can add a two-count pause at the top as your next change. After the third week, the options are more repetitions, a slower tempo or the optional band, but not all at once.
Tracking progress without obsessing
A routine this short is easy to do on autopilot, and autopilot is where form slips. A very small amount of tracking keeps the sessions honest without turning an ankle routine into a performance review.
Counting clean single-leg raises
The 2024 clinical guideline for Achilles problems recommends the single-leg heel-raise endurance test among its outcome measures, so counting controlled single-leg raises has a real place in clinical practice. For personal use, write down the number of clean raises on each leg once a week at the same time of day, and stop counting when your form drifts. Expect differences between left and right, which are common, and avoid chasing a number. If you notice a big gap or a sudden drop, mention it to a clinician rather than trying to fix it alone.
Where this fits in your week
The Centers for Disease Control and Prevention adult activity guidelines call for muscle-strengthening activities on two or more days a week that work all of the major muscle groups, in addition to aerobic activity. A 15-minute lower-leg routine covers a small part of that picture. Pair it with hip, trunk and upper-body work, for instance through a beginner Mat Pilates workout, and treat the calf routine as a supplement rather than a complete program.
Soreness, Pain and When to Stop
Calf work often produces a pleasant ache, and that ache is easy to confuse with something that deserves attention. Learning the difference is the most useful safety skill in this article, and none of it replaces an examination by a clinician.
Telling soreness from pain
Muscle soreness and pain that signals a problem tend to look different in where they sit, when they arrive and how they behave when you move. These are general patterns, not a way to diagnose yourself.
What ordinary muscle soreness tends to feel like
Exercise soreness is usually a dull, spread-out ache in the belly of the calf that builds a day or so after unaccustomed work and eases as you move gently. It tends to be similar on both sides and does not stop you from walking normally. A short warm-up walk often makes it feel better, not worse. If the ache is broadly across the muscle and gradually fades over a few days, it fits the pattern of normal soreness, but if it is getting worse each day or is focused at one small point, treat it more cautiously.
Warning signs that mean stop
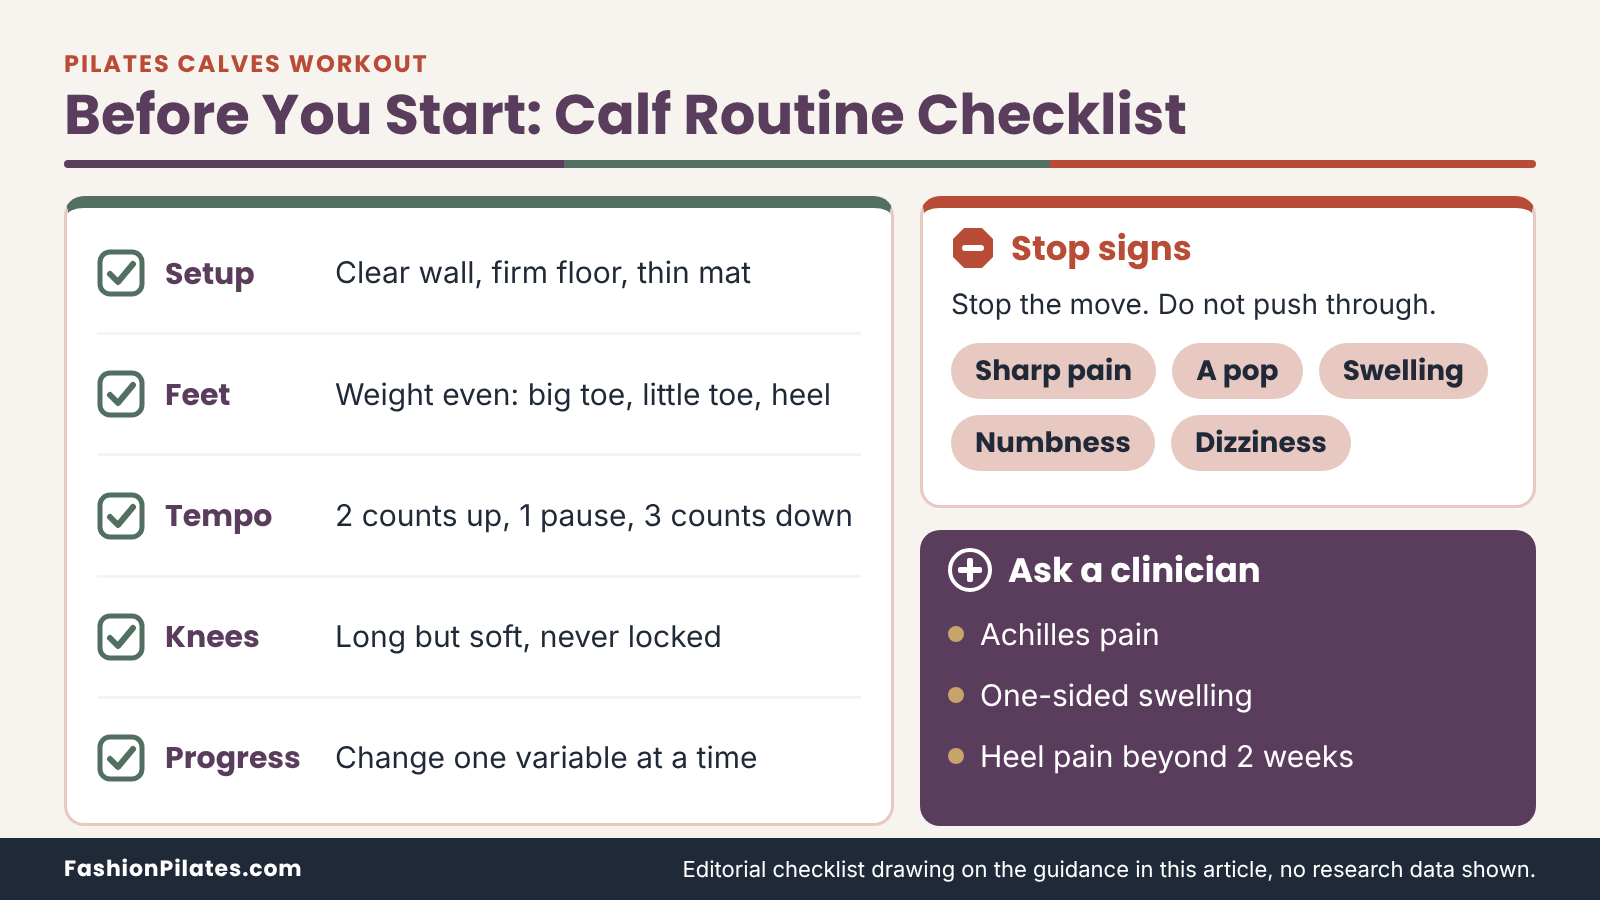
Stop the exercise and do not push through if you notice sharp or sudden pain, pain at a specific point of the tendon or heel, a pop or snap, swelling, bruising, numbness or tingling, dizziness, or pain that worsens as a set continues. Pain that is still increasing the next morning after a session also deserves caution. The Cleveland Clinic lists “avoid pushing through pain” among its advice for calf strain prevention, which is a good default for the whole routine. If a symptom does not settle quickly, check with a clinician instead of repeating the move to see what happens.
Achilles, calf and foot pain: when to see a clinician
This section is a map of when to ask for help, not a diagnostic guide. Several conditions can cause pain in the lower leg and heel, and only a clinician who examines you can tell them apart.
Achilles-area pain and the pop warning
The orthopedic patient page on Achilles tendinitis describes pain and stiffness along the tendon, often worse in the morning or after exercise, sometimes with thickening or swelling. It also says that a sudden pop at the back of the calf or heel needs prompt medical attention because it may signal a tendon tear. The 2024 clinical guideline notes that for midportion Achilles problems, complete rest is not generally advised and progressive loading is first-line, but that advice sits inside clinician-led care. If you have Achilles pain, get an assessment before you continue this routine, because the right exercise dose depends on what is going on.
Calf strain, swelling and the one-leg warning
The Cleveland Clinic’s page on a pulled calf muscle lists sudden calf pain, difficulty rising onto the toes, swelling, bruising and a snapping or popping sensation as common features, and advises contacting a provider if you cannot bear weight or have severe pain. Separately, one-sided swelling, tenderness, warmth or redness in the leg can have a different cause. The Centers for Disease Control and Prevention blood clot page lists swelling, pain, warmth and redness as signs of deep vein thrombosis and says to see a doctor as soon as possible, and to seek emergency care for symptoms such as trouble breathing or chest pain. Do not exercise through any of these signs.
Heel, arch and shin pain
Pain on the bottom of the foot near the heel, especially with the first steps after rest, matches the typical description of plantar fasciitis in the National Health Service and orthopedic patient pages. The National Health Service advises seeing a general practitioner if symptoms last beyond two weeks of self-care, if you feel tingling or numbness, or if you have diabetes with foot pain. Pain along the inner edge of the shinbone is a different pattern, and the orthopedic page on shin splints notes that stress fractures and other conditions can mimic it. Neither of these is something to diagnose with a stretch or a heel raise.
Who Should Modify, and How
A routine that works for one person can be too much for another, and the right adjustment depends on your history, your balance and how your feet feel on the day. Modifying is not a downgrade. It is the reason this routine can be used for years rather than weeks.
Situations that call for a modified or supervised version
Some circumstances mean you should check with a qualified clinician or Pilates professional before you start, not after something hurts. The list below is general and cannot cover every case.
Newer exercisers and anyone with balance concerns
If standing on one foot feels unsteady, skip the single-leg raises and keep the two-foot versions with firm fingertip support at a wall or counter. Many people also find it easier to start with the heel raises seated on a sturdy chair, with the feet flat on the floor. A standing exercise should feel challenging but controlled. If you feel faint, dizzy or unable to steady yourself, sit down and stop. If balance problems are new or getting worse, bring it up with a clinician instead of training around it.
Past ankle sprains, instability and joint looseness
An ankle that has been sprained before can feel less trustworthy, and some people have naturally loose joints that make the ankle roll more readily. Those situations deserve a closer look because a routine that assumes a stable ankle may not be the right starting point. A physical therapist can assess ligament stability and design the order of exercises for your ankle. Until then, keep the range small, stay near a wall and treat any giving-way feeling as a signal to stop.
Medical situations that need a clinician’s input first
Check with a qualified clinician before starting if you are pregnant or postpartum, have had recent surgery or an acute injury to the leg, have osteoporosis, have diabetes or numbness in the feet, have circulation or heart conditions, or have been told to limit weight-bearing. The National Health Service page on plantar fasciitis specifically lists diabetes with foot pain as a reason to see a general practitioner, and it is a reminder that foot symptoms in people with chronic conditions deserve professional attention. These categories are not off-limits for movement, but a clinician can tell you which parts of the routine are suitable and how much is appropriate.
A menu of modifications
Modifications are about reducing one variable at a time: support, range, repetitions or load. The table pairs common situations with practical adjustments so you can pick the smallest change that makes the move comfortable.
| Situation | Suggested modification | Check with a professional first if |
|---|---|---|
| New to standing balance work | Two-foot raises only, with fingertips on a wall or counter | You feel dizzy or unsteady during ordinary activities |
| Calves feel tight or crampy | Smaller range, fewer repetitions, longer rests between sets | Cramping is frequent, one-sided or comes with swelling |
| Previous ankle sprain | Small range, wall support, skip single-leg work at first | The ankle gives way, swells or feels unstable |
| Achilles tendon area is irritable | Pause the heel raises and stretches | Always, because the dose depends on the cause |
| Limited standing tolerance | Seated heel raises and toe raises on a sturdy chair | Standing causes pain, breathlessness or lightheadedness |
| Pregnancy, postpartum, recent surgery or osteoporosis | Follow the clinician’s guidance on positions and load | Always, before starting |
| Diabetes or numb feet | Seated moves in supportive footwear, as your clinician advises | Always, before starting |
Seated and supported versions
Seated heel raises are done on a stable chair with the feet flat, then the heels lift while the toes stay down. The knee is bent, so the soleus does most of the work, and the demand on balance is gone. Seated ankle pumps, circles and toe raises also work, and the wall stretches can be replaced by a seated stretch with a towel looped around the foot and the knee straight. These versions keep the logic of the routine and give you a place to start if standing is a challenge.
Less range, less volume, more support
Reduce the repetitions first, then the range, then the pace. A person doing 4 careful raises is training the lower leg, even if the full routine feels too big. Use more hand support before dropping the single-leg raises entirely, and add extra rest between sets. When a modification feels easy for several sessions in a row, move to the next stage of the progression table, not straight to the full routine.
Common Mistakes and Fixes
Most calf-routine problems come from a short list of habits, and most of them are easy to fix once you know what to watch for. A mirror, or a quick phone video from behind your heels, is the quickest feedback you have.
Form mistakes
Form mistakes are not a moral failing. They are what a tired or unfamiliar foot does by default, and noticing them is progress.
Rolling onto the outside edge of the foot
When the heels rise, many people let the weight drift to the little-toe side and the ankles tip outward. The big-toe side then does too little, and the ankle works harder to stay upright. To fix it, imagine pressing evenly through the ball of the big toe and the ball of the little toe, and lower the height until the heels stay straight. Watching from behind helps because the ankle line is easy to see and hard to feel. A smaller, steadier raise is better than a high, tilting one.
Dropping, bouncing and rushing the lowering phase
The lowering phase is where the calf lengthens under tension, and many people simply let it fall. Bouncing at the bottom turns a controlled movement into a rebound, and the tendon takes the repetitive shock. Slow the lowering to a count of three, and let the heels touch the floor lightly before the next rise. If you cannot control the descent, the set is finished no matter how many repetitions are left on the page.
Locking the knees, leaning on the wall and clawing the toes
Straight knees should stay long without being pushed back into a hard lock, because a locked knee shifts the effort away from the calf. Pulling yourself up the wall by the hands defeats the purpose of the move, so keep the fingertips light. Gripping the floor with curled toes is another common habit, and it hides weakness in the arch. Spread the toes softly and let the foot stay long, with the weight carried by the ball of the foot.
Programming mistakes
Programming mistakes happen between sessions, not during them. They are less visible than form errors, and they are more likely to cause trouble over weeks.
Doing too much too soon
The American Academy of Orthopaedic Surgeons lists a sudden increase in exercise intensity among the risk factors for Achilles irritation, and the same logic applies to any new calf routine. If you were not doing much lower-leg work before, three hard sessions in the first week is a big change. Follow the progression table and build slowly. When you add a second activity, such as a new running plan or a new studio class with a lot of footwork, give your calves time to adjust to that too.
Stretching only, or skipping the shin and the bent-knee version
Some people treat any calf discomfort as tightness and answer it with more stretching. A stretching-only plan leaves strength and control untouched. Others skip the toe raises because the front of the shin feels unfamiliar, or they skip the bent-knee heel raise because the range feels small. Each omitted move leaves a part of the lower leg untrained. The routine is short enough to do whole, so keep the pieces together unless a clinician has told you otherwise.
Ignoring left-right differences and early warning signs
Most people have one side that is steadier or stronger, and that difference is usually harmless. A sudden new asymmetry, a side that feels pinchy or an ache that lingers into the next morning deserves attention instead of a workaround. Train the weaker side first, keep the repetitions equal and avoid letting the stronger side do extra. If the gap grows over several weeks or comes with pain, ask a clinician or a certified Pilates instructor to watch you perform the move.
| Mistake | What it looks like | Simple fix |
|---|---|---|
| Rolling outward | Ankles tip toward the little toes at the top of the raise | Lower the height and press through the big-toe side |
| Bouncing | Heels hit the floor and rebound | Count three on the way down and touch lightly |
| Locked knees | Knees pushed back, thighs rigid | Keep the knees long but soft |
| Pulling on the wall | Hands gripping, shoulders climbing | Use fingertips only, or add a chair |
| Clawed toes | Toes curl under or grip the floor | Spread the toes and lengthen the foot |
| Too much too soon | Three hard sessions in week one | Follow the progression table |
What Calf Work Can and Cannot Change
People come to a calf routine for different reasons, and some of them have to do with how their legs look. It is better to be honest about what a short bodyweight routine does and does not do than to promise a shape.
Honest expectations for strength, endurance and appearance
The most reliable benefits of a short routine like this one are functional: better control at the ankle, steadier balance and more repeatable heel raises. Those are modest, useful and measurable by you.
What a 15-minute bodyweight routine can reasonably do
Done consistently with sensible progression, a pilates calves workout like this one may support calf strength and endurance and may improve how steady your ankles feel in standing work. Gains depend on your starting point, your sleep, your other activity and how often you actually do the sessions. Bodyweight work becomes less challenging as you adapt, which is why the progression table matters. Nothing here has been tested on readers, and the claims rest on general exercise principles and clinical sources, not on a trial of this routine.
Calf shape and size
Calf shape is influenced heavily by individual anatomy, such as where the muscle belly sits and how long the tendon is, and no routine changes that. You also cannot choose where body fat is lost, so no exercise can slim a single area. Muscle can grow with enough progressive resistance over time, but a short bodyweight routine is designed for control and endurance, not for size. If you want to change how your calves look, the honest options are patience, heavier progressive training under guidance and acceptance of the leg shape you were given.
Caring for your lower legs beyond the 15 minutes
The routine does its best work when the rest of your week supports it. Footwear, walking habits and professional input all play a part, and none of them requires special equipment.
Shoes, surfaces and daily walking
Worn-out shoes and abrupt changes in footwear can contribute to foot and heel irritation, and the orthopedic patient pages recommend replacing worn athletic shoes and wearing cushioned, supportive footwear for heel pain. Vary your surfaces when you can, and give your feet some barefoot time at home on a comfortable floor if that feels good to you. Everyday walking also keeps the lower legs moving between sessions. See also Pilates for balance and stability for related work that pairs well with this routine.
Working with an instructor or clinician
A certified Pilates instructor can watch your foot and knee alignment in real time, set reformer footwork tension appropriately and adjust cues to your body. That is something an article cannot do. If you have pain, a physical therapist or physician is the right person to ask, and many instructors will happily work alongside one. For a broader view of the category, see the Targeted Pilates Workouts hub, the Pilates footwork on the reformer guide and the complete guide to Mat Pilates.
Frequently Asked Questions
Can Pilates make my calves stronger?
Pilates-informed lower-leg work can train calf strength, especially when moves such as slow heel raises and single-leg balance are progressed gradually. Reformer footwork adds resistance through springs, while mat and standing versions use your own body weight. This guide is built on anatomy and general exercise principles rather than on a trial of this exact routine, so results will vary from person to person. Think of the routine as a way to build control and endurance in the lower leg. Larger strength changes usually need heavier progressive training than a short bodyweight session provides.
How often should I do this routine?
Two to three non-consecutive days a week is a sensible starting point. The three-week progression begins with two sessions and adds a third only if you feel recovered. Mild muscle fatigue the next day is common, but sharp pain or increasing Achilles stiffness means you should hold back. Spacing sessions gives muscles and tendons time to adapt. Some people build toward more frequent practice later, but it is better to get there gradually.
Why do my calves cramp or burn during heel raises?
A burning feeling during repeated raises is often the sensation of a muscle working near its limit, which is common when the calf is not used to the volume. Rushing, holding your breath or adding too many repetitions at once can make it worse. Slowing the tempo, reducing the range and resting longer between sets usually help. If a cramp hits, ease out of the movement and walk around until it settles. Frequent cramps, cramps in only one leg or cramps with swelling deserve a conversation with a clinician.
Should I do heel raises barefoot or in grip socks?
Either can work, and the better choice is the one that lets you control your foot on your floor. Bare feet let you see and feel how weight moves across the foot, while grip socks add traction on slick surfaces. Supportive athletic shoes are reasonable if the floor is hard or cold or if you have heel pain. Check that socks fit snugly without bunching under the arch. If you have diabetes, numbness or a foot condition, ask your clinician about footwear before you decide.
Do I need a reformer for this?
No, this routine uses a wall, a floor and optionally a chair or a light band. Reformer footwork adds spring resistance and a lying-down position, which changes how the calf is loaded. Spring tension varies by brand, so follow your instructor and the manufacturer’s manual if you do use one. A reformer class can also be a useful way to get real-time feedback on foot and knee alignment. The two approaches can complement each other.
Will this make my calves bigger or slimmer?
A 15-minute bodyweight routine is designed for control and endurance, not for changing calf size or shape. Calf shape depends largely on individual anatomy, and no exercise can remove fat from one specific area. Muscle can grow with enough progressive resistance over time, but that is a different training goal from this one. If appearance is your main concern, a clinician or qualified strength coach can discuss realistic options. In the meantime, focus on what you can measure, such as steadier balance and cleaner single-leg raises.
Is this safe if I have Achilles tendon pain or heel pain?
Not without guidance, because the right exercise dose depends on what is causing the pain. Achilles and heel pain have several possible causes, and only a clinician who examines you can tell them apart. A clinical practice guideline for midportion Achilles problems favors progressive loading over complete rest, but that advice is meant to be individualized and supervised. A sudden pop at the back of the calf or heel needs prompt medical attention. Pause the routine and get assessed before you continue.
How do I know my ankles and calves are getting stronger?
Look for steadier single-leg balance, less wobble at the top of a heel raise and lower legs that feel less tired at the end of a session. You can also count clean single-leg heel raises once a week, since clinicians use the single-leg heel-raise endurance test to track calf function. Stop counting when your form drifts, and compare each leg with its own earlier results rather than with other people. Progress is rarely a straight line, so a weaker day is not a failure. Share any large or sudden difference between sides with a clinician.