
Direct answer: A home Pilates studio comes together in three decisions, made in this order: what you will practice, how much clear floor and ceiling you can truly spare, and how much equipment that practice justifies. A mat-only corner needs a mat-sized patch of floor with breathing room around it, a mat-and-props setup adds a storage plan, and a reformer, tower, or chair setup needs measured length, ceiling height, a safe delivery path, and floor protection. Build in phases, and confirm every apparatus dimension on the manufacturer’s current spec sheet before you buy.
This guide is written for readers who want to practice Pilates at home and are weighing a corner of the bedroom against a dedicated room. It covers the planning work that usually gets skipped: measuring, flooring, noise, storage, safety, upkeep, and budget logic. It does not rank products. Where equipment is mentioned, the focus is on the decisions behind it, and the detailed product comparisons live in the dedicated equipment guides linked along the way and gathered in the main Pilates Equipment & Gear hub.
A note on method. This is a research-based comparison built on manufacturer specification pages, published care guidance, and general planning criteria. Nobody on the editorial team tested the equipment named here, and dimensions are shown only as examples of what a spec sheet looks like. Specs change between model years, so treat every number as a prompt to check the current listing, not as a purchase spec.
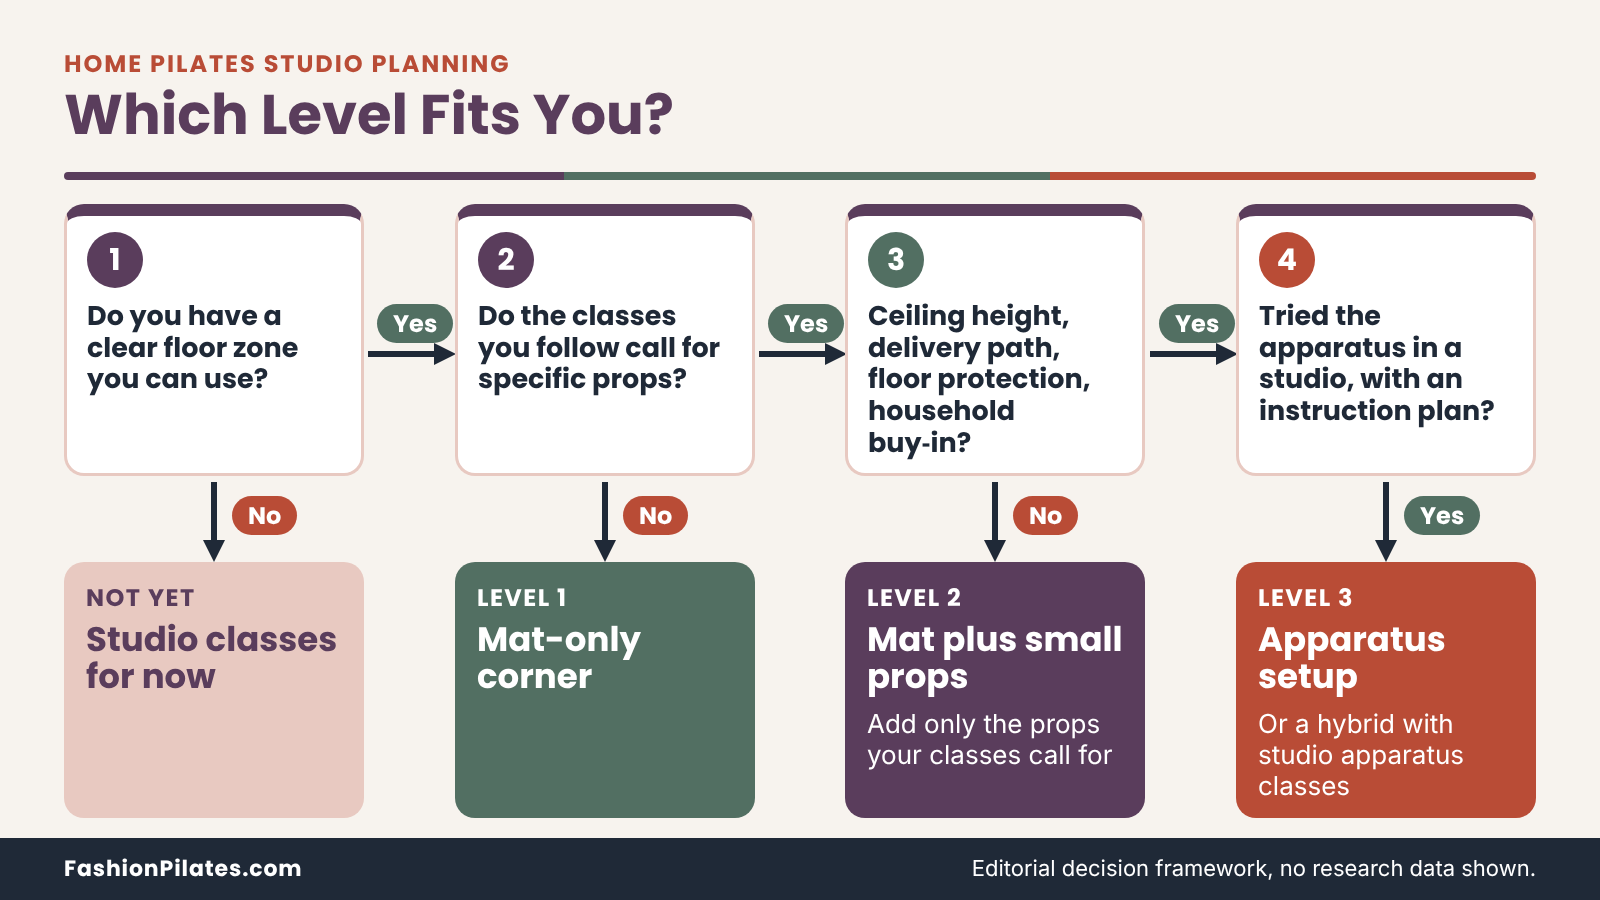
What a Home Pilates Studio Really Means: Three Levels
The phrase covers everything from a rolled mat beside the bed to a converted spare room with a reformer, a wall-mounted tower, and a chair. Those are very different projects with very different price tags, floor demands, and delivery logistics. Sorting yourself into one of three levels first keeps you from shopping for a level you will never reach, or, more commonly, from buying a level-three machine for a level-one life.
The table below is the quick map. Each level is described in more detail after it, with an honest account of where it stops being enough.
| Level | What it includes | Space demand | Best for | Main trade-off |
|---|---|---|---|---|
| 1. Mat-only corner | A Pilates mat and a clear patch of floor | Clear floor only; stored in a closet or behind a door | Learning the basics, short daily sessions, tight budgets or rentals | No spring resistance; progression comes from technique, tempo, and class variety |
| 2. Mat plus small props | Level 1 plus items such as a ring, bands, a ball, sliders, or a foam roller | Clear floor plus one bin or shelf | Regular practice that needs more feedback, variety, or support | Props can multiply into clutter; each one needs a purpose |
| 3. Apparatus setup | A reformer, tower, chair, or a combination, plus level 1 and 2 items | Dedicated floor length, ceiling height, a delivery path, and often a dedicated room | Committed practice with instruction, apparatus classes, or a long-term home plan | Highest cost, space, noise, and maintenance demands; harder to undo |
Level one: the mat-only corner
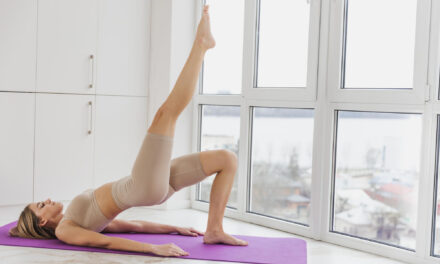
This is the lowest-commitment version, and it is also where most people should begin. If you are new to the method, a corner with a mat is enough to learn the principles, build routine, and find out whether you like practicing at home.
What a mat-only corner needs
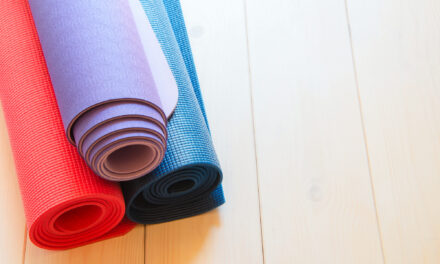
You need a stretch of clear, level floor, a mat suited to the surface underneath it, and enough space that your arms and legs can travel without clipping a bed frame or a coffee table. Pilates mat work includes rolling, lying, kneeling, and side-lying positions, so the clear zone matters in every direction, not only along the length of the mat. A towel and a small cushion for under the head or hips are common additions, though neither is required.
The mat itself is the one purchase worth a little care, because its thickness and grip decide whether the corner feels pleasant or punishing. Detailed comparisons belong in our guide to the best Pilates mats, so this article simply treats the mat as the foundation of every level.
Who it suits and where it stops
A mat corner suits renters, travelers, people with shared rooms, and anyone testing the waters. It also suits experienced practitioners who attend studio apparatus classes and use home sessions for maintenance of habit. Where it stops is resistance and feedback: a mat has no springs, so the work comes from body weight, control, and sequencing.
That is not a weakness, since classical and contemporary mat repertoire is built around exactly that constraint. It does mean that people who specifically want spring-based work will eventually look upward. A beginner mat routine shows how much a mat alone can offer before you spend anything more.
Level two: mat plus small props
Level two keeps the mat as the foundation and adds a handful of portable accessories. The aim is not to collect gear. It is to solve specific problems that the mat alone does not, such as wanting gentle resistance, extra support under the spine, or a way to vary the load without leaving the room.
What the small-prop layer adds
Small props add three things: resistance, support, and feedback. A resistance band or a ring gives something to push or pull against. A ball or a foam roller can support the body or give tactile feedback about position. Sliders change friction, which alters how hard a floor-based movement feels. None of these changes the footprint of your practice area, because everything stores in a bin or a drawer.
The later section on small props sorts each one by what it does and when you can safely skip it. The short version is that two or three well-chosen items beat a bag of ten, and the reader who buys one prop at a time based on a real gap in practice almost always spends less.
Who it suits and where it stops
This level fits people who practice several times a week, follow online or in-person mat classes that call for props, or want variety without a large purchase. Where it stops is the same place level one does: props approximate some spring-style feedback, but they do not reproduce the guided, adjustable resistance of apparatus.
If your goal is to practice the repertoire taught on reformers, towers, or chairs, props will not stand in for them, and it is better to say so plainly than to promise a reformer substitute. The later section on props covers what each accessory is genuinely good for.
Level three: reformer, tower, and chair setups
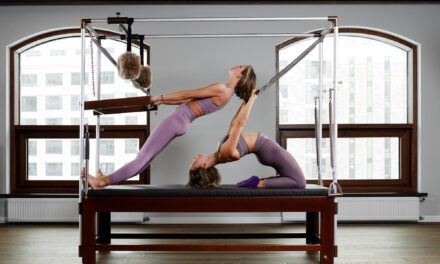
Level three means apparatus: a reformer (a sliding carriage on a frame, with springs for resistance), a tower or Cadillac-style frame (a tall structure with spring attachment points), a Pilates chair, or a combination. This is where measured space, floor protection, delivery logistics, and maintenance stop being optional considerations and become the whole project.
What apparatus setups demand
Apparatus demands three kinds of room: floor length, overhead height, and a path to get the equipment inside. A reformer is long and narrow, a tower is tall, and a chair is compact but dense. Each also needs standing-room around it, because you step on and off, adjust springs, and sometimes work with a teacher or a partner nearby.
The specific numbers vary by brand and model. A later section pulls example dimensions from official manufacturer spec pages, with the reminder that they are examples. For the reformer decision itself, our Pilates reformer buying guide and the small-space guidance later in this article go much deeper than a planning hub can.
Who it suits and where it stops
This level suits readers who have already tried apparatus work in a studio, expect to practice consistently for years, and have a space that can host the equipment without constant rearranging. It is also where a studio membership may remain a better use of money, a point the closing section revisits.
Where it stops is not really capability, since apparatus offers a wide repertoire. It stops at your room, your household, and your upkeep tolerance. A machine that is exciting for six weeks and dusty for six months is the most expensive way to learn that you prefer classes.
Define Your Practice Before You Shop
Equipment should follow practice, not the other way around. The most common regret in home fitness is buying for the practice you imagine on a motivated Sunday instead of the practice you will repeat on a tired Wednesday. A few honest questions about format, frequency, and household settle most of the later decisions before you measure anything.
Formats, frequency, and session length
Start with what you already do or plan to do over the next three months, not the next three years. Equipment you will use twice a week for a year earns its place far more reliably than equipment bought for an ambitious plan.
Match the equipment to the format you follow
If your practice is video classes, check what those classes expect. Many online mat sessions need only a mat, some call for a ring or bands, and apparatus classes assume a specific machine, often a reformer with a particular layout of springs, footbar, and ropes. Buying equipment first and finding classes second is how people end up with a machine that does not match the instructors they like.
If you attend a studio, ask your teacher which home equipment would complement what you do there. A teacher who knows your body and your repertoire can say whether a ring would be useful or whether a home reformer would be a poor stand-in for the studio model you are used to. If you are self-guided, a mat and two or three props are a sturdier base than apparatus, because apparatus rewards instruction more than most beginners expect.
Frequency, duration, and the friction budget
Count honestly. If you practice three times a week for 45 minutes, that is a little over two hours of weekly use, and a setup that takes ten minutes to pull out and ten to put away taxes about a quarter of that time before you have started. This is the friction budget: every extra step between you and the first movement lowers the odds that you will do the session.
That is why a corner that stays set up often outperforms a better-equipped space that requires rearranging furniture. If the answer to “how long does setup take” is longer than the warm-up, the layout needs rethinking before the shopping does. It is a dull criterion, and also the one that predicts most abandoned home gyms.
Who shares the space and who is teaching you
A home studio is rarely a private chapel. It is a room that other people, animals, and schedules also occupy, and the best layouts account for that early.
The household: partners, children, pets, and roommates
Ask who else will be in or near the space during practice. A partner on a video call in the next room affects how much noise you can make. Children and pets change what you can leave assembled, because spring-loaded and rolling equipment is a different category of hazard from a mat. A later section on safety and maintenance goes through that in detail, and the practical takeaway here is simply to decide up front whether the space can be closed off.
Shared rooms also change what level you can sensibly choose. A spare room with a door suits apparatus. A living-room corner that must be a living room by dinner suits level one or two, or a reformer that stores upright and rolls away, if its specs and your ceiling allow.
Instruction: online, in person, or both
Pilates is a movement method with technique details that are hard to self-assess, so think about how you will get feedback. Online classes work well for many people, particularly for mat practice, and some studios offer virtual or hybrid sessions. In-person instruction is especially valuable when you are learning apparatus, because springs, straps, and carriage movement add variables that a camera angle can hide.
If you are looking for a qualified teacher, the Pilates Method Alliance describes itself as an international professional association for Pilates teachers, studios, and educators, and it provides a membership directory for finding certified instructors and studios that have joined. Membership is voluntary, so a teacher’s absence from it says nothing by itself, but it is a reasonable starting point. For online options, see our guide to online Pilates classes. This article is general fitness education, not individualized medical advice: if you are pregnant or postpartum, recovering from surgery or injury, or managing a chronic condition, check with a qualified clinician or Pilates professional before choosing equipment or a program.
Choose and Measure the Room
Measuring is the least glamorous step in building a home Pilates studio and the one that saves the most money. Three measurements decide almost everything: the clear floor you can dedicate, the ceiling height over that floor, and the width of every opening between the front door and the room. Take them before you browse a single product page.
Clear-floor footprint and side clearance
The footprint of a Pilates practice is larger than the footprint of the gear. A mat is a rectangle, but the work happens in the space your limbs sweep through, and apparatus adds the zone where you step on, step off, and adjust equipment.
Measure the practice zone, not just the equipment
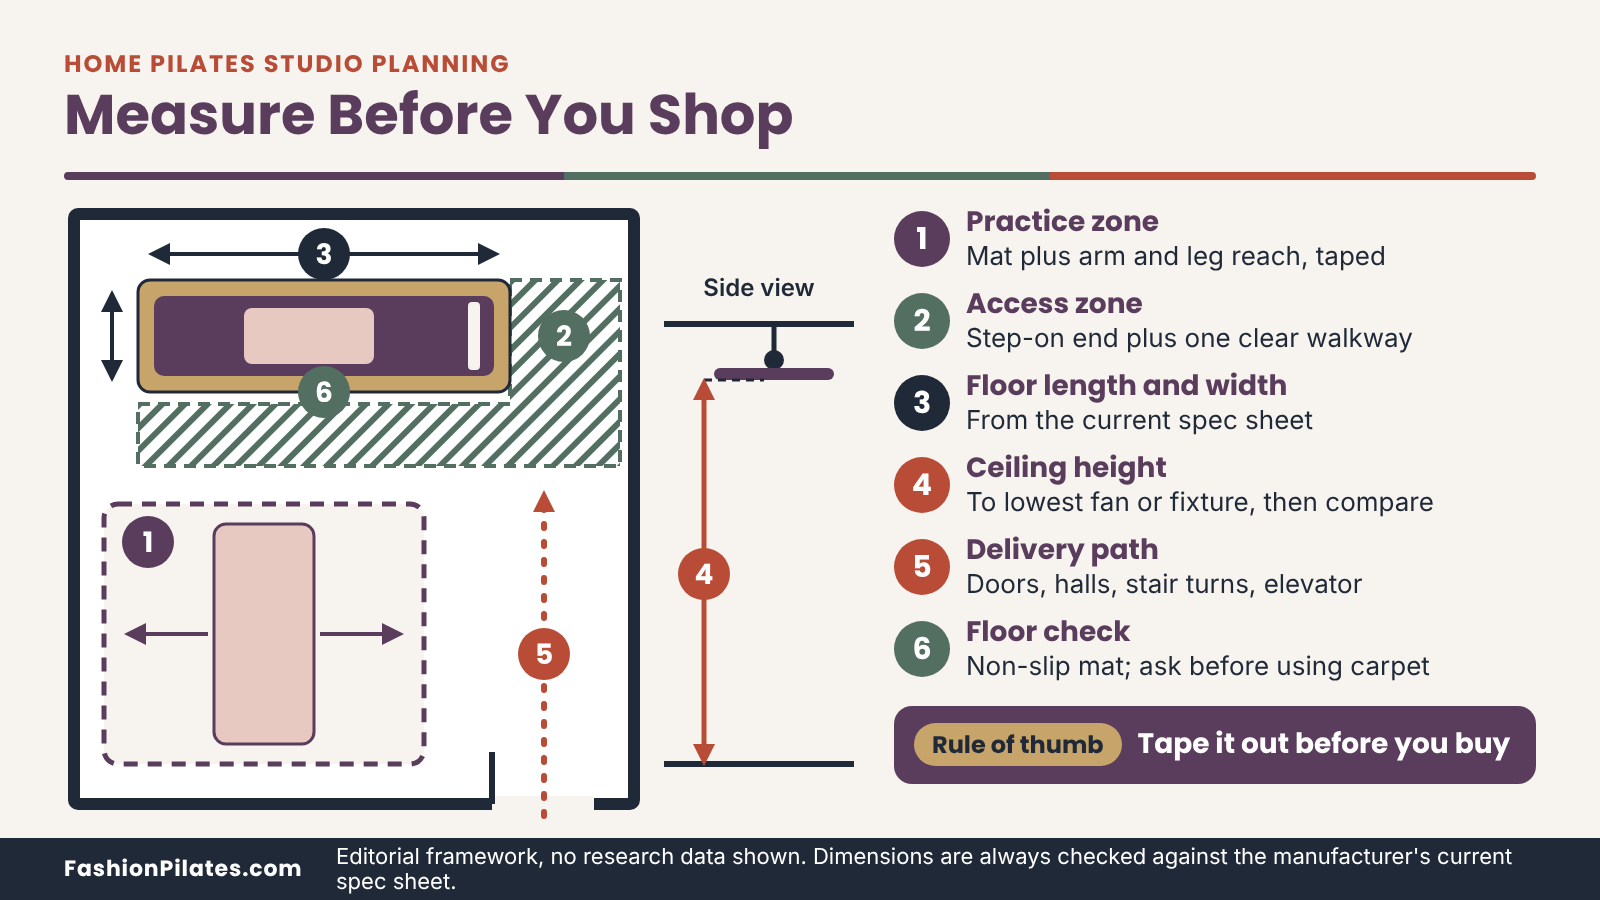
For mat work, try the tape test. Lie on the floor where you plan to practice, reach your arms overhead, extend your legs, and have someone mark the fingertip-to-toe line with painter’s tape. Then repeat with your arms out in a T and your legs wide, since side-lying and straddle positions need width. Whatever rectangle results, add a little extra margin on each side so you are not tucking in an elbow every time you extend. As a planning rule of thumb, which is an editorial allowance and not a manufacturer requirement, leave at least one arm’s length of free floor on any side where you will stand, kneel, or reach.
The same trick works for apparatus. Take the length and width from the spec sheet, tape the outline on your floor, and then tape the access zones: the end where you step on, the side where you stand to adjust, and any area where a teacher or partner might stand. A reformer that technically fits in a room can still be unusable if the only way to reach the footbar is to squeeze past a dresser.
Frame length is not working length
Spec sheets list frame dimensions, but a working setup is bigger. Footbar position, rope and pulley hardware, and optional accessories all change what you need. Balanced Body’s Allegro 2 support page, for example, lists optional items such as jumpboards, plank bars, and platform extenders among the replaceable and add-on parts for that reformer, which is a reminder that the machine you buy today may not be the footprint you run in two years.
Also check the width in the configuration you will actually use. Balanced Body’s listing for the Allegro 2 gives one frame width without the footbar and a larger one with it, and that gap matters if you are squeezing the machine along a wall. Measure at the widest configuration and add the walking space.
The table below collects example dimensions from official manufacturer pages. They are shown to illustrate the kinds of numbers you will meet, not to recommend a model, and every one of them should be checked against the current spec sheet before you buy, because manufacturers revise models, options, and listings.
| Example item | Length or depth listed | Width listed | Height or ceiling note listed | Weight listed |
|---|---|---|---|---|
| Balanced Body Allegro 2 Reformer | Frame 94 inches (239 cm) | 25 inches without footbar; 31.25 inches with footbar | Frame height 15 inches with legs; tower option adds height, so check the page | 155 lb with legs |
| Balanced Body Studio Reformer with Tower and Mat | 93 inches (236 cm) | 27 inches; tower 30.25 inches wide | Reformer height options of 14, 18, or 24 inches; tower 83.5 inches high when installed on the 24-inch option | 188 lb for the total system |
| Merrithew SPX Max Reformer | 99.5 inches (252.7 cm) with footbar down | 26 inches (66 cm) | Minimum ceiling for standing exercises 97.5 inches; standing storage height 100.5 inches | 128 lb |
| Merrithew SPX Max Plus Reformer | 99.5 inches (252.7 cm) with footbar down | 26 inches (66 cm) | Minimum ceiling for standing exercises 97.5 inches | 164 lb |
| Merrithew Split-Pedal Stability Chair | 33 inches (83.8 cm) deep | 31 inches (78.8 cm) | 55.5 inches high with handles | 82 lb |
| Balanced Body Wall Tower | 20 inches (51 cm) deep | 27 inches (69 cm) | 89 inches high; ceiling clearance of at least 89 inches listed | Not listed on the page checked |
Two patterns stand out. First, similar machines from the same maker can differ in weight by dozens of pounds, which changes the delivery plan. Second, the ceiling number on a spec sheet is often the one that surprises people, and the next subsection deals with it.
Ceiling height, overhead reach, and tower or standing work
Floor length gets all the attention, but vertical clearance quietly rules out more rooms than floor space does. It matters for standing work on a reformer, for anything with a tower, and for the moment you reach your arms overhead.
Why the ceiling number matters
Merrithew lists a minimum ceiling height for standing exercises of 97.5 inches for both the SPX Max and SPX Max Plus reformers on their product pages. A ceiling of 8 feet is 96 inches, so by that example, a standard-height room can fall short of the listed minimum before you add a ceiling fan or a light fixture. The lesson is not that those models are unsuitable, but that you should read the ceiling line on any machine you consider and then measure your room, not assume it.
The number also depends on who is standing on the carriage. A taller person with arms overhead needs more clearance than a shorter one, and the manufacturers are quoting a minimum for a defined scenario. If you plan to do standing or jump work, treat the spec as a floor to exceed, not a target to hit exactly.
Towers, vertical storage, and ceiling obstacles
Tower and Cadillac-style frames add height. Balanced Body lists its Wall Tower at 89 inches high with a listed ceiling clearance of at least 89 inches, and its Studio Reformer with Tower at 83.5 inches when the tower is installed on the tallest reformer height. On the Studio Reformer page, the tower is described as rigidly secured to the frame, not easily removable, and not foldable, which means a tower-equipped reformer is a permanent resident, not something that tucks away.
Vertical storage, where a reformer stands on end against a wall, brings its own height requirement. Balanced Body’s Allegro 2 page says to confirm ceiling clearance before storing it vertically and notes that transport wheels are required and that two people are recommended, while Merrithew’s SPX Max page lists a standing storage height of 100.5 inches. Check lights, ceiling fans, sloped ceilings, soffits, and sprinkler heads before you trust any of these numbers in a real room. For more on the apparatus itself, see our Pilates tower and Cadillac explained.
The delivery path: doors, stairs, and turns
The room may be perfect and the machine may still never reach it. Delivery is where a surprising number of home setups stall, and it is entirely preventable with a tape measure and a phone call.
Walk the route with a tape measure
Trace the path from the delivery vehicle to the room: entry door, hallway widths, stairwell turns, landings, elevator interior, and the door of the destination room. Note the narrowest opening and the tightest turn. Then ask the seller for the dimensions of the largest packaged piece and the heaviest single component, because the frame is typically the awkward one.
Spec pages give you the starting numbers. A frame near 94 to 100 inches long, as in the examples above, is a long object to turn around a corner, and 128 to 164 pounds is a serious load for one person on a stair. Ask whether delivery goes to the curb, the doorstep, or the room of your choice, what each costs, and whether assembly is included or optional.
Plan for assembly and the unglamorous parts
Balanced Body says the Allegro 2 arrives partially assembled, with the footbar, springs, shoulder rests, and risers still to attach, and it supplies instructions and video guidance. Whatever brand you choose, expect an assembly session of a couple of hours and a second person to help. Clear the room first, and decide where the packaging goes, because a flattened reformer carton is a surprisingly large item.
If you live in an apartment, check building rules for elevator reservations, delivery hours, and any restrictions on bringing in large items. A landlord who has not been told about a 150-pound frame going down a hallway is a problem you can avoid with one email. The next section covers what that frame will be standing on.
Once you have the numbers, fold them into one layout plan. The table below turns the measuring work into a checklist by setup type. The clearance figures are editorial planning allowances for comfortable use, not manufacturer requirements, and they should always yield to the equipment’s own manual.
| Setup | Clear floor to reserve | Overhead check | Access and clearance allowance | Delivery check |
|---|---|---|---|---|
| Mat only | Mat length and width, taped on the floor | Arms-overhead reach; ceiling fans and low fixtures | An arm’s length of free floor on each side you will stand, kneel, or reach | None needed; carry it in |
| Mat plus small props | Same as mat only, plus a landing spot for props during a session | Same as mat only; extra care with balls and rings overhead | Room to set props down within reach without stepping on them | None; props travel in a bin or bag |
| Reformer | Frame length and width from the spec sheet, in the widest configuration you will use | Standing-work ceiling minimum from the spec sheet, plus fixtures | A clear step-on end and a walkway on at least one long side | Longest piece, heaviest piece, doors, stairs, turns |
| Reformer with tower | Reformer footprint; tower attached is a permanent fixture | Installed tower height from the spec sheet, plus fixtures | As for a reformer, plus room to reach spring attachment points | Confirm whether the tower ships attached or separately |
| Wall-mounted tower | Listed width and depth, against a wall that can take the mounting | Listed ceiling clearance, plus fixtures | Space in front for the movement you plan to do | Check mounting hardware needs for your wall and floor type |
| Chair | Listed depth and width, with room around it | Listed height with handles, plus arm reach on top of it | A step-up and step-off zone on at least two sides | Dense and heavy for its size; check doors and stairs |
Flooring and Floor Protection
Whatever you practice on, the floor matters twice: it supports you, and it has to survive the equipment. A mat has modest demands. A reformer has wheels, springs, and a lot of mass, and a bare spot of the wrong flooring will show it within weeks. This section keeps to what manufacturers actually say and flags where a professional should take over.
Hard floors, carpet, and subfloors
Most homes offer one of two situations: a hard surface such as hardwood, laminate, tile, or concrete, or carpet over padding. Each helps in some ways and complicates others.
Hardwood, laminate, vinyl, tile, and concrete
Hard, flat floors are the easiest base for equipment because they stay level and let wheels roll predictably. The trade-offs are cosmetic and comfort-related. Wood and softer surfaces can scratch or dent under concentrated weight, glossy tile can be slippery for stocking feet, and a bare concrete floor can feel cold and unforgiving under a thin mat. On the equipment side, Merrithew’s care guidance recommends placing non-slip mats underneath equipment to prevent floor damage, a simple and cheap precaution that suits almost any hard floor.
The same guidance says chemical-based products may permanently mark floors, which is worth remembering when you clean the machine on the floor it sits on. Wipe with the manufacturer’s suggested water-and-mild-soap approach, avoid spraying liquid directly onto equipment, and keep drips off the floor where possible. For wood floors in particular, ask your flooring installer or the floor’s manufacturer what pads and care products they approve before relying on a generic felt pad.
Carpet, rugs, and padding
Carpet is more complicated. It can cushion mat work, but it can also make the surface uneven, and thick pile or soft padding may let narrow legs and wheels sink or rock under load. For anything on legs or rails, a stable and level base matters more than a comfortable one. Before placing a reformer, tower, or chair on carpet, read the manual for floor requirements and ask the manufacturer’s customer service, because some guidance is model-specific.
If you must use carpet, a firm base under the equipment, such as a dense, flat mat or a rigid board sized to the footprint, may improve stability, though whether it is appropriate for your model is a question for the maker, not for a general guide. For mat work alone, a firm mat on low-pile carpet is a common setup, and a thicker mat is less necessary when the floor already gives. Our guide to Pilates mat thickness covers the cushioning side.
| Floor type | Where it helps | Watch-outs | Protection to consider |
|---|---|---|---|
| Hardwood | Flat and stable; wheels roll predictably | Can scratch or dent under concentrated weight; cleaning products may mark it | Non-slip mat under equipment; ask the flooring maker about approved pads |
| Laminate or vinyl plank | Level, easy to wipe, widely used in apartments | Can scratch or indent; some surfaces are slick | Equipment mat; check the flooring maker’s guidance on heavy loads |
| Tile | Hard and level | Slippery for stocking feet; cold; hard on a thin mat | Grippy mat; avoid wet-cleaning right before practice |
| Concrete (basement or garage) | Strong support for heavy equipment | Cold, hard, sometimes damp or dusty | Rubber or foam flooring; check moisture and temperature |
| Low-pile carpet | Comfortable for mat work; quiet | Variable support under legs and wheels | Firm base under equipment if the manufacturer allows it |
| Thick carpet or soft padding | Very cushioned for floor work | May allow equipment to sink or rock | Ask the manufacturer before placing apparatus; consider another room |
Weight, point loads, and when to ask a professional
Nobody wants to read about structural loads in a Pilates article, and a general guide cannot assess your house. What it can do is give you the vocabulary to recognize when to ask someone who can.
Understanding load in plain terms
The load on a floor is the equipment weight plus the weight of the person and any other contents. The examples in the earlier table list reformer weights from about 128 to 188 pounds, and the Merrithew SPX Max and SPX Max Plus pages list a weight capacity of 350 pounds. Add a person and you are in the neighborhood of a few hundred pounds, supported on a small number of wheels or legs.
Most residential floors are designed with loads spread across a room in mind, not concentrated at a handful of small contact points, which is why protective pads that spread weight help hardwood and why upper-floor rooms deserve a second thought. If you live in an older building, plan to place several machines in one room, or notice that your floor flexes or bounces under normal use, ask a builder, contractor, or structural engineer before you buy. That is a house question, not a Pilates question, and it should not be answered by a product page.
Wall and floor anchoring for towers
Some equipment is designed to be fixed in place. Balanced Body’s Wall Tower page states that the unit must be mounted to both wall and floor, ships with four lag bolts, two for the wall and two for a wood floor, and that non-wood floors need appropriate hardware bought separately. The page also advises that an experienced handyperson attach it to the wall and floor.
That has two practical consequences. First, wall-mounted equipment is a home-improvement project, with studs, fasteners, and potential damage to walls and floors. Second, if you rent, you need written permission from the landlord. If anchoring is off the table, freestanding frames and compact apparatus are the better fit, and our discussion of storage and small spaces covers options that do not require drilling.
Mats and Surfaces: Where This Guide Hands Off
Every level of a home Pilates studio includes some kind of mat, so it deserves a few paragraphs here. It does not deserve a product roundup, because that job belongs to the dedicated mats and flooring coverage. Think of this section as the bridge: what the surface has to do, how it fits the room, and why two similar-sounding phrases mean different things.
What the surface has to do
A Pilates mat has three jobs. It must give your hands and feet something to grip, give your spine, hips, and knees a little padding where bones meet floor, and stay put on the floor beneath it. Getting two of those right and the third wrong is how a mat ends up folded in a closet.
Grip, cushion, and stability
Grip matters most when your hands or feet are doing work, as in planks, quadruped positions, or standing transitions. A surface that slides forces you to grip with the wrong muscles, and an unstable surface is a distraction in any movement that asks for control. Cushion matters when you lie on your back, roll through the spine, or kneel. Many mats made for Pilates are thicker than a typical travel yoga mat for exactly that reason, though thicker is not automatically better, since a very soft surface can feel wobbly in balance work.
The right balance depends partly on the floor beneath. A firm mat on a hard floor feels different from the same mat on carpet, and a surface that is perfect on hardwood may be too slick on tile. The practical test is simple: if you are adjusting your mat more than your body, it is the wrong mat. For the product comparisons behind that test, head to the dedicated mat coverage.
Size and fit with your room
A mat has to fit the person and the room. Check the listed length against your own, particularly if you are tall, so your head and feet rest on the surface during full extension. Check the width against the way you move, since side-lying and wide-legged positions need room, and check the dimensions against the space you measured earlier so you are not buying a mat that only fits diagonally.
Also think about how it stores. A thick mat that rolls into a tidy cylinder fits in a closet or behind a door. A thick folding mat stores flat but takes up more depth. Your storage plan, covered later, should have a spot for it before it arrives, not after.
“Mat Pilates” versus “Pilates mat”: the vocabulary bridge
These phrases are easy to blur, and the difference affects what you search for, what you buy, and what you read. Keeping them separate saves time.
Method versus product
Mat Pilates is the method: a floor-based practice using body weight and control, sometimes with small props. A Pilates mat is the product you practice on. A reader searching for the first wants a workout or class, and a reader searching for the second wants a thing to buy. If your question is how to start the practice itself, our beginner Mat Pilates workout is the right next stop, not another mat comparison.
The reverse also holds. If you are comparing thickness and grip, you do not need a class plan. This article sits at the intersection, since it asks how to arrange a home for both, and the rest of the planning below refers to each by its proper name.
How mats fit into apparatus setups
People sometimes assume that buying a reformer retires the mat. It rarely does. Even apparatus practitioners use floor work for warm-up, stretching, and mat sequences, and a mat is a cheap way to keep a spot comfortable beside a machine. Some apparatus offers a mat-height platform too: Balanced Body lists a mat conversion for its Studio Reformer with Tower and Mat at 93 by 27 by 3.5 inches, for example, and says twin mats store under the frame when not in use.
The point is not to buy that feature but to notice that apparatus and floor work coexist. If you are deciding between them, our comparison of reformer vs Mat Pilates explains how the two differ in feel and demand.
Small Props: What Each One Does and When It Is Optional
Small props are the aisle of home fitness where marketing does its best work. They are inexpensive, colorful, and lightweight enough that buying five feels harmless. A tidy way to resist is to ask what each one does and whether a class you actually take calls for it.
Resistance and feedback props: rings and bands
Rings and bands add resistance you can feel in your hands, arms, or legs, and some also give feedback about alignment. They are the props most often named in online mat classes.
The Pilates ring
A Pilates ring is a flexible circle, often with padded grips, that you can press, squeeze, or hold between hands, forearms, thighs, or ankles. Its job is light, adjustable-feeling resistance and a clear point of focus: you press into something, which can make the intention of a movement easier to find. It is a prop that appears in many online mat sessions.
It is optional if your classes do not use it. It also does not scale resistance the way a spring does, since the resistance depends on how hard you press and on the ring’s own stiffness. If you try one in a studio first, you will learn whether you like the feel before buying. Rings are small and store flat against a wall or in a bin.
Resistance bands and loops
Bands and loops are elastic and come in different tensions. They add pulling or pushing resistance to leg and arm work and are useful for people who want variety without much storage. The catch is that tension labels, usually color-coded, are not standardized across brands, so what one maker calls light may feel different from another’s. Follow the instructor’s guidance and the product’s own instructions, not a color assumed to be universal.
Check bands before each session for nicks, thin spots, and cracks, because a damaged band can snap. If you have a latex sensitivity, read the material listing before buying. Bands are optional if your sessions never use them, and they are a good example of a prop worth buying only after a class or teacher recommends it.
Support and mobility props: balls, sliders, rollers, and blocks
This group changes how your body is supported or how much friction the floor adds. They tend to be helpful in specific situations and unnecessary in others.
Balls and sliders
A small inflatable ball can go under the hips or low back for support, or between the knees or ankles for a focus point. A larger ball works as a seat or a base for certain movements. Sliders, sometimes called gliding discs, reduce friction between hands or feet and the floor, so floor-based movements require more control. Sliders are often surface-specific, with different sides or designs for hard floors and carpet, so check the product instructions against your flooring.
Both are optional unless your classes use them, and both are easy to store. If you try a ball, keep it inflated to the maker’s guidance, and keep it away from sharp edges and heat. If you try sliders, test them on a floor you are not worried about scratching, and remember that the same reduced friction that makes them useful makes them easy to slip on.
Foam rollers, blocks, and the “maybe” pile
A foam roller can be used for gentle rolling or as a long surface to lie on, and some mat classes use it as a support or balance challenge. Blocks and bolsters are a similar category: supportive shapes that raise or fill space. Towels, a small cushion, and a folded blanket do much of the same work for free, and they are already in the house.
That is the real filter for the “maybe” pile. If a household item does the job, it can wait. If you need something firmer or more consistent, a purpose-made version is worth it. Our Pilates props guide covers each accessory in detail. The table below sorts the small props by function so you can see where a purchase actually earns its drawer space.
| Prop | What it does | You can skip it if | Storage |
|---|---|---|---|
| Pilates ring | Gives something to press or squeeze, adding light resistance and focus | Your classes do not use one | Hangs flat on a wall hook or fits in a bin |
| Resistance band or loop | Adds pulling or pushing resistance; tension varies by brand | You are not following sessions that call for one | Coils into a drawer; keep away from heat and sharp edges |
| Small ball | Supports the hips or back, or gives a focus point between knees or ankles | A rolled towel does the job for you | Small; store partly inflated per the maker’s guidance |
| Larger exercise ball | Acts as a seat or a base for some movements | You have no use for it in your sessions and little space | Bulky; needs a corner or a closet |
| Sliders | Reduce friction on the floor, changing how a movement feels | Your floor is carpeted and the sliders are hard-floor only, or you do not use them | Flat; fits in a drawer |
| Foam roller | Supports the body or serves as a rolling surface | You already have a roller from other training | Long and light; stand it in a corner |
| Block or bolster | Raises or fills space for support | Towels or a cushion work for you | Modest; stack with the mat |
Storage and Small-Space Solutions
Most home studios are not rooms. They are corners, hallways, and bedrooms that have a second job. The difference between a space that gets used and one that collects laundry is almost always storage and setup speed, so this section treats them as design problems, not afterthoughts.
Storing mats and props
For levels one and two, storage is nearly free, but it needs a plan. A bin, a hook, and a habit will do more than any furniture purchase.
Give every item a home
Choose one spot for the mat, such as upright behind a door, flat under a bed, or rolled in a basket, and one container for props. A single lidded bin or a shelf with a basket keeps the ring, bands, ball, and sliders together, which matters because a half-used prop collection scattered through the house tends to stop being used. Keep the bin close to where you practice so setup stays quick.
Store materials according to the maker’s care guidance. Foam and rubber products generally do not enjoy prolonged heat or direct sun, and elastic bands age faster when exposed to either, so a closet or a shaded corner is a better home than a sunny windowsill or a hot car trunk. If your mat arrived with a care card, keep it.
Shorten setup to a minute or two
Earlier, the friction budget was the main criterion, and storage is where you spend it. If your mat lives within arm’s reach of the practice spot, setup is two minutes. If it lives in an attic, you will find reasons to skip. Some people leave the mat rolled in the corner as a visual cue, and others keep a basket by the sofa that doubles as décor. Either works, provided putting things away takes about as long as getting them out.
A small trick for shared rooms: keep a clear route from storage to the practice spot, and decide in advance which piece of furniture moves. A coffee table that must be shifted every time is a coffee table you will stop shifting.
Sharing a room with apparatus
Reformers, chairs, and towers are not things you tuck in a drawer. If the room has to switch roles, your best bets are equipment that stores compactly, equipment that is simply allowed to stay out, and honest arithmetic about the floor.
Vertical storage, wheels, and stacking
Some reformers are designed to stand on end or stack in a compact way. Merrithew describes its SPX Max reformer as lightweight and stackable, with easy-roll wheels at both ends and a listed standing storage height of 100.5 inches. Balanced Body says its Allegro 2 can be stored vertically with proper footbar positioning, that transport wheels are required, and that two people are recommended. Those are examples, not guarantees about any model you might own, because not every reformer stores upright and the exact method differs.
The decision logic is simple. Vertical storage helps only if you have the ceiling height, a wall that can take the load of leaning equipment, a clear space to stand it in, and the strength, with a helper, to tip it up and down safely. If any of those is missing, a permanently placed machine in a room with a door is usually the easier answer.
A worked example: the 10-by-12-foot bedroom
Take a bedroom that measures 10 feet by 12 feet, which is 120 inches by 144 inches. A reformer with a listed length of 99.5 inches needs the 144-inch direction, because 120 inches leaves only about 20 inches beyond the frame in the short direction, not enough for stepping on and off comfortably. Along the 144-inch direction, you have roughly 44 inches of spare length, which is enough for a step-on zone but leaves little room for a dresser at that end.
Now add width. A 26-inch frame in a 120-inch room leaves about 94 inches across, so a walkway on one side is easy. The bed, then, has to live somewhere other than the long wall the reformer occupies. This is the kind of arithmetic worth doing with painter’s tape before any purchase, using your own room and the real spec sheet.
Apartment and rental realities
Renters face limits that homeowners do not. Most are manageable, but they have to be asked about early, not after a frame is wedged in a stairwell.
Leases, deposits, and anchoring
Read the lease for anything about floor coverings, wall damage, and large items. Anchoring a wall tower means drilling into walls and floor, as discussed earlier, so it requires explicit landlord consent. Heavy equipment on a floor you do not own may also raise questions about damage, and photographing the floor before and after can protect your deposit. A protective mat under the equipment is both a courtesy and a form of insurance.
When anchoring is not an option, look at freestanding equipment, compact frames, and small apparatus. Our home Pilates reformer for small spaces guide covers the compact end of the market, which is a better fit for most leases than a permanent tower.
Elevators, stairs, and storage cages
Elevators have limits for dimensions and weight, buildings may restrict delivery hours, and many have rules about moving large items in common areas. Ask building management early, and measure the elevator interior and the hallway turns against the longest and heaviest packages. A frame that is just under 100 inches long may need to go diagonally in an elevator, which is a conversation to have with the delivery company before the truck is outside.
Also think about secondary storage. A basement storage cage can hold a boxed machine through a lease transition, but it is a poor home for anything you plan to use. If you move often, level one or two with a compact reformer later is a more realistic path than a heavy fixed setup.
Lighting, Mirrors, Air, Sound, and Screens
A room can meet every measurement and still be unpleasant to practice in. These factors do not make or break a build, but they decide whether you want to return tomorrow. Most are inexpensive to fix and a few are free.
Lighting and mirrors
Good Pilates lighting is soft, even, and kind to someone who spends part of the session on their back. Mirrors are optional, and when they are used they deserve some safety thinking.
Lighting that works lying down
Pilates includes plenty of time on your back, so the light that looks fine when you walk in may be a spotlight in your eyes when you lie down. Look at the ceiling from the mat before you commit. Diffused ceiling light, a lamp placed to the side, or natural light from a window to the side of the mat is more comfortable than a bare overhead bulb directly above.
Dimmable lights help with variety, from bright for classes to low for a cooldown. Keep floor lamps and their cords out of the movement zone and away from apparatus, since a toppled lamp near a moving carriage is a problem you can avoid with one wall sconce.
Mirrors: useful, optional, and worth securing
A mirror can help you check alignment, and some people like it for self-correction while others find it distracting. A phone propped nearby to record a short clip can serve the same purpose, and it can be reviewed later without staring at yourself mid-session. Whether you want a mirror is a matter of temperament.
If you choose a mirror, mount it securely according to the product’s instructions and wall type, not just leaning it against a wall. Position it so balls, rings, and apparatus parts cannot strike it, and so it does not bounce glare into your eyes. A large mirror leaning in a corner is both a hazard and an invitation for a pet or child to knock it over.
Air, temperature, and sound
These three are the invisible parts of a room, and they are the ones most often ignored until they are a problem.
Ventilation and temperature
You will be breathing deliberately and moving for 30 to 60 minutes, so fresh air helps. The EPA’s indoor air guidance says that bringing more outdoor air indoors helps reduce indoor pollutants, suggests opening windows and doors when weather permits, and points to bathroom and kitchen exhaust fans that vent outdoors as useful tools. It also notes that when you use products that release pollutants, you should make sure airflow is adequate, which includes some cleaning products. Apply that to your studio by cracking a window during practice and after you wipe down equipment.
New mats, rubber flooring, and equipment can have a noticeable smell at first, and airing the room is the sensible response. As for temperature, comfortable and slightly cool tends to be easier than warm and stuffy, and a small fan helps. Avoid drafts that blow directly onto you during floor work, and keep a layer nearby for the cooldown.
Sound and your neighbors
Mat work is quiet. Apparatus is not always. Springs can rattle or twang, carriages can clunk at their stops, pedals on chairs and footbars can clack, and jump-style work adds impact. Whether a given machine is noisy depends on the model, how it is maintained, and how you use it, so check manufacturer guidance and plan for noise rather than hoping for silence.
If you share walls, floors, or ceilings, impact noise is the one to watch. ASTM International’s E989 standard describes a classification for rating how well a floor-ceiling assembly reduces impact noise, measured with a standard tapping machine, which is a technical reminder that how much noise passes through a floor is a property of the building, not just of your equipment. You probably do not know your building’s rating, so use practical steps instead: place heavy or jumping work on the lowest floor available, put a protective mat under equipment, avoid early and late sessions, and tell neighbors you are adding equipment.
Screens and online classes
Plenty of home practice runs through a tablet, laptop, or television. A little thought about placement saves neck strain and missed instructions.
Screen placement and camera angle
Place the screen where you can see it without craning in the positions you hold most, which in Pilates often means from your back, side, or hands and knees. A screen near the foot of the mat or at a side wall at floor-to-eye height works for many floor classes. For apparatus, a screen at the end you face during the main work is usually best. If a teacher watches you live, a camera angled to show your whole body, from the side if possible, gives the most useful feedback.
Keep the device on a stable stand set back from the movement zone, not on a chair that a swinging limb or carriage could hit. A tablet falling onto a mat is annoying, and one falling onto a person is worse.
Audio, Wi-Fi, and cables
Instruction cues matter, so check that audio is audible over the sounds of the equipment. A small Bluetooth speaker is better than earbuds with a cable that can snag, and wireless audio avoids a trip hazard. Test your Wi-Fi from the actual practice spot, since the corner you chose may be a dead zone.
Also route power cables along the wall, not across the floor, and tape or cover any that must cross a path. Cords near a moving carriage or rolling frame are an easy way to turn a screen into a hazard.
Safety, Maintenance, and Care
Safety in a home studio is mostly about boring habits: a stable setup, a clear zone, a closed door when needed, and a quick look at moving parts before you use them. None of it is exciting, and all of it is cheaper than the alternative. This section stays in general terms, because the manual for your equipment is the authority and it varies from model to model.
Securing equipment, children, and pets
Equipment that moves, rolls, or stores tension deserves a different level of respect from a mat. The first job is making sure it stays where you put it. The second is deciding who can reach it.
Stability, placement, and the clear zone
Follow the assembly instructions exactly, tighten hardware as the manual describes, and place the equipment on a level, stable surface. Rolling equipment should not be able to wander while you step on or off, so use any wheel locks, stops, or non-slip mats the manufacturer describes. Merrithew, for example, advises non-slip mats under its equipment, which also protects the floor. If anything feels loose or wobbles, stop and fix it first.
Respect the listed weight capacity, which Merrithew gives as 350 pounds on its SPX Max reformer and Split-Pedal Stability Chair pages, and keep the clear zone around the equipment empty during practice. Mats, props, shoes, and cords belong off the path, since you will be stepping on and off a surface that may move. Springs are under tension, so attach and detach them only as the manual shows, keep hands and hair away from moving parts and pinch points, and never improvise replacements. Spring tension is not standardized across brands, so follow your instructor and your manual, not a color chart from another machine.
Children and pets
The American Academy of Pediatrics’ HealthyChildren site lists several hazards of home exercise equipment, including friction burns, finger injuries, falls, and entrapment under rollers or moving parts, and notes that the Consumer Product Safety Commission has recalled equipment after injuries. It advises supervising young children closely, avoiding placing equipment in areas where children regularly play, and installing locks on workout rooms where possible. That advice was written for exercise equipment generally, but a carriage on rollers, springs, and ropes belongs in the same category.
The simplest policy is a door that closes, ideally one that latches above small hands, and a rule that nobody climbs on or under the equipment unsupervised. Pets are curious about moving things, so keep them out of the room during practice and when you are not there. If the manual describes a storage or lock-down position, such as a parked carriage or a lowered footbar, use it whenever the machine is unattended.
Inspection and cleaning routine
Care is also general safety. A clean machine is easier to inspect, and an inspected machine is less likely to surprise you. Most of this is a few minutes and a damp cloth.
Springs, ropes, straps, and hardware
Look at springs for visible deformation, rust, or uneven stretch, listen for new noises, and look at ropes, hooks, cleats, and straps for fraying, cracks, or wear. Merrithew’s equipment-maintenance advice includes inspecting the rope, rope hook, and cleats for wear or damage every day in a studio setting, and tightening hardware when needed. At home, a quick look before each session and a closer one monthly is a reasonable adaptation, but the manual rules.
Replacement timing is where manufacturers differ, and it is worth knowing why. Balanced Body’s Allegro 2 maintenance guide recommends replacing its Signature Springs after about 3,000 hours of use and gives a formula: hours used per day times days per week times 52 weeks. Merrithew’s maintenance advice suggests replacing springs every two years. The first is usage-based and the second is calendar-based, and both appear in guidance aimed at studios.
A home user who practices an hour a day, four days a week, logs about 208 hours a year by the first formula, which would put 3,000 hours well over a decade away. That is arithmetic, not a recommendation to wait. The right interval for your equipment is the one in your manual and warranty terms, and any spring that shows damage or changes behavior should be replaced or checked sooner. If something looks wrong, stop and contact the manufacturer.
Upholstery, rails, mats, and the floor around them
Merrithew’s care page recommends wiping vinyl surfaces with warm water and mild soap and rinsing thoroughly, cleaning channels, rails, and rollers with a damp cloth, and not spraying liquid directly onto equipment. It also says never to use oil lubricants, because they can damage rollers, and that chemical-based products may mark floors and are not covered by warranty. Those are specific, quotable cautions from one maker, and the sensible general rule is to use only what your manufacturer recommends.
Mats and props follow the same logic. Wipe them after use with a damp cloth and mild soap, let them dry fully before rolling them up, and check the care label for products to avoid. Harsh chemicals can degrade many materials, and a mat that smells musty or feels sticky is telling you it has not dried or has aged. Wash towels and any cover cloths as you would other gym laundry, and give the floor around the equipment a quick vacuum, since dust and hair on a rail is a common cause of rough rolling.
The table below turns all of that into a routine. It is an editorial schedule built around the general direction of the manufacturer guidance quoted above, and it is not a substitute for the interval stated in your own manual.
| When | Task | What to look for | Notes |
|---|---|---|---|
| Before each session | Quick visual check of springs, ropes, straps, and clear zone | Fraying, kinks, loose hardware, anything on the floor in the path | Takes a minute; stop and fix anything that looks off |
| After each session | Wipe upholstery and touched surfaces; wipe mat and props | Sweat, dust, residue on rails and rollers | Use what the maker recommends; avoid spraying liquid directly on equipment |
| Weekly | Wipe rails, channels, and rollers; check that wheels and stops work | Debris, hair, dust, rough rolling | Merrithew describes damp-cloth cleaning of channels, rails, and rollers; never oil rollers |
| Monthly | Closer look at springs, ropes, hooks, cleats, and fasteners | Rust, deformation, wear, loosening | Tighten only as the manual describes |
| Per the manual | Replace springs, ropes, or straps at the stated interval | Hours-based or calendar-based guidance, plus condition | Makers differ; replace sooner if damaged |
| When something changes | Stop using the equipment and contact the manufacturer | New noises, uneven movement, visible damage | Do not improvise repairs |
A Budget Framework by Tier
Prices for Pilates equipment move with models, bundles, freight, and promotions, so this guide gives you a way to decide, not a number to anchor on. Where an official listing shows a price, the right habit is to read the current listing on the day you buy. The framework below works at any budget because it is built on sequence and arithmetic, not on figures that go stale.
Decision logic: what to spend on first
The most reliable budget advice in home fitness is also the least exciting: spend first on what you will touch most often and on what keeps you safe, and delay the rest until practice proves it needs it.
Spend where your body meets the room
A sensible order runs like this. First, the surface and the space: a mat that suits your floor and a clear, safe zone, with floor protection if you are adding equipment. Second, feedback: classes, a teacher, or a program you will actually follow, since good instruction improves every other purchase. Third, small props that fill specific gaps you have noticed. Fourth, apparatus, only after a trial period has shown you the practice is a habit.
Inside each tier, put fit and safety ahead of extras. A reformer that suits your height, ceiling, and floor will serve you longer than a feature-heavy model that does not. A mat that grips and cushions properly will be used for years, while a pile of colorful accessories may go untouched. Splurging is defensible when the item is something you will use at every session, such as the mat or a machine you have already tried in a studio.
Cost per session and the break-even question
Do the math with your own numbers. Divide the total cost of the setup by the number of sessions you realistically expect to do on it over its useful life, then add the ongoing costs: replacement parts, cleaning supplies, any online program, and extra protection for the floor. That gives a cost per session you can compare with the per-class cost at a studio near you.
The break-even point is the number of sessions at which the home setup costs less than the studio. It is the total cost of the home setup divided by the difference between the studio’s per-class price and your home cost per session. The weak point of that math is honesty about attendance. If you would go to a studio twice a month but would use a home machine four times a week, the comparison needs the same sessions on both sides, or it flatters whichever option you prefer. Resale values vary widely, so do not count on recouping much.
Reading price listings honestly
Two listings for similar machines can describe very different purchases. Reading them carefully is as important as comparing the headline price.
What is in the box
Official product pages show how much configurations vary. Merrithew lists its SPX Max reformer on its own and in bundles, including versions with a vertical stand or a tall box, and Balanced Body lists the Allegro 2 as a reformer with legs and a steel footbar, with a tower available as an addition. A low price can reflect a bare frame, and a higher one a bundle that includes items you would otherwise buy separately. Make a list of what you need to start practicing on day one, then compare each listing against that list.
Check height options, accessories, and whether the price covers a mat or platform, a box, springs, and a jump or accessory board if you want one. The Balanced Body Studio Reformer page, for example, lists three different frame heights, and the height you choose changes the overall height of the setup once a tower is installed.
Shipping, assembly, and what comes after
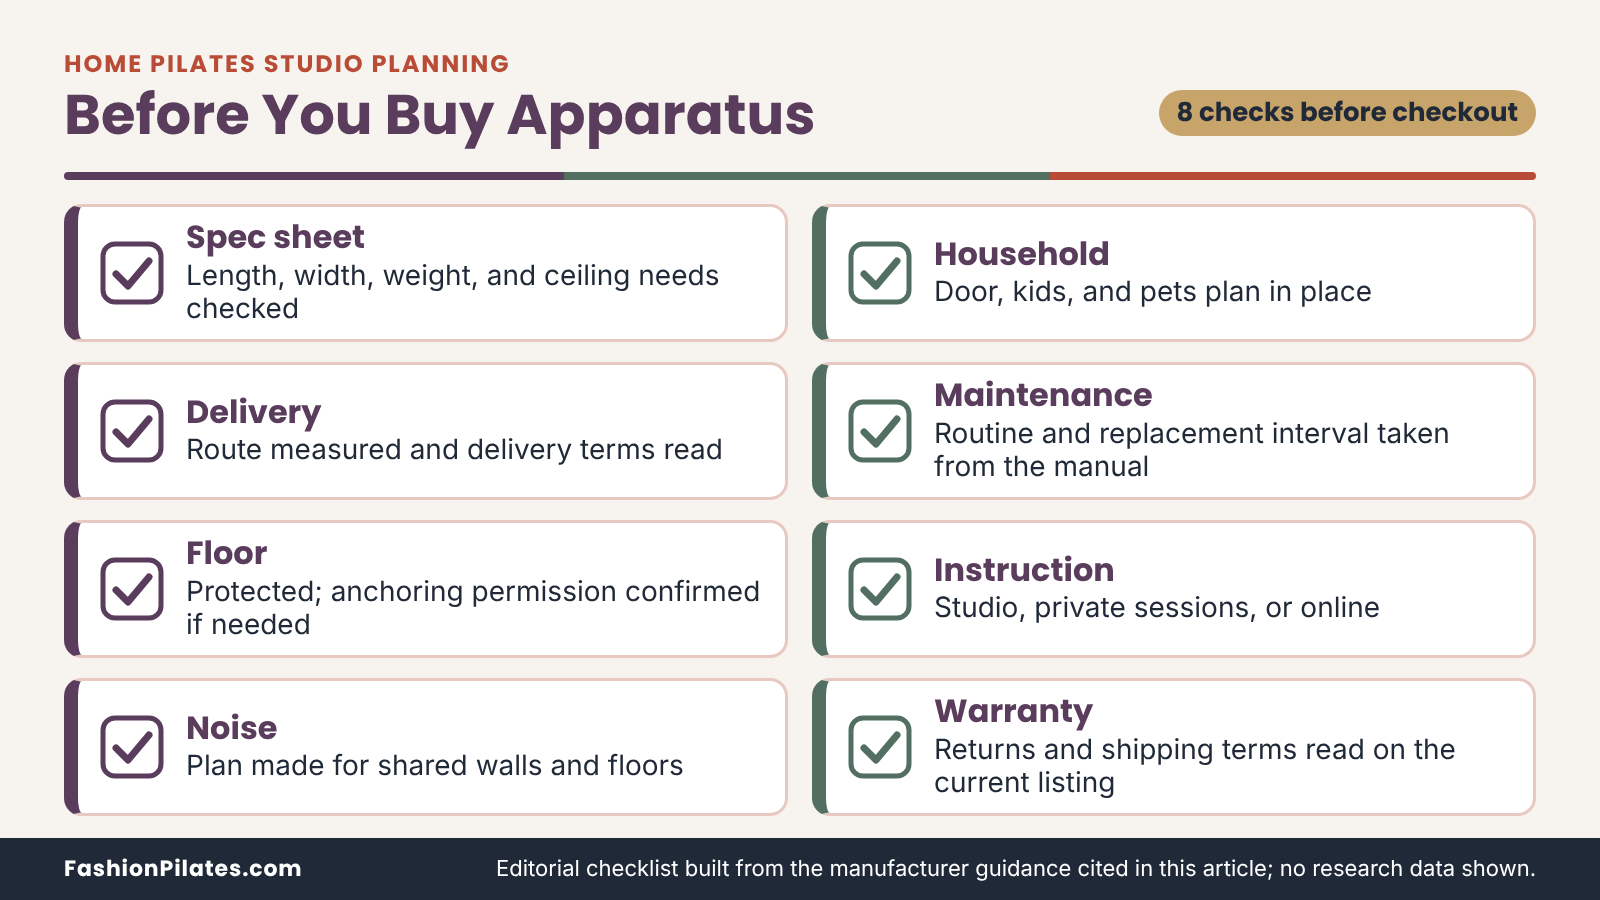
Freight on heavy items can be a separate line, and delivery may stop at the curb unless you pay for more. Assembly is a few hours for a competent pair of people and an extra cost if you hire it out. Springs and ropes eventually need replacing, and floor protection and a mat are small, but real, additions. Ask about warranty terms, return policies for large items, and what happens if something arrives damaged.
Prices, availability, and promotions change often, so treat any number you see as a snapshot and check the current listing. If an offer depends on a code or a limited window, read the terms before you plan around it. The table below puts the framework into one view by tier, using decision logic rather than prices.
| Tier | First spend priority | Common add-ons | Hidden or ongoing costs | Spend more when | Save when |
|---|---|---|---|---|---|
| Mat-only corner | A mat that suits your floor and body; a clear zone | Towel, cushion, instruction or class subscription | Replacement mat over time; a class subscription if you add one | You practice most days and the mat is the one item you touch every session | You are still testing whether home practice sticks |
| Mat plus small props | The one or two props your classes actually call for | Ring, bands, ball, sliders, roller | Replacing worn bands; storage bin or hooks | A teacher or class regularly uses a specific prop | A household item can do the same job |
| Apparatus | A model that fits your room, ceiling, and delivery path, tried in a studio first | Box, mat conversion, tower, jump or accessory board, vertical stand | Freight, assembly, floor protection, spring replacement, instruction, noise mitigation | Your practice already centers on apparatus and you have the space and household buy-in | You mostly practice mat classes or are in a rental with tight limits |
A Phased Build Plan: Month 1, Month 3, Month 6
Building a home studio in phases lets practice make the decisions that guesswork cannot. Each phase has a short job, a checkpoint, and permission to stop. Nothing here requires you to reach level three, and for many readers the best outcome is a well-run level one or two.
Month 1: lay the foundation
The first month is about proving the habit and getting the space right. It costs little, and it generates the information the later phases depend on.
The month-one task list
Pick the corner, do the tape test, and clear the zone. Choose a mat that suits your floor, and set up a spot for it with a storage plan. Sort out lighting and where the screen goes, and try one or two practice formats, such as a video series or a class. If you are curious about apparatus, take a few classes at a studio and ask the teacher about home equipment, rather than buying anything.
At the same time, write down the measurements you have taken: floor length, width, ceiling height, and door and hallway widths. You will need them in month three, and they cost nothing to record now. Keep any manufacturer spec sheets you collect in the same folder as your notes, so you can check them against each other later.
The month-one checkpoint
At the end of the month, count how many sessions you did compared with how many you planned. As an editorial rule of thumb, not a research-based threshold, if you completed most of what you planned, the habit is real enough to justify month three. If you completed far fewer, the issue is more likely friction, schedule, or interest than missing equipment, and buying a machine will not solve it.
Use the checkpoint to adjust the setup, not to feel bad about it. Move the mat closer, pick shorter sessions, change the time of day, or try a different style of class. Then repeat the month. There is no prize for speed.
Month 3: add what practice proves it needs
By month three you have data: what you did, what you skipped, and what annoyed you. That is when to add things.
Props, storage, and screen fixes
Add props only where a real gap has appeared. If a class keeps calling for a ring and you keep improvising, buy the ring. If you keep sliding on the floor, address the surface. Improve storage if setup is slower than it should be, and fix the screen position if your neck complains. Consider sound if neighbors have said something or if you know the walls are thin.
This is also the moment to check floor protection, ventilation, and the safety basics from earlier, since a more established routine tends to push the limits of a temporary setup. Anything you improvise in month one, such as a stack of books propping a tablet, deserves an upgrade now.
Researching an apparatus decision
If apparatus is still on your mind, do the homework. Book a few private sessions or classes on the model you are considering and ask about its quirks. Compare the current spec sheets for length, width, weight, ceiling requirements, and listed capacity, and check them against your measurements. Read the warranty, the return terms for large items, and what the delivery service includes.
If you are tempted by used equipment, inspect it carefully and ask for the model, age, and spring and rope history, since wear is not always visible from a photo. Used equipment deserves the same safety inspection as new, plus the knowledge that you may need to replace springs and ropes soon. The model-level trade-offs belong to the dedicated reformer guides, and the studio-versus-home question in the next section is worth reading before you commit.
Month 6: scale up or stay put
Six months in, you can choose from a position of information. Both paths below are legitimate, and neither is a lesser outcome.
If you add apparatus
Plan the installation as a project. Confirm the delivery path again, protect the floor, clear the room, and arrange for a second person to help. Follow the assembly instructions and the manual, and have an instructor or the manufacturer’s support review anything you are unsure about. Set up a maintenance routine on day one, including the first inspection, and tell the neighbors if you share walls.
Plan your instruction too. A reformer or chair without a teacher or a structured program is less useful than it looks, because apparatus technique is harder to self-assess. Our Pilates chair guide covers one of the other apparatus you might consider next.
If you stay at level one or two
Refine what you have. Replace worn items, tidy the storage, and revisit the lighting and screen. Consider hybrid practice, with a studio membership for apparatus and home sessions for everything else, which is a common and perfectly good arrangement. If your space or household does not suit apparatus, say so and invest the money in instruction instead.
Re-evaluate every six months. Life changes, rooms change, and a mat corner that suited a studio apartment may become a dedicated room after a move. The plan is a loop, not a ladder, and the next table summarizes it.
| Phase | Main job | Typical actions | Checkpoint | If it is not working |
|---|---|---|---|---|
| Month 1 | Prove the habit and get the space right | Tape test, clear zone, mat, storage, lighting, screen spot, trial classes | Did you do most of the sessions you planned? | Reduce friction, shorten sessions, change the format; do not buy more gear |
| Month 3 | Fill real gaps and research apparatus | Add props that classes call for, improve storage and sound, trial apparatus in a studio, compare spec sheets | Can you name the specific problem each purchase solves? | Pause purchases; stay at level one or two |
| Month 6 | Scale up or stay put | Install apparatus with floor protection and a maintenance routine, or refine the mat-and-props setup | Does the setup fit your room, household, and instruction plan? | Consider a hybrid of studio apparatus classes and home mat practice |
Mistakes to Avoid and When a Studio Is the Better Choice
Most home-studio regrets fall into a small set of patterns, and nearly all of them are avoidable with the steps already covered. The final section collects them, then answers the question that deserves an honest answer: sometimes the right home Pilates studio is not at home.
Common mistakes and how to fix them
Mistakes come in two kinds: those made before the purchase, and those made after. The first kind is more expensive.
Planning mistakes
The classic one is buying before measuring. A machine ordered on enthusiasm and delivered to a room with a 96-inch ceiling, a narrow turn, or a bed in the way is a purchase that has to be returned or lived with. The fix is the tape test, the ceiling check, and the delivery walk-through described earlier, done before any checkout page.
Others in this group: buying for the imagined routine instead of the real one, treating a retailer’s listing as the spec sheet, forgetting that the floor has to carry the load, and ignoring the household. If the room is also a bedroom, a hallway, or a playroom, decide how the equipment will live there and who can reach it. The fix for most of these is to write the plan down and check each item against a manufacturer page, not a marketing blurb.
Setup and habit mistakes
After the purchase, the common errors are smaller but add up. Buying a bag of props that never get used, leaving cables across a path, skipping the floor mat under the machine, neglecting the inspection routine, and practicing apparatus without any instruction are the usual suspects. A mirror leaning in a corner and a tablet balanced on a stack of books both belong in this category.
The most underrated error is not revisiting the setup. A corner that worked in January may be wrong in June after a schedule change or a new pet. Put a recurring reminder on your calendar to look at the space with fresh eyes, check the equipment, and decide whether it still fits your life. Each of these has a one-line fix, and none needs a purchase to apply.
When a studio is the better choice
A home studio is not the right answer for everyone, and a guide that says otherwise is selling something. Several situations point toward a studio, at least for now.
Situations that favor a studio
If you have no room that can be dedicated, if the household cannot be made safe around moving equipment, or if the delivery and anchoring limits of your building rule out apparatus, studio classes give you the equipment without the footprint. If you are learning apparatus for the first time, hands-on instruction from a qualified teacher is hard to replace, because springs, straps, and a moving carriage add variables that are easier to manage with someone watching.
The same goes if you are pregnant or postpartum, recovering from surgery or injury, or managing a chronic condition. In those cases, check with a qualified clinician or Pilates professional before choosing equipment or a program, and favor supervised instruction until you have guidance. Studios also offer community, variety of apparatus, and accountability, which matter if motivation is your bottleneck. And when the cost-per-session math from earlier does not favor home, the studio is simply the cheaper path.
A hybrid and a quick decision test
You do not have to choose one or the other. A common arrangement is apparatus classes at a studio once or twice a week and mat practice at home in between, supported by a few props. Some people book a private session to build a home routine with a teacher and then return periodically for refinement. That gets most of the benefit of both at a fraction of the commitment.
A quick test: could you practice here three times a week for a year, with a setup that takes under five minutes, in a room that is safe for everyone who enters it, on equipment you have tried and can maintain? If the answer is yes to all of those, go ahead and plan the build in phases. If the answer is no to any, fix that item first, or let a studio carry the load while you build up to it. Our comparison of Pilates studio vs home looks at that decision in more depth.
Frequently Asked Questions
How much space do I need for a home Pilates studio?
It depends on the level you choose, and the answer ranges from a mat-sized patch to most of a room. For mat work, tape out your mat plus enough free floor for your arms and legs to move without touching furniture. For a reformer, start with the frame length and width on the manufacturer’s current spec sheet, then add a step-on zone at one end and a walkway along one side. Also check ceiling height, because standing work and towers add a vertical requirement that many rooms cannot meet.
Can I set up a home Pilates studio in a small apartment?
Yes, as long as you match the level to the space and the lease. A mat corner with a small prop bin works in nearly any room and stores in a closet. Compact or upright-storing equipment is possible for some models, but it depends on ceiling height, wall space, and whether you can lift and tilt it safely with a helper. Check your lease and building rules first, especially for delivery, floor protection, and anything that must be anchored to a wall or floor.
What flooring works best under Pilates equipment?
A flat, level, hard surface is generally the easiest base for rolling equipment, with a non-slip mat under the machine to protect the floor. Carpet and soft padding can make narrow legs and wheels sink or rock, so ask the manufacturer before placing apparatus on them. Tile can be slippery for stocking feet, and wood can scratch or dent under concentrated weight. For wall-mounted equipment, read the anchoring instructions closely, because the hardware depends on your floor type.
How high does the ceiling need to be for a reformer?
There is no single number, because each model lists its own requirement. Merrithew, for example, lists a minimum ceiling height of 97.5 inches for standing exercises on two of its reformers. A room with an 8-foot ceiling measures 96 inches, so some standard rooms fall short of that listed minimum. Read the ceiling line on the exact model you are considering, and measure to the lowest fixture or fan, not to the ceiling itself.
Do I need a reformer to have a home Pilates studio?
No, and for many people a reformer is the wrong first purchase. A mat and a few props support a full home practice, and many classes are designed for exactly that setup. A reformer makes sense when you already practice on one regularly, have the space and delivery path, and have a plan for instruction and upkeep. If you are unsure, take apparatus classes at a studio before you buy.
Which small props are actually worth buying?
Buy a prop only when a class or teacher you follow keeps calling for it. A ring, a set of bands, and a small ball are the most common starting items, and each one does a different job. Household items such as a towel or a cushion can substitute for supports and blocks. Tension labels on bands and rings are not standardized across brands, so follow your instructor’s guidance and the product instructions.
How can I reduce equipment noise for neighbors?
Start by placing noisy or high-impact work on the lowest floor available and putting a protective mat under any equipment. Keep the machine well maintained, because worn or dirty parts can add rattles and clunks. Schedule sessions away from early mornings and late evenings, and let your neighbors know in advance. Building construction determines how much impact noise passes through a floor, so a rental with thin floors may limit what you can do.
How often should I inspect and clean home Pilates equipment?
Give moving parts a quick look before each session and wipe touched surfaces afterward. Do a closer check of springs, ropes, hooks, and fasteners about once a month, and follow the replacement interval in your manual. Manufacturers describe their cleaning methods differently, so use only the products they recommend and avoid oil on rollers. If you notice damage, a new noise, or uneven movement, stop using the equipment and contact the manufacturer.
Is a home studio cheaper than going to a studio?
It can be, but only if you use it consistently. Add the full cost of the setup to ongoing costs such as replacement parts and any online program, divide by the sessions you will realistically do, and compare that with a class price near you. Mat-based setups usually break even quickly, while apparatus takes much longer and depends on honest attendance. If you would use a studio for the community and instruction anyway, a hybrid approach may cost less than either extreme.


Trackbacks/Pingbacks