
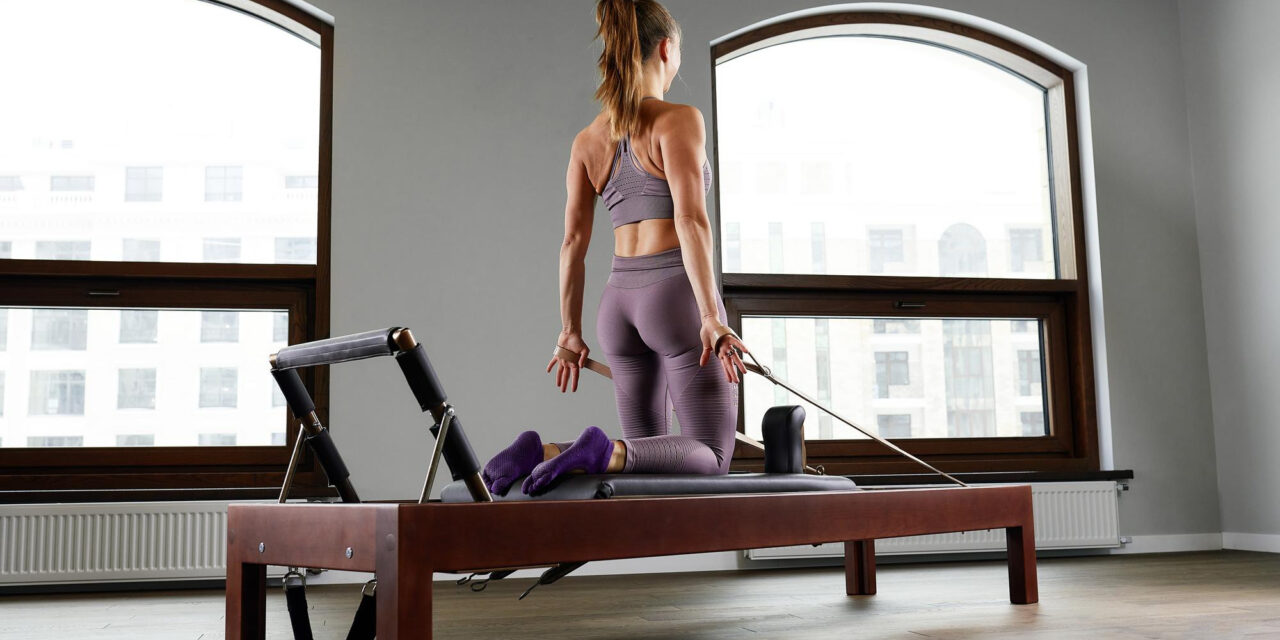
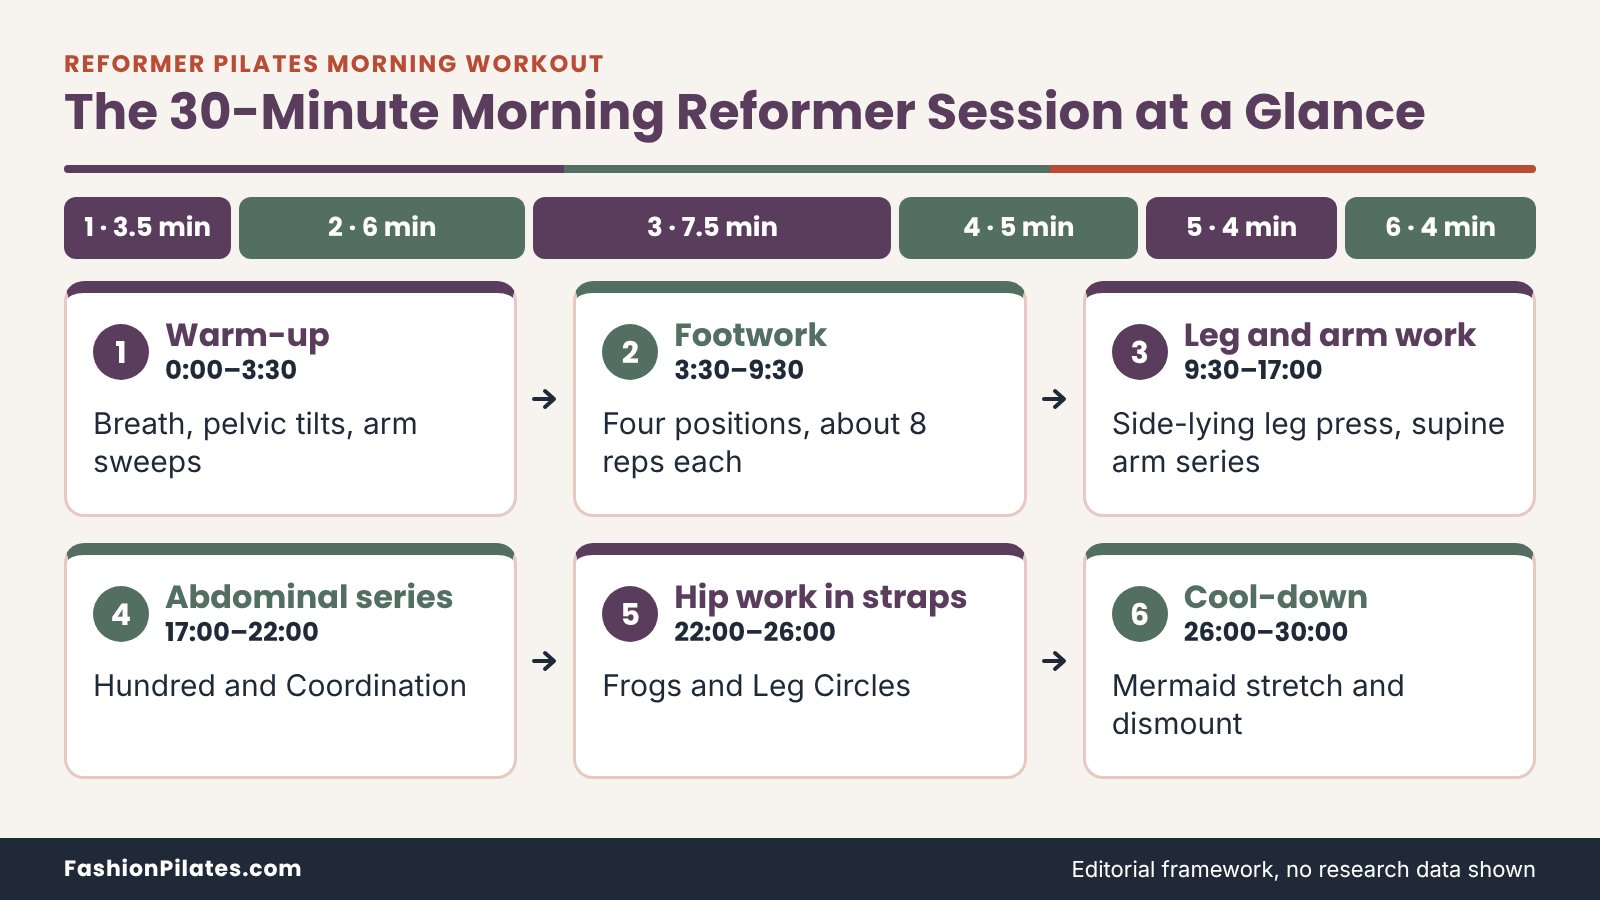
Direct answer: A reformer pilates morning workout can cover your whole body in 30 minutes if you group exercises by footbar position and spring setting. This session moves from a gentle warm-up and footwork, through side-lying leg work, supine arm work, the Hundred, Coordination, Frogs and Leg Circles, and finishes with a Mermaid stretch. You make only two spring changes and two footbar changes, and every spring recommendation is general (light, medium, heavier) because your instructor and your machine’s manual decide the exact setting.
This guide is for people who already have access to a reformer, either a studio-style machine or a home model, and who have been shown the basics by a qualified instructor. It is general fitness education, not individualized medical advice, and it is an expert-informed, research-based guide built on published tutorials, manufacturer documentation and health-organization pages; we did not conduct hands-on testing. It deliberately skips a long explanation of what a reformer is, because what is reformer Pilates already does that, and it sits inside the wider Reformer Pilates Workouts hub.
How a Reformer Pilates Morning Workout Is Built
Most reformer routines are written for a studio, where an instructor handles the clock, the springs and the cueing. A morning session at home or in an open-gym slot has to do more of that thinking in advance. The design below does it for you: one timed route, grouped so you rarely stop to rearrange the machine.
Who and what this session is for
Before the clock starts, it helps to know exactly what the session assumes about you and your machine, because several of the choices later in the guide follow from those assumptions.
The reader and the machine this session assumes
The session assumes a standard reformer with a sliding carriage, springs, a footbar that can be raised and lowered, a headrest, shoulder rests, and handled straps on ropes. It also assumes you have taken at least a few instructor-led classes or private sessions, so footwork, a neutral pelvis and basic breathing are not brand-new ideas. If you are completely new, treat this guide as a map to bring to a lesson, not a replacement for one. One owner’s manual for a home reformer states plainly that inexperienced users should work under the supervision of a trained professional, which is a fair reading of how this article should be used by newcomers (Merrithew At Home SPX owner’s manual).
What the session is and is not trying to do
The aim is a controlled, full-body session at an effort you could repeat on a work morning, not a maximal workout. It works the legs, hips, trunk, shoulders and upper back through slow, resisted movement, and it finishes with a stretch. It is not designed as a weight-loss program, a rehabilitation program or a posture-correction routine, and nothing here should be read as a promise of any of those. If you want a calorie-focused or heart-rate-focused morning, pair a different activity with it; the weekly schedule later in this guide shows how.
The 30-minute map
The table below is the whole session on one page. Read it first, then use the later sections for the step-by-step details of each block.
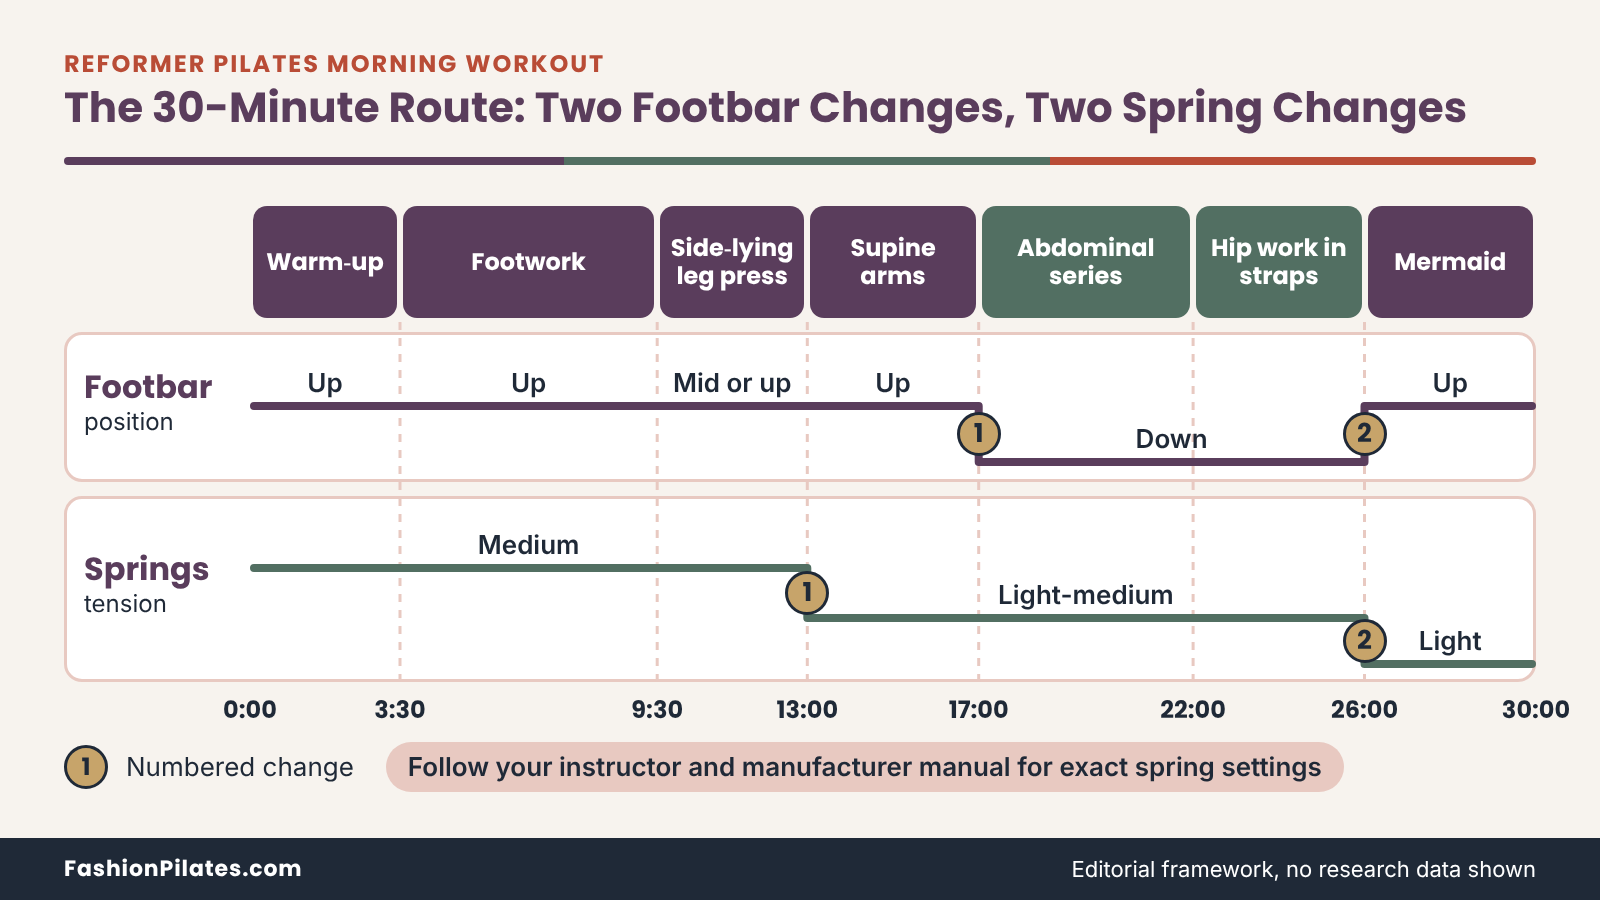
| Clock | Block | What you do | Footbar | Spring tension (general) |
|---|---|---|---|---|
| 0:00 to 3:30 | Warm-up | Breath, pelvic tilts, arm sweeps, a few easy carriage glides | Up | Medium |
| 3:30 to 9:30 | Footwork | Four foot positions, about 8 reps each | Up | Medium |
| 9:30 to 13:00 | Side-lying leg press | About 8 reps per side | Mid or up | Medium (same as footwork) |
| 13:00 to 17:00 | Supine arm series | Spring change, then arm presses and arm circles | Up | Light to medium (change 1) |
| 17:00 to 22:00 | Abdominal series | Lower footbar, Hundred, Coordination | Down (change 1) | Light to medium |
| 22:00 to 26:00 | Hip work in straps | Frogs, then Leg Circles | Down | Light to medium; add tension only if straps go slack |
| 26:00 to 30:00 | Stretch and dismount | Raise footbar, Mermaid on both sides, step off | Up (change 2) | Light (change 2) |
How to read the clock
The times include transitions, not just work. A block that says 3:30 to 9:30 for footwork gives you six minutes to set your feet, move between positions and rest briefly between sets. If a transition runs long because you are checking a strap or adjusting the headrest, let the next block start late instead of rushing the work. A session that finishes at 33 minutes with good control beats one that finishes at 30 with a clattering carriage.
Why the order looks this way
Footwork, side-lying work and the arm series all happen with the footbar raised, so they sit together. The Hundred, Coordination, Frogs and Leg Circles all happen with the footbar lowered and the straps in your hands or on your feet, so they sit together too. The Mermaid needs the footbar up again, which is why it closes the session. The order differs a little from a classical studio sequence, which is a trade made on purpose: fewer machine changes in the morning, when you are alone and probably short on time.
Reformer Parts and Safety Checks Before You Start
A reformer is stable and forgiving when it is set up correctly, and unforgiving when a footbar isn’t locked or a strap is frayed. Two minutes of checking before each session is cheap insurance, and it also gives your body a calm start.
A quick apparatus recap
If you’ve met a reformer before, this is a refresher, not a lesson. Machine names vary by brand, so use your manual for the exact terms on your model.
| Part | Role in this session | Check before you begin |
|---|---|---|
| Carriage | The sliding platform you lie, sit or kneel on | Glides smoothly and quietly; nothing on the track |
| Springs | Provide the resistance; you add or remove them to change tension | No stretched, kinked or damaged coils; fully seated at both ends |
| Footbar | Raised for footwork and stretches, lowered for strap work | Seated securely in the position you chose |
| Carriage stopper | Limits how far the carriage can slide toward the standing end | Fully inserted in a position that suits your leg length |
| Headrest | Supports the head when lying down | Latched in the position you want |
| Shoulder rests | Keep your shoulders from sliding as you press | Fully inserted and secure |
| Ropes, handles and straps | Connect your hands or feet to the spring resistance | No fraying, cracks or loose stitching |
The parts you will touch in this session
Every item in the table is used at some point in the 30 minutes. You will press the footbar with your feet, lie against the shoulder rests, hold straps in your hands, loop long straps around your feet, and change springs twice. Knowing which part does which job makes the later instructions easier to follow, and it makes a problem easier to describe if you need to ask your instructor or the manufacturer about it.
Where the full explanation lives
This article does not explain the history of the reformer, how it differs from other Pilates apparatus, or how to choose between machines. For that background, read what is reformer Pilates, and for equipment choices read home reformer buying guide. The rest of this guide stays focused on running a safe, well-ordered morning session on a machine you already have.
A two-minute safety check
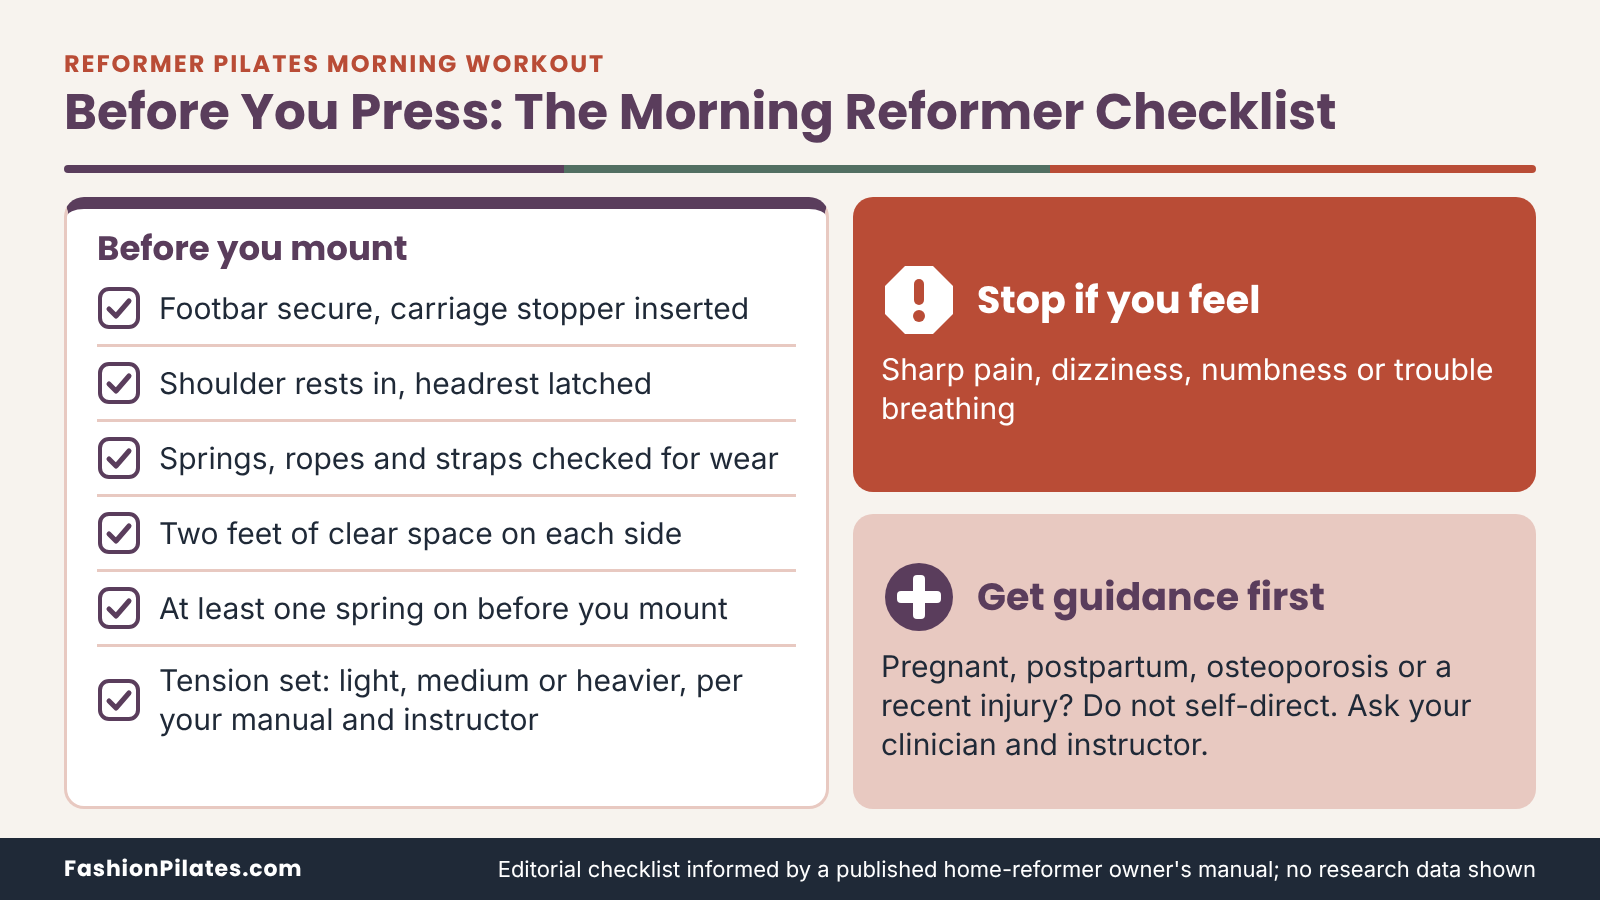
The checks below borrow from one manufacturer’s published manual and from common sense. Your own manual is the authority for your own machine, and it may list more steps than these.
Frame, footbar, stopper and headrest
The manual for one home reformer lists daily checks that include confirming the carriage stopper is fully inserted, the shoulder rests are fully inserted, and the footbar is securely fastened (Merrithew At Home SPX owner’s manual). Do those three things every time, and tap or press the footbar gently to confirm it doesn’t move in its seat. Check that the headrest is latched where you want it. A checklist only works if you run it on the days you are sure you don’t need it.
Springs, ropes and straps
The same manual asks users to inspect springs for wear and damage before use, check roller movement for smoothness and quiet, and look over ropes and straps for wear on a regular schedule, replacing anything worn. It also gives replacement intervals for spring clips and springs that apply to that specific model. Intervals vary by brand and by how often the machine is used, so look up your own manufacturer’s numbers rather than borrowing these. Run your fingers along each strap and look at the stitching where it meets the handle or loop; replace anything that looks frayed before you use it.
Space, floor and surroundings
The same manual specifies at least two feet (about 60 cm) of clear space on either side of the machine, and warns users to step onto the center of an attached platform or box to avoid tipping. Clear the floor of towels, water bottles and phones you could step on, and make sure the machine sits on a flat, stable surface. A small gripper mat beside the reformer helps you stand without slipping. Keep pets and children out of the room while you work, and remember that the manual cited above limits the machine to one user at a time.
Mounting, dismounting and changing the setup
Getting on, getting off and adjusting the machine are the moments when you are least stable, so they deserve their own routine. The one below keeps you low and controlled.
Getting on
The manual for that home model says to have the carriage stopper in place and at least one spring engaged before you mount, and for the supine start it describes sitting on the carriage first, then rolling onto your back with a hand on a shoulder rest, then bringing your legs up to the footbar. It also warns against stepping directly onto a standing platform with both feet. Follow that pattern: sit, roll, then lift your legs. Never launch yourself backward onto a moving carriage.
Getting off and moving between blocks
To dismount, reverse the sequence: bring your feet to the footbar or carriage, roll to your side, press up to sitting with a hand on the frame, and only then stand. Do the same any time you need to step off mid-session. Let the carriage come fully to rest against the stopper before you move your weight. If you feel dizzy after lying down for a few minutes, pause seated for a few breaths before standing.
Changing springs and the footbar
Make spring changes while you are off the carriage. According to the same manual, the safe way is to grasp the spring itself, not the ball on its end, then stretch it to hook it on or off the gearbar. Keep at least one spring engaged whenever someone is on the carriage. For the footbar, the manual describes lifting the adjuster out of its cradle and setting it into the new one, making sure it seats securely. Check by pressing on it before you lie back down.
Morning-Specific Considerations: Stiffness, Food, Water and Caffeine
Nothing about the reformer changes at 7 a.m., but your body, your schedule and your stomach might. Some points in this section are supported by health organizations, and others are plain preferences, and each one is labeled so you can tell which is which.
Easing out of a stiff start
Many people feel stiffer in the first part of the day. The session is built to respect that, but it’s worth being honest about how much is actually known.
What is and is not established about morning stiffness
Plenty of exercisers describe feeling tight in the back, hips and shoulders after a night in bed. In our source review we did not find a reliable, accessible source that says exactly how long that lasts or how a workout should change because of it, so we are not going to dress it up as a rule. What we can say is that a longer, slower warm-up costs very little and gives you time to notice how you feel. Treat the opening block as a conservative editorial choice, not a research-backed prescription, and adjust it if your own body tells you something different.
What the first three and a half minutes do
The warm-up uses small, supported movements: breathing, a few pelvic tilts, easy arm sweeps and half-range carriage glides, all with your feet already on the footbar. That keeps the early work low-risk while your joints and muscles get used to moving. If something still feels stiff or sharp after the warm-up, shorten the range of the first few exercises, or take the session down to the 20-minute version covered later. Skip any move that causes pain.
Food, water and caffeine
Timing around food and drinks is mostly a comfort question. The general guidance below comes from a major clinic and an agency page; anything beyond them is labeled as preference.
Timing around food
Mayo Clinic advises eating larger meals at least three to four hours before exercise, with smaller meals or snacks about one to three hours before. It also cautions that skipping food entirely before a morning workout can leave you feeling slow or lightheaded (Mayo Clinic on eating and exercise). Because much of this session happens lying down or with the trunk working, a heavy breakfast is likely to feel uncomfortable, but that is a preference, not a finding. A small snack, such as a piece of fruit or toast, an hour or so before is a common compromise. If you have diabetes or take medication that affects blood sugar, ask your clinician about timing.
Water and caffeine
The American College of Sports Medicine guidance quoted by Mayo Clinic suggests drinking roughly two to three cups of water in the two to three hours before a workout, and about half a cup to one cup every 15 to 20 minutes during longer sessions. For a 30-minute session, keep a water bottle within reach but off the floor around the machine. On caffeine, the FDA says that about 400 milligrams a day is not generally linked to negative effects for most healthy adults, while stressing that sensitivity and how fast people clear caffeine vary widely (FDA on caffeine). Whether coffee before the reformer helps is individual. Some people find slow, controlled holds feel steadier without it, while others feel flat; if you are pregnant or nursing, the FDA recommends asking a healthcare provider about caffeine.
Fitting the session into a real morning
The best session is the one you will actually do. A few practical points make the 30 minutes easier to protect.
How it fits the weekly activity guidelines
The Centers for Disease Control and Prevention recommend that adults get at least 150 minutes of moderate-intensity activity a week, plus muscle-strengthening activity on two or more days that works all the major muscle groups, and it notes that activity can be broken into smaller chunks, for example 30 minutes on five days (CDC adult activity guidelines). A reformer session that works the legs, hips, back, abdomen, shoulders and arms may contribute to the muscle-strengthening part when done with enough effort. It is not designed as aerobic exercise, so a brisk walk on other days remains a sensible partner.
Noise, light and what to wear
Reformers are not silent; springs and carriages click when you rush, which is another reason to move slowly in an apartment with sleeping neighbors. Set up the room the night before so the machine, a towel and a water bottle are ready, and keep lighting bright enough to see straps clearly. Wear fitted clothing that won’t catch on moving parts, and use grip socks if your studio or manual suggests them; for outfit ideas, see what to wear to reformer Pilates.
Minutes 0 to 9:30: Warm-Up and Footwork
The first nine and a half minutes are the foundation of everything that follows. The footbar stays raised and the springs stay at one medium setting, so there are no machine changes at all.
Warm-up (0:00 to 3:30)
Set the footbar up, choose a medium spring setting as described by your manual and instructor, and lie back using the roll-down method from the safety section.
Setup and steps
Lie on the carriage with your head on the headrest, feet flat on the footbar about hip-width apart, knees bent, arms by your sides. Take about five slow breaths, letting the ribs widen sideways as you inhale and soften as you exhale. Then do six gentle pelvic tilts: exhale and let your lower back come toward the carriage, inhale and return to a neutral position with a small natural gap under the lower back. Next, with no straps, reach your arms to the ceiling and take them overhead only as far as your ribs stay quiet, five times. Finish with six half-range carriage glides, pressing the legs about halfway out and returning slowly.
Modifications and common mistakes
If your neck feels strained, raise the headrest or add a thin folded towel. If your shoulders pinch when the arms go overhead, stop at shoulder height. If lying flat is uncomfortable for any reason, keep the knees bent and the movements smaller, and tell your instructor. The usual mistakes are pressing the lower back hard into the carriage in a forced flat position, rushing through the breaths, shrugging the shoulders toward the ears, and treating the glides as a race to the end of the range. Slow and small is correct here.
Footwork (3:30 to 9:30)
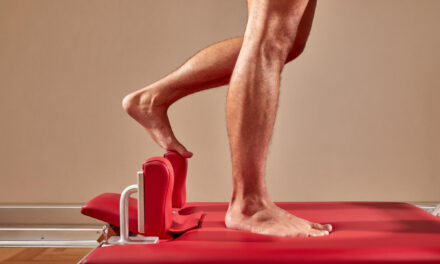
Footwork is often described as lying-down squats, because you press the carriage away and return it under control while the pelvis stays still (Complete Pilates on reformer footwork). It teaches the hips, knees and ankles to move while the trunk holds steady.
Setup, positions and tempo
Keep the same medium setting and the footbar raised. A published tutorial describes four classic positions: Pilates V on the balls of the feet with heels together and turned out, arches parallel, heels parallel with toes pointing up, and tendon stretch on the balls of the feet with the heels lowering and lifting (Pilates Anytime footwork tutorial). Do about eight slow repetitions in each position, spending roughly a minute and a half per position including the move between them. Press out for about two counts, return for about three, and stop just short of locking the knees.
Breath and cues
Teachers differ on breath: one popular library cues pressing out on the inhale and returning on the exhale, and others cue the reverse. Pick one pattern and keep it steady. The cues that matter most are a still pelvis, ribs that stay down, knees tracking toward the second toe, and returning with resistance instead of letting the springs snap the carriage home. Resting your hands lightly on your hip bones lets you feel whether the pelvis rocks. A common beginner error is moving the pelvis during footwork, which defeats the purpose of the exercise.
Modifications and common mistakes
If a position bothers your feet, calves or Achilles tendons, stay on the heels, which one instructor site describes as a good option for foot discomfort. Reduce the range of motion if your knees object, and skip tendon stretch entirely on days your calves feel tight. If the carriage clunks against the stopper on return, your springs are probably too light for control; if your knees can’t bend smoothly or your lower back lifts, they are probably too heavy. Other mistakes include lifting the ribs, tilting the pelvis and putting more weight on one foot than the other.
Minutes 9:30 to 17:00: Side-Lying Leg Work and Supine Arms
These two blocks keep the footbar raised. The first keeps the footwork springs; the second is the session’s first spring change, so budget a minute for it.
Side-lying leg press (9:30 to 13:00)
The side-lying leg press trains the hip and thigh muscles of one leg at a time while your trunk works to stay stacked and still. One instructor guide describes it as lying sideways on the carriage with hips and shoulders stacked and the top foot against the footbar (Dynamo Fitness side-lying leg press guide).
Setup and steps
Keep the springs where they were for footwork and set the footbar at a mid or high position that lets your top leg start with a comfortable bend. Lie on one side with your head resting on your lower arm or the headrest, hips and shoulders stacked, and the bottom leg relaxed on the carriage. Place the top foot flat or on the ball of the foot against the footbar, and rest the top hand lightly on the carriage in front of your chest for balance. Press the leg long without locking the knee, then return slowly, about eight times. Sit up using the side-roll method, turn around and repeat on the other side.
Modifications and common mistakes
Reduce the range of the press if your hip or lower back complains, and place a thin folded towel under your head if your neck tips sideways. If lying on your shoulder is uncomfortable, repeat one footwork position instead. The guide above lists the main errors: letting the hips shift, losing core control and straining the lower back, and snapping the knee straight at the top. Also watch for the pelvis rolling backward as the leg presses, which is the quickest sign that the range is too big or the springs too light.
Supine arm series (13:00 to 17:00)
The arm series happens lying on your back with your feet on the footbar and your hands in the strap loops or handles, which one beginner arm flow describes in the same way (Pilates Anytime beginner arms and core flow). It uses the same body position as footwork, which is why it comes next.
Setup and steps
Step off, change to a lighter setting for arm work as your instructor or manual describes, check that at least one spring is attached, and mount again with the sit, roll and lift sequence. Lie back, feet on the footbar, handles in your hands, arms reaching toward the ceiling. For the presses, exhale and press the arms down along your sides toward the carriage, then inhale and return to the ceiling, six to eight times. For the circles, lower the arms toward your hips, open them out and up in a small circle, and reverse after four rounds. The carriage should stay still while the arms move.
Modifications and common mistakes
Keep the range small if your shoulders feel pinched, and skip the circles and do presses only if you have shoulder or neck problems. Another instructor library warns that a different, kneeling arm-circles exercise is not ideal for people with shoulder or neck issues, so caution with any shoulder work is reasonable. Common mistakes include letting the carriage rock because the pelvis is moving, shrugging the shoulders toward the ears, flaring the lower ribs as the arms lift, and swinging the arms wider behind the body than the shoulders can control. If the arms feel floppy, the spring is probably too light; if the shoulders rise, it is probably too heavy.
Minutes 17:00 to 26:00: Abdominal Series and Hip Work in Straps
This is the middle of the session and the hardest part to do well alone. All three exercises happen with the footbar down and the straps in use, and the springs stay at the same light-to-medium setting.
The Hundred (about 2 minutes)
The Hundred is a classic Pilates abdominal exercise built around 100 small arm pumps and a steady breathing rhythm. Traditionally the breath runs five pumps in and five pumps out, repeated ten times (Pilates Anytime Hundred tutorial). On the reformer, the exercise is done on your back with the handles in your hands, as described by an online reformer exercise library (Online Pilates Classes reformer Hundred).
Setup and steps
Step off, lower the footbar into its seat, and mount again. Keep the springs light to medium; published tutorials differ widely on spring counts for this exercise, which is one more reason to follow your instructor and manual. Lie back with the handles in your hands and arms reaching toward the ceiling. Press the arms down so the hands hover a few inches above the carriage. Beginners should leave the head down and either keep both feet flat on the carriage with knees bent or lift the legs into a tabletop position. Pump the arms in small, quick beats, inhaling for five and exhaling for five. Start with five breaths, or 50 beats, and build toward ten.
Modifications and common mistakes
A Peak Pilates teaching article notes that very few beginners can safely achieve the ideal full form, so progress gradually and keep the head down until your neck and abdominals are ready. For the mat version, the same article describes bending one knee with the foot down and alternating legs partway through as an easier option; the idea adapts to a foot resting on the carriage. If the carriage moves, the arms are pumping from the shoulders instead of pressing steadily against the straps. Lifting the head and chest, which the online library flags as unsuitable for certain neck and shoulder problems, can be skipped. Other mistakes include holding the breath, flaring the ribs and letting the lower back arch.
Coordination (about 2 minutes)
Coordination links arm bending with leg opening and closing, and it earns its name because everything must happen in the right order. Because it asks you to track several things at once, one instructor recommends learning it without the straps first, then adding resistance (Pilates Anytime Coordination tutorial).
Setup and steps
Keep the footbar down and the springs light to medium. Lie back holding the handles, bring the knees toward the chest, and keep your head down for this session. Bend the elbows so that the backs of the upper arms rest on the carriage, then press the arms long toward your hips as you extend the legs on a diagonal line, open them slightly and close them together. Return by bending the knees back toward the chest and bending the elbows, so the whole pattern restarts. Repeat three to five times, moving slowly enough that you could describe each step out loud.
Modifications and common mistakes
If the sequence is hard to follow, do the arms alone for two or three rounds, then add the legs; this is the same “learn it without resistance” principle in smaller form. Keep the legs higher if the lower back wants to arch. Mistakes include rocking the torso, letting the carriage push you around, and speeding up because the pattern feels awkward. Skip the exercise on days when your hip flexors or neck feel strained, and ask your instructor to walk you through it before including it routinely.
Frogs and Leg Circles (about 4 minutes)
Frogs and Leg Circles use long straps looped around the feet, so the legs move against spring resistance while the trunk stays steady. One reformer encyclopedia lists the exercise with the footbar down, the headrest up, and long straps with the hardware worn on the outside (Pilatesology Frogs and Leg Circles entry).
Setup and steps
Attach the long loops to your feet while sitting or lying, using the order your manual describes. Lie back with arms long beside you, heels together and toes apart, with the knees following the line of the second toe. For Frogs, press the legs out along a high diagonal and bend the knees back, three to five times, reaching into the straps throughout. For Leg Circles, extend the legs and circle them, small at first, three to five times in each direction at a controlled pace. Keep the same spring setting as the Hundred; if the straps go slack during the circles, that is the one case where a third spring change is worth making.
Modifications and common mistakes
One instructor library notes that this exercise is not suitable for some lower back problems, so skip the circles and do Frogs only if your back is touchy, or skip both. Make the circles smaller whenever your pelvis starts to move. The range guidance is simple: as high as the tailbone stays down, as wide as the pelvis stays still, and as low as the lower back stays long. Mistakes include letting the springs pull the knees inward, letting the legs drop below the point of control, and allowing the straps to go loose.
Minutes 26:00 to 30:00: Mermaid Stretch and Dismount
The final block asks for the session’s second footbar change and second spring change. After that, it is one stretch, a slow breath and a careful exit.
Mermaid side stretch (26:00 to 29:30)
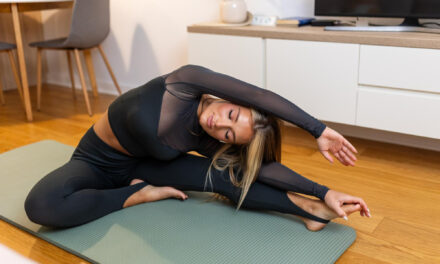
The Mermaid is a seated side-bending stretch that opens the ribs and the side of the trunk while the springs add gentle resistance on the return. A published tutorial lists it with the headrest up and the footbar up, starting from a Z-sit on the carriage with the spine tall and both sit bones grounded (Pilates Anytime Mermaid tutorial).
Setup and steps
Step off, raise the footbar into a secure position, raise the headrest, and change to a light spring setting; that tutorial’s own color-based spring suggestion is specific to its brand, so use your instructor’s and manual’s guidance instead. Sit on the carriage in a Z-sit, with one shin in front of you and the other behind, or cross-legged if that is more comfortable. Place one hand on the footbar in front of the shoulder and reach the other arm out at shoulder height. Follow the first phase of the published pattern: bend the spine sideways toward the footbar as the carriage opens a little, then use the spring’s pull to return to center with control. Do three slow repetitions per side.
Modifications and common mistakes
The tutorial also adds spinal rotation and extension phases, but those are best learned with an instructor, so this session leaves them out. Sit cross-legged if the Z-sit bothers your knees or hips, shrink the range if your ribs or shoulder feel tight, and skip the exercise on days your hips or back are irritated. The tutorial’s main cue is to stay centered within the frame of the machine without leaning forward or back, and drifting off that line is the most common error. Other mistakes include hiking the shoulder toward the ear, lifting one sit bone and holding the breath.
Dismount and reset (29:30 and after)
The last half minute is for leaving the machine safely, and for leaving it ready for tomorrow.
Stepping off safely
Let the carriage settle fully against the stopper, place a hand on the frame and rise slowly. If you feel lightheaded after the side bends, sit still and breathe for a few breaths before you stand. The manual for the model cited earlier describes mounting with one foot on the carriage and the other on the standing platform and warns against putting both feet on the platform, so reverse that pattern when you step off. Stand beside the reformer for a few breaths with your weight even before you walk away.
A short reset routine
Drink some water, wipe down the carriage and handles, and return the straps to their resting position without dropping the handles, because a handle that snaps back can scratch the frame or hit a hand. Leave at least one spring attached and the footbar in a secure position, so tomorrow’s check starts from a safe state. Take a moment to note how the session felt: which exercise felt shaky, which felt easy, whether any area complained. A line in a notes app is enough, and it gives your instructor something useful to work from at your next lesson.
Spring Tension, Who Should Not Self-Direct, and When to Stop
These three topics are where an article can do real harm if it’s careless, so they get their own section. None of this replaces a clinician or a qualified instructor.
Spring tension without a universal color code
Every tutorial wants to tell you the right springs. The trouble is that spring labels are brand-specific, and copying them across machines can give you the wrong load.
Why a color from a tutorial cannot be copied
A spring conversion guide for studios states that there is no shared color code in Pilates and that each brand chose its own, with red meaning a medium spring on some brands and a heavy one on others (Studio Growth spring conversion guide). A spring guide from an online Pilates platform gives similar examples, noting that blue is light on some brands and medium on others (Pilatesology reformer springs guide). The manual for one home reformer rates its springs by percentage (black 125 percent, red 100, blue 50, white 25), which tells you that even the numbers belong to that manufacturer. That is why this guide gives only light, medium and heavier, and why every exercise tells you to follow your instructor and manual.
A general way to choose light, medium or heavier
The same springs guide offers a handy rule: if you feel compressed, the setting is too heavy, and if you feel out of control, it is too light. Use the table as a starting point for a conversation with your instructor rather than as a prescription.
| Setting | What it tends to feel like | Signs it is wrong for you |
|---|---|---|
| Light | The carriage moves easily and you work to steady it | The carriage clunks, the legs or arms flop, or you feel out of control |
| Medium | Smooth resistance through the full range with a controlled return | The pelvis rocks, or the return is faster than you can manage |
| Heavier | Firm resistance that supports slow, strong pressing | You feel compressed, the knees can’t bend fully, or the ribs flare and the neck tightens |
Who should not self-direct this session
A video-led or article-led session cannot see your body. Some situations call for professional guidance before you do anything on the machine without a teacher present.
Conditions that call for professional guidance first
Harvard Health recommends checking with your doctor before starting Pilates and notes that a doctor may advise avoiding certain exercises if you have back pain or spine issues, while a qualified instructor can tailor the work to you (Harvard Health on Pilates). Add recent surgery, an acute injury, a hernia, uncontrolled blood pressure or heart conditions, balance problems, dizziness, and new or unexplained pain to that list. The owner’s manual cited earlier tells users to consult a physician before starting any exercise program. In each case the right next step is a conversation with a clinician and a Pilates professional, not a modified version of this routine.
Pregnancy, postpartum and osteoporosis in more detail
The American College of Obstetricians and Gynecologists encourages exercise before, during and after pregnancy and says it is best to consult your physician before starting a program (ACOG on exercise in pregnancy and postpartum). Positioning on a reformer changes through pregnancy and the postpartum period, so a prenatal-trained instructor should decide what you do. For osteoporosis or low bone density, a hospital health presentation advises avoiding forceful forward flexion and full spinal rotation, and it lists roll-ups, teasers and crunches as exercises to skip (SUNY Upstate Pilates and osteoporosis handout). Parts of this session, such as the head-up option in the Hundred and the Mermaid, involve flexion or side bending, so anyone with osteoporosis needs individualized guidance first.
When to stop and what to do next
Discomfort that fades as you warm up is different from a warning sign. Learn the difference before you need it.
Stop signs during a session
Stop right away for sharp or sudden pain, dizziness, faintness, numbness or tingling, a pinching feeling in a joint, or any unusual shortness of breath. The home reformer manual cited above tells users to stop immediately for chest pain or difficulty breathing. Step off the machine using the dismount routine, sit down, and let your breathing settle. If symptoms are severe, sudden or don’t ease quickly, seek medical care instead of waiting to see whether they pass.
After a session that went badly
Muscle soreness that is mild and symmetric is common after new exercise. Pain that lingers, that is sharp, that is on one side only, or that worsens over a day or two is a reason to pause the program and check in with a clinician. Do not push through it to protect your streak. When you return, ask your instructor to watch your setup, tension and range, because a small error such as the wrong spring or a mis-set footbar can turn a routine session into an uncomfortable one.
Adapting the Session: Home Machines, 20 Minutes, 40 Minutes and a Weekly Schedule
A good routine has to survive real life: a smaller machine, a short morning, a day when you want more. This section gives you honest ways to scale the session without breaking its logic.
Adapting to a smaller or home machine
Home reformers vary more than studio machines do. Some fold, some stand on end for storage, and some skip features that this routine quietly assumes. Check what yours has before you commit to the full session.
What to check in your manual first
Start with the rated weight limit, the number of footbar heights, the number of carriage stopper positions, and whether your machine includes shoulder rests, a headrest with several positions, and long strap loops. The manual for one home model, for instance, gives a maximum user weight of 250 pounds (113 kg), four footbar heights and six carriage stopper positions, and it asks users to keep at least two feet of clear space on each side (Merrithew At Home SPX owner’s manual). Yours will differ. Set the stopper so that, lying on your back with heels on the footbar, your hips bend to about a right angle when the carriage rests against the stopper, which is the guideline that manual gives for its machine.
Substitutions when a feature is missing
If your footbar has fewer heights, pick the position your manual recommends and shorten the range of footwork and side-lying work instead of forcing it. If your headrest has only one position, use a thin folded towel for comfort. If you don’t have long strap loops for the feet, skip Frogs and Leg Circles and repeat a footwork position or the Hundred instead. If the carriage is too short or the frame too tight for the Mermaid, replace it with a seated side stretch on a mat beside the machine. If your machine is light enough to shift on the floor, put it on a non-slip surface and check it again before every session.
Shortening to 20 minutes or extending beyond 30
The table shows three versions built from the same blocks. The 30-minute session remains the reference; the others drop or add blocks without changing the exercise order.
| Version | Blocks included | Blocks dropped or added | Machine changes |
|---|---|---|---|
| 20 minutes | Warm-up 2:30, footwork 4:00, side-lying leg press 3:00, Hundred 3:30, Frogs and Leg Circles 3:30, Mermaid and dismount 3:30 | Drops the arm series and Coordination | Footbar down once, footbar up once, one spring change before the Hundred |
| 30 minutes | The full session in the timed table | Reference version | Two footbar changes, two spring changes |
| 40 minutes | Full session plus a second round of footwork positions, a second set of arm presses and a longer cool-down | Adds time, not new exercises | Same as the 30-minute version |
The 20-minute version
The short version keeps one exercise from each of the major blocks: footwork for the legs, side-lying work for the hips, the Hundred for the trunk, Frogs and Leg Circles for hip control and a stretch. It drops the arm series and Coordination, which are the two blocks that require the most setup. Move straight from footwork and side-lying work to the footbar-down block, make your one spring change as you lower the footbar, and finish with the Mermaid. If even 20 minutes is too much on a given morning, do the warm-up, footwork and the Mermaid for ten.
Extending toward 40 minutes
The easiest way to extend is to slow down and add a second round, not to add difficult exercises. Add a second pass through the four footwork positions, a second set of arm presses and circles, and a longer cool-down with a few slow breaths. Anything new, such as seated arm work or spinal stretches that bend the trunk forward, should come from your instructor, who can see how you perform them. Instructors and online libraries also classify some exercises, for example the rowing series, at different difficulty levels, which is another reason to get a teacher’s opinion first.
A weekly schedule that works around the session
A morning session only helps if it fits into a week you can sustain. The table is an editorial template, not a prescription, and you should adjust it for your schedule, recovery and any advice from your clinician.
| Day | Plan | Time | Notes |
|---|---|---|---|
| Monday | Full 30-minute reformer session | 30 minutes | Run the full safety check |
| Tuesday | Brisk walk or other aerobic activity | 20 to 30 minutes | Counts toward weekly aerobic minutes |
| Wednesday | 20-minute reformer version | 20 minutes | Good for busy mornings |
| Thursday | Rest, gentle walking or stretching | As you like | Note any areas that feel sore |
| Friday | Full 30-minute reformer session | 30 minutes | Try a slightly slower tempo |
| Saturday | Longer walk or recreation you enjoy | 30 to 60 minutes | Aerobic emphasis |
| Sunday | Rest | None | Review how the week felt |
Three-day and four-day patterns
Three reformer mornings a week, spaced with a day between, is a sensible starting point and meets the muscle-strengthening part of the CDC guideline when the effort is real. A fourth day can be the 20-minute version. Add days only when the sessions feel controlled and you recover well, not because a streak sounds good. If you also take studio classes, count them as reformer days and pull back the home sessions accordingly.
Protecting recovery and other activity
The CDC’s weekly guideline pairs muscle-strengthening with at least 150 minutes of moderate aerobic activity, and the sample week leaves room for walking and recreation to cover it. Take at least one full rest day, and swap a session for rest if you wake up with unusual soreness, poor sleep, illness or a flare of an old problem. The reformer will still be there tomorrow, and a calm Thursday often makes Friday’s session better.
Mistakes That Undermine a Morning Session
Individual exercises already carry their own mistakes lists. The errors below apply to the session as a whole, and most are about setup, pacing and expectations.
Setup mistakes
The most expensive errors happen before the first repetition and are easy to avoid with a little structure.
Skipping the check and rushing the setup
It is tempting to jump on the machine on a hurried morning, but the safety check takes about two minutes, and a loose footbar or a worn strap is exactly the sort of problem you want to find before your body is on the carriage. Build the check into the routine so it does not depend on motivation: do it as you set the water bottle down. If you notice damage, stop and contact the manufacturer or a qualified technician before using the machine again.
Copying spring settings from a video
A video may show a colorful spring combination that works beautifully on the instructor’s brand, and it can mean something very different on yours. Use the general light, medium and heavier language in this guide, match it to your own manual’s labels, and confirm with an instructor who has watched you work. Adjust one variable at a time. If you change the springs and the range together, you won’t know which change helped or hurt.
Pacing and effort mistakes
Once you’re moving, the common errors are about tempo, ambition and attention.
Treating the session as a race
Thirty minutes is tight, and the clock invites speed. Resist it. The springs punish rushing: a fast return slams the carriage, a quick press lets the pelvis rock, and a hurried transition sets up a wobbly mount. If you run over, drop a block or take the 20-minute version, and let the work stay slow and exact. Slowness is also what makes the quieter muscles work, which is the whole point of the method.
Chasing range and repetitions
More range, more reps or heavier springs feel like progress, but control is the real measure. Keep the carriage quiet, the pelvis still and the breath even; add range or tension only when those conditions hold for the whole set. Many people also underestimate how much effort the supporting muscles are making in a slow set, so the shaking you feel in the last repetitions is normal, and a reason to stop at the planned number, not an invitation to push for five more.
What the Research Does and Does Not Say
Pilates has a respectable research literature, but it does not speak directly to a 30-minute morning reformer routine. Being clear about that keeps expectations realistic.
What studies suggest about Pilates in general
Evidence on Pilates comes mostly from small trials of varying quality, often with specific populations. The best use of it is as a rough guide to what may be worth expecting.
Findings and how strong they are
A systematic review of Pilates in older adults, covering 17 experimental studies, reported strong evidence for improved static and dynamic balance and moderate evidence for lower-limb flexibility, but limited or contradictory evidence for muscle strength and cardiorespiratory endurance, and no evidence of changes in body composition (systematic review of Pilates and fitness in older adults). The authors also noted low study quality, small samples, a lack of blinding and inconsistent exercise protocols. Those findings come from older adults, so they may not apply to you.
What research does not tell us about this session
No study we located tests this specific sequence, this order or this time of day, so nothing here should be read as proven to produce a particular result. There is also no evidence-based answer to whether morning is a better time than evening for reformer work. Treat a reformer pilates morning workout like this one as a thoughtfully designed practice session, and judge it by how controlled you feel and whether you keep doing it, not by promised outcomes.
How this guide was built and what still needs a human check
Transparency about method helps you decide how much weight to give any single instruction.
Method and sources
This guide is a research-based, expert-informed compilation. Exercise names, positions and cues were checked against published instructor tutorials and exercise libraries; safety checks and mounting details were drawn from a manufacturer’s owner’s manual; guidance on food, water, caffeine, activity amounts and pregnancy came from health organizations. We did not test the routine on a machine, so the timings are design estimates, not measured results.
What a certified instructor should confirm for you
Even a carefully built routine has judgment calls that a qualified instructor should confirm for your body and your machine: the spring setting for each block, how you lower the footbar mid-session, the head-down options for the Hundred and Coordination, the Mermaid direction and range, and any adaptation for a particular medical history. If you can, take one lesson, run through the whole session with the instructor, and write down the changes.
Frequently Asked Questions
Can I do a reformer pilates morning workout every day?
Most people are better served by a few sessions a week than by a daily one. The sample schedule in this guide uses three full or shortened sessions with rest and walking days between them. Daily practice may be reasonable if you are experienced, your instructor agrees and your body recovers well. Take a rest day whenever you feel unusual soreness, poor sleep or a flare of an old problem.
Should I eat or have coffee before a morning reformer session?
Mayo Clinic suggests that skipping food before a morning workout can leave you feeling slow or lightheaded. A small snack about one to three hours beforehand is a common approach, and a larger meal needs three to four hours. Caffeine tolerance varies widely according to the FDA, so use what you normally tolerate. If you are pregnant, nursing or managing a medical condition, ask your clinician about caffeine and meal timing.
Is 30 minutes enough on the reformer?
Thirty minutes is enough to work the legs, hips, trunk, shoulders and upper back once each at a controlled pace. The session will not replace a longer class if you want more variety, and it will not provide aerobic exercise. The CDC guideline for adults includes 150 minutes of moderate activity and muscle strengthening on two or more days, and it allows activity to be broken into shorter chunks. Pair the session with walking or other activity you enjoy.
How many springs should I use for each exercise?
There is no universal answer, because spring colors and ratings differ between brands. One manufacturer’s manual rates its springs by percentage, and a studio spring guide shows the same color meaning different loads on different machines. Use light, medium or heavier as your starting language, and follow your instructor and your own machine’s manual. A useful rule is that a setting that leaves you feeling compressed is too heavy and one that leaves you feeling out of control is too light.
Can I follow this session on a home reformer with fewer features?
Often you can, with substitutions. Check your manual for the weight limit, footbar heights and stopper positions, and shorten the range if a position is not available. If your machine lacks long foot straps, skip Frogs and Leg Circles and repeat another block instead. If anything about the setup feels unstable, stop and ask the manufacturer or a qualified instructor before continuing.
What should I do if I wake up stiff or sore?
Mild stiffness often eases as you move, which is why the session begins with a slow warm-up. Shorten the session, reduce the range and skip any exercise that causes pain. Sharp pain, numbness, dizziness or pain on one side only are reasons to stop and seek advice. A clinician or a qualified Pilates instructor can help you decide whether the stiffness is routine or something that needs attention. If you still feel tight after the warm-up, the 20-minute version is a reasonable fallback for that morning.
Will a morning reformer workout help me lose weight?
This session is not designed for weight loss, and no research we reviewed supports that goal for it. A systematic review of Pilates in older adults found no evidence of body-composition changes, although the studies were small and of low quality. Body weight depends on many factors beyond one workout. If weight is a goal, talk with a clinician or a registered dietitian about a plan that includes activity, sleep and nutrition.
Is morning the best time of day for reformer Pilates?
We did not find reliable evidence that any time of day is best for reformer work. The best time is the one you can protect consistently and perform with attention. Some people prefer mornings because the schedule is quieter, while others find their bodies feel looser later. Try a few weeks of mornings and judge by how controlled and comfortable the sessions feel.



Trackbacks/Pingbacks