Direct answer: A 30 minute intermediate mat pilates posture workout works best as six timed blocks: a breath and alignment reset, spine mobility, front-body control, back-body strength, side-body and rotation work, and a short cool-down. It pairs a handful of classical-style movements (the Hundred, roll-up, swan prep and spine twist) with shoulder-blade and upper-back work, so the muscles that hold you upright get trained instead of just stretched. Evidence suggests exercise can improve measured posture, but results for Pilates specifically are mixed, so treat this as strength and body-awareness practice rather than a cure for how you stand or sit.
This guide is for people who already know the basics of Mat Pilates and want a structured session that fits a lunch break or an early morning. You will get the full timed sequence, step-by-step cues for every exercise, modifications for each level of effort, a mistakes-and-fixes table and a simple weekly schedule. It is general fitness education, not individualized medical advice, and it was built as a research-based, expert-informed routine from published exercise descriptions and review literature rather than tested on a group of exercisers. If you are brand new to the method, start with a beginner Mat Pilates workout and come back when the Hundred and roll-up feel familiar.
What a Posture Workout Really Means
Before the stopwatch starts, it helps to agree on what “posture work” can honestly promise. The phrase gets stretched in marketing until it sounds like a body-reset button, and the reality is more modest and more useful.
Posture as a Habit, Not a Shape
Most of what people call posture is the position you drift into when you are not thinking about it. That makes it a habit with a muscular component, not a fixed pose you either have or lack.
Why there is no single correct posture
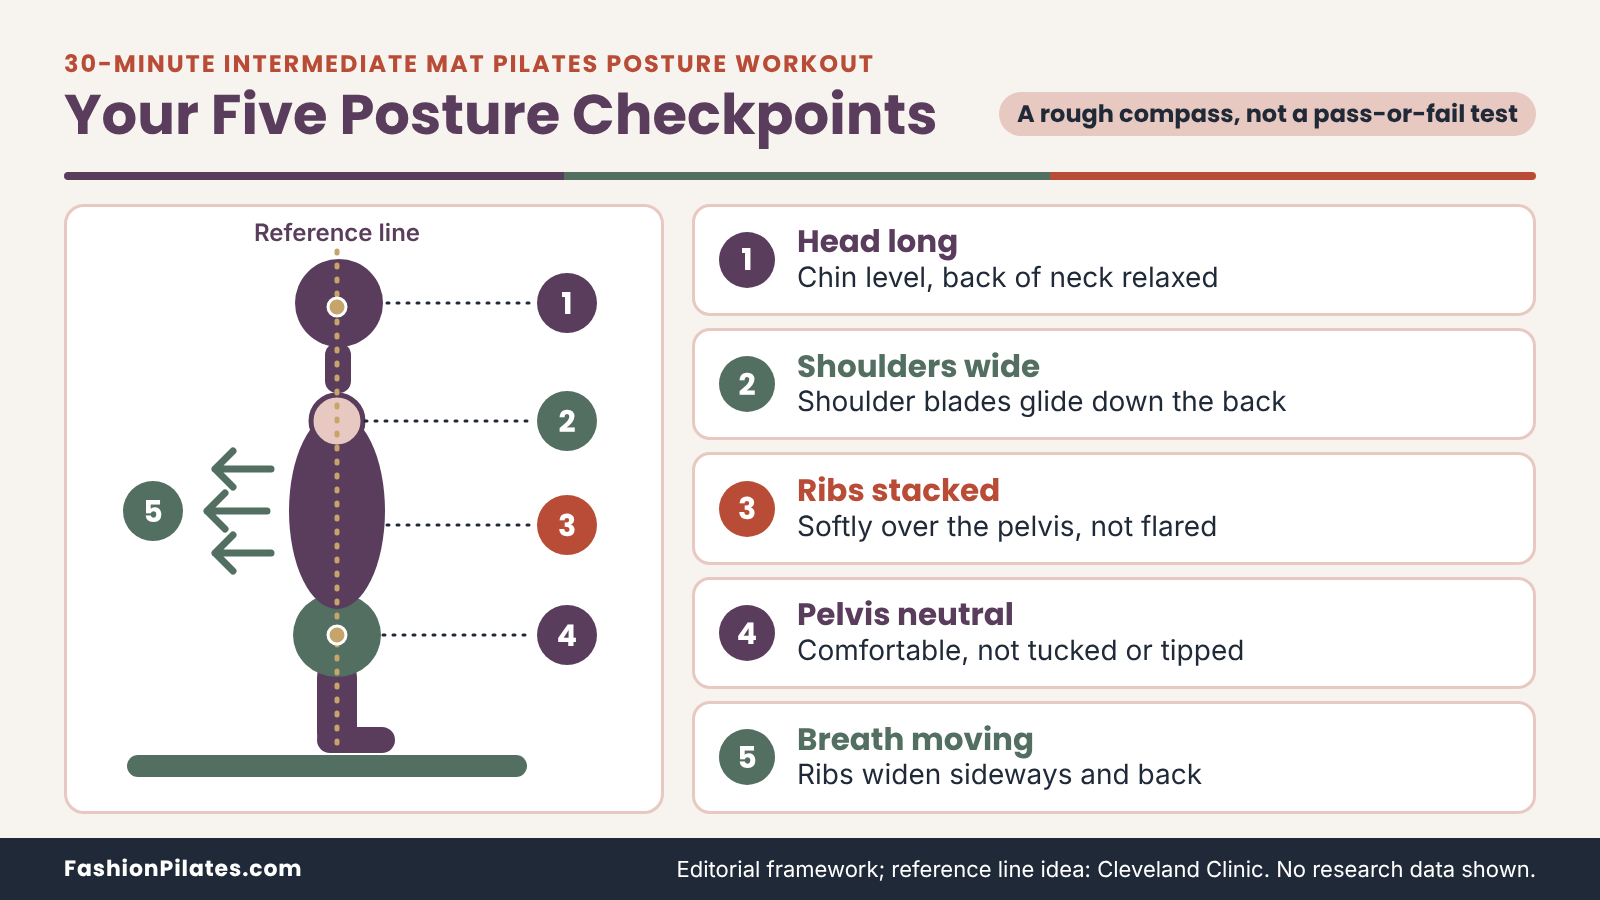
Bodies differ in rib shape, hip structure, shoulder width and the natural curves of the spine, so a photo-perfect stack is not a fair target for everyone. A commonly used reference, described in a Cleveland Clinic guide to posture exercises, imagines a straight line from the ceiling passing through the earlobe, the tip of the shoulder and the side of the pelvis. Treat that line as a rough compass rather than a pass-or-fail test. The more useful question is whether you can move in and out of comfortable positions without strain, and hold a tall, relaxed position for as long as your day requires.
What this routine targets instead
Rather than chasing a shape, this session trains the capacities that make good positions easier to hold: breathing that moves the ribs, mobility through the upper back, strength in the deep abdominal wall, endurance in the muscles along the back of the spine and shoulder blades, and control of rotation. Think of it as practicing the skills that let you sit tall when you choose to, then forgetting about it when you do not. That framing keeps expectations realistic and keeps the work enjoyable, which matters because the only routine that helps is the one you actually repeat.
What the Research Says, and What It Does Not
The honest summary is encouraging but incomplete. Studies on exercise and posture exist, yet they vary in quality, length and how they measure “posture” in the first place.
Pilates-specific studies
A 2024 systematic review of Pilates and body posture, indexed in the Directory of Open Access Journals, pooled thirteen investigations with roughly 783 participants and looked at neck, upper-back and lower-back posture along with pain and quality of life. Its authors concluded that Pilates looked helpful as a supportive approach, while also calling for more rigorous trials. An earlier 2016 review of Pilates and women’s static posture found only four studies with inconsistent results, and its authors judged the evidence insufficient for healthy women. Taken together, the fair reading is “promising, not settled.”
Wider exercise evidence and its limits
A 2024 meta-analysis in BMC Musculoskeletal Disorders combined 22 studies with 903 participants and found that therapeutic exercise programs were associated with improvements in measured forward head position, rounded shoulders and thoracic curvature. Those programs were mixed strengthening and stretching approaches, not Pilates in particular, most lacked long-term follow-up, and the studies differed a great deal from each other. Association is not the same as a guarantee, and a measurement on a screen is not the same as feeling better at your desk, so this article makes no promise about changing how your body looks.
Who This Intermediate Routine Is For
“Intermediate” is one of those words that means different things in every studio. Here it has a concrete meaning, built around what your body should already be able to do comfortably.
Skills You Should Have First
This session moves briskly and strings together curled-up and lying-face-down work with little rest. A few prerequisites keep it productive rather than frustrating.
Movement prerequisites
You should be able to breathe sideways into the ribs while keeping the abdomen gently engaged, find a neutral pelvis lying on your back, and hold a curled-up position with the head and shoulders lifted for about 20 seconds without your neck taking over. You should also be comfortable lying face down and lifting the chest a few inches without pain, and able to rotate through the upper back while sitting tall. If any of these feels like a stretch of your current ability, spend a few weeks with the foundations first.
Experience benchmark
A rough benchmark is a few months of regular Mat Pilates, whether in classes or at home, including exposure to the Hundred, a roll-up in some form and a basic back-extension exercise. That is a guideline, not a gate. Someone who has practiced yoga or strength training with good body awareness may be ready for this 30 minute intermediate mat pilates posture workout sooner, while someone returning after a long break may prefer to start from the shorter 15-minute beginner Mat Pilates mobility workout and build up. When in doubt, choose the easier option for every exercise and stay with it for two weeks.
Who Should Skip or Modify
Some people should talk to a professional before trying any version of this sequence, and everyone should know the stop signs. This is where caution beats ambition.
Check with a clinician or instructor first
If you are pregnant or postpartum, recovering from surgery, managing an acute injury, living with osteoporosis or low bone density, or dealing with a diagnosed spine, neck or shoulder condition, get guidance from a qualified clinician or Pilates professional before starting. Spinal flexion (rounding forward) and forceful twisting in particular are movements that a Bone Health and Osteoporosis Foundation guide to moving safely advises people with osteoporosis to avoid or modify, and this routine contains several of them. The Hundred, roll-up and spine twist are the ones to discuss.
Stop signs during practice
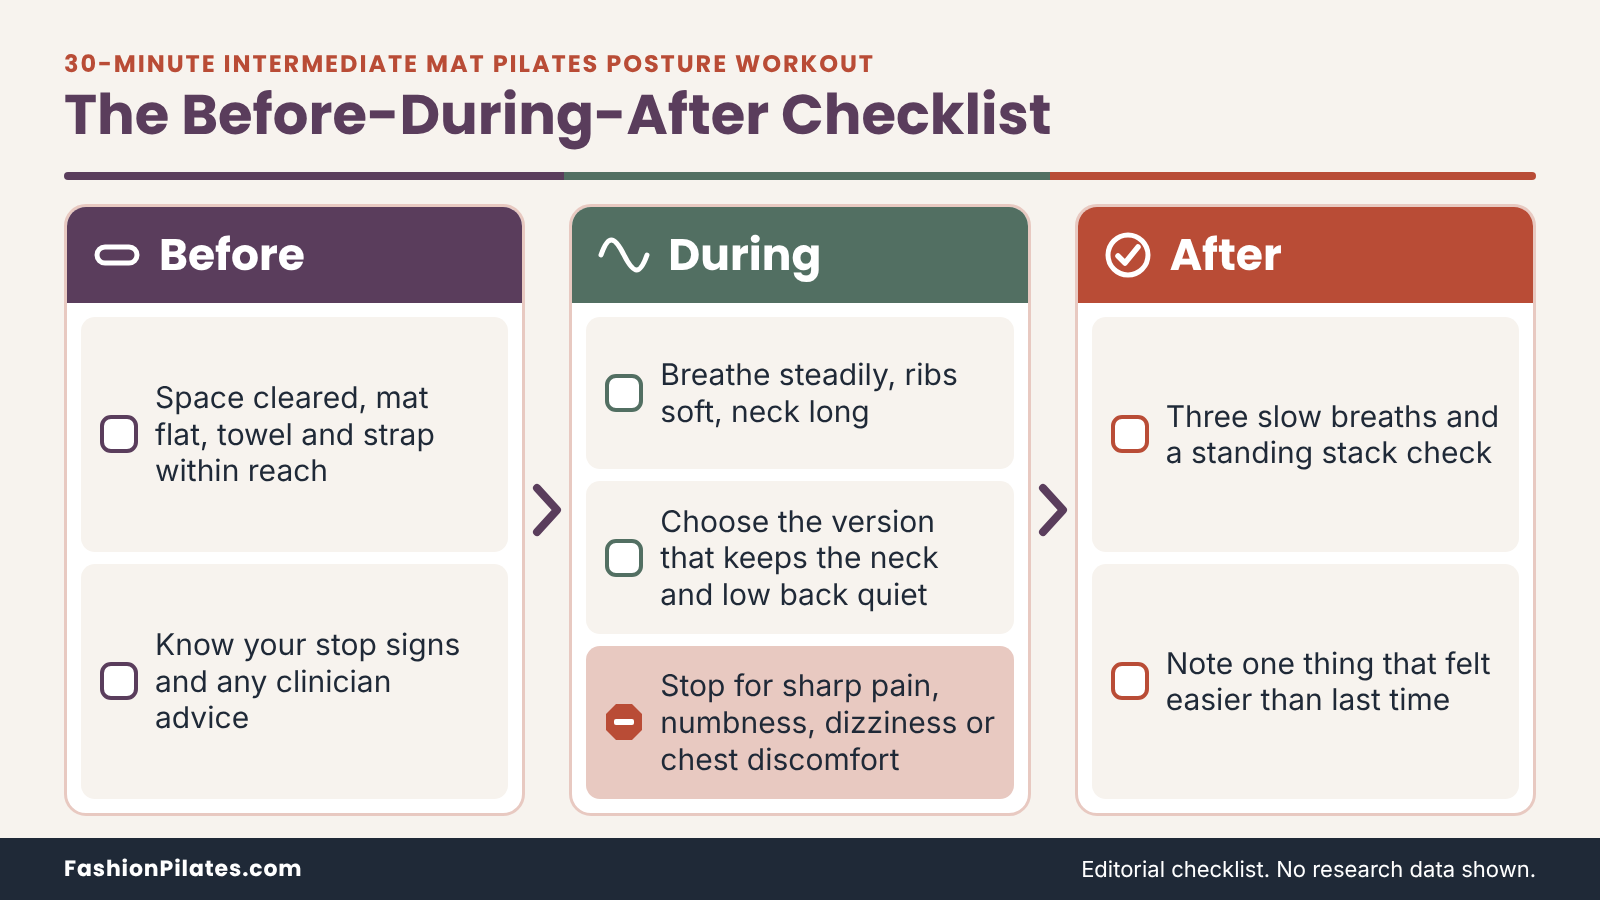
Stop the exercise if you feel sharp or pinching pain, tingling or numbness, dizziness, chest discomfort, unusual shortness of breath or pain that travels down an arm or leg. Muscle effort, warmth and mild shaking in a long hold are normal; pain in a joint or the spine is not. Ease off, rest, and do not “test” the pain again the same day. If symptoms continue after you stop, contact a healthcare professional rather than pushing on through the remaining blocks.
Setup, Space and Gear
This routine needs almost nothing, which is part of its charm. A few small decisions about where and on what you practice still make the difference between a smooth 30 minutes and one spent adjusting, sliding and searching for a towel.
Your Mat and Your Space
Mat Pilates is a floor method, so the floor and the mat are your whole studio. Getting those two right removes most of the avoidable friction.
Choosing a mat that suits this routine
You want a surface that cushions the spine during roll-ups and the knees during all-fours work without feeling so soft that your wrists and hips wobble. A non-slip top surface matters for the hands in the Thread the Needle and the feet in the bridge, and the mat should be long enough that your head and tailbone both stay on it when you lie back with arms overhead. Thicker mats favor comfort, thinner ones favor floor feedback, and the right choice is personal. If you are shopping, the separate guide to the best Pilates mat under 100 walks through how to compare options, which is a different question from how to use one.
Floor, room and clothing
Pick a hard, flat floor with enough room for the full mat plus an arm’s reach on each side, because the side-bend and spine twist need space to swing. Carpet works if it is low and firm, but deep pile makes balance work wobbly. For clothing, choose something that stays put when you lie back, roll up and reach overhead, and that lets you see the movement of your ribs and hips in a mirror or on video. Bare feet or grip socks are both fine; choose whichever keeps your feet from sliding.
Small Props That Help
You can do the entire sequence with nothing but the mat. A few household items make several exercises friendlier and are worth having within reach before you begin.
Folded towel, pillow and strap
A thin folded towel under your forehead keeps the neck long in the face-down exercises, and under the head it supports a neutral neck when lying on your back if your chin tips up. A long towel, scarf or yoga strap looped around the feet gives you a lever in the easier roll-up. A small pillow or folded blanket under the hips can make the kneeling and seated work more comfortable. None of this is cheating, and no specialty gadget is required; a bath towel does the job of most things sold as posture accessories. Props are how experienced teachers adapt the same exercise for different bodies.
Wall and mirror or phone video
A bare wall gives you a quick alignment check, because standing with the heels, hips and upper back near it shows you where your usual stance differs from your idea of it. A mirror or a short phone video recorded from the side lets you compare what a movement feels like with what it looks like. Use these as information, not judgment, and do not stare at the screen for the whole session or you will end up practicing neck craning.
The 30-Minute Plan at a Glance
Thirty minutes is enough for a complete session when the transitions are planned. The structure below keeps every block short enough to stay sharp and ordered so that each exercise prepares the next.
Your 30 Minute Intermediate Mat Pilates Posture Workout Timeline
Here is the full session mapped to the clock. Read it once before you start so you are not scrolling mid-exercise, and note where the optional rest points fall.
Block-by-block overview
The table below lists the six blocks with their timing, the exercises inside each and the main job of the block. Reps are suggestions for a steady, controlled pace; if you reach the end of a block early, rest rather than adding extra repetitions. Quality of movement beats quantity, and the clock has slack built in for setting up props and moving between positions.
| Clock | Block | Exercises and reps | Main job |
|---|---|---|---|
| 0:00 to 4:00 | 1. Arrival | Rib-breath check (5 breaths); pelvic clock (6); arm arcs (6) | Settle the breath and find neutral |
| 4:00 to 8:00 | 2. Spine mobility | Cat-cow (6 cycles); Thread the Needle (4 to 5 per side) | Move the upper back through rotation and extension |
| 8:00 to 15:00 | 3. Front-body control | Pelvic curl into bridge (6); Hundred (5 to 10 breath cycles); Single-Leg Stretch (8 per side); roll-up (5) | Build deep abdominal control and trunk flexion strength |
| 15:00 to 21:00 | 4. Back-body strength | Swan prep (5); alternating arm and leg lifts (8 to 10 per side); prone Y, T and W lifts (5 each); child’s pose rest | Train the muscles along the spine and shoulder blades |
| 21:00 to 27:00 | 5. Side body and rotation | Side-lying leg work (about 1.5 minutes per side); side bend (4 per side); spine twist (4 to 5 per side) | Control the waist, hips and rotation |
| 27:00 to 30:00 | 6. Cool-down | Standing stack check; optional roll-down; three closing breaths | Carry the awareness back to standing |
Pace, breathing and tempo
Move at the speed of your breath: roughly one inhale or exhale per phase of an exercise, with no rushing and no pausing for long. A common Pilates pattern is to exhale on the effort, such as curling up or lifting the chest, and inhale to prepare or return. If a different breathing rhythm feels better in a particular exercise, or your instructor teaches another, follow that instead. What matters is that you keep breathing and keep the ribs and jaw soft, rather than holding the breath through the hard part.
Why the Order Works
The sequence is not random. It follows a logic that most Mat Pilates teachers would recognize, and understanding it helps you make sensible swaps on days when something does not feel right.
Mobility before strength
The first eight minutes are deliberately gentle. Moving the ribs with the breath, then rotating and extending the upper back on all fours, wakes up the joints you want to use before you ask the muscles around them to work hard. People who sit for much of the day often feel stiff through the upper back and chest at the start of a session, and a few slow cycles of cat-cow and Thread the Needle give the strength work that follows a better base. Skipping this stage is the fastest way to turn the swan prep into a lower-back squeeze.
Balancing flexion with extension
Blocks 3 and 4 are a matched pair. Block 3 spends time curling forward through the abdominals, and block 4 immediately balances it with extension and shoulder-blade work along the back of the body. Pilates has a reputation for being all abdominals, but a posture-minded session needs the back body at least as much. Following forward-curling work with back extension also gives the spine a change of direction, which most people find more comfortable than staying in one pattern for long stretches.
Minutes 0 to 8: Arrival and Spine Mobility
The opening two blocks take eight minutes and do not feel like much, which is the point. Treat them as a calibration rather than a warm-up you rush through to reach the exciting bits.
Block 1 (0:00 to 4:00): Breath and Alignment Reset
Lie on your back with knees bent, feet hip-width apart and arms by your sides. Use a folded towel under the head if your chin lifts toward the ceiling.
Rib-breath check, five breaths
Rest your hands on the lower ribs. Inhale slowly through the nose and notice the ribs widening sideways and a little toward the mat, rather than the chest simply rising. Exhale through softly pursed lips and let the ribs settle back toward the pelvis without clamping down. Repeat for five slow breaths. If the movement is mostly under your hands rather than in your upper chest, you are on track; if not, keep practicing. This simple awareness is the foundation for every later exercise, so give it a full minute.
Pelvic clock and arm arcs
For the pelvic clock, exhale and gently tilt the pelvis so the lower back softens toward the mat, then inhale and return to a comfortable neutral; do six small, slow tilts. For the arm arcs, reach both arms to the ceiling, inhale as they travel overhead only as far as your ribs stay quiet and do not pop up, and exhale as they return. Do six. If the ribs flare when the arms go overhead, shorten the range; that signal tells you where your usable shoulder range currently ends.
Block 2 (4:00 to 8:00): Cat-Cow and Thread the Needle
Come to all fours with wrists under shoulders and knees under hips. Pad the knees if the mat is thin.
Cat-cow, six cycles
Exhale to round the spine toward the ceiling, tucking the pelvis slightly and pressing the floor away through the hands so the shoulder blades spread. Inhale to lengthen forward into a gentle extension, letting the breastbone travel forward and the gaze stay down and ahead so the neck stays long. Move through the whole spine rather than only the lower back, and keep the range comfortable. Six slow cycles take about a minute and a half. If your wrists complain, come onto fists or forearms.
Thread the Needle, four to five per side
From all fours, inhale and reach the right arm up toward the ceiling, turning the chest to follow it. Exhale and thread that arm under the left, palm up, letting the right shoulder and the side of the head lower toward the mat while the hips stay stacked over the knees. Inhale to unwind and reach back up, then repeat four to five times before switching sides. The goal is rotation through the upper back; if the shoulder or neck pinches, reduce the depth or stay on the way up with a smaller reach.
Minutes 8 to 15: Front-Body Control
Block 3 is the most demanding stretch of the session, and it earns its seven minutes. Pilates exercise names are a mixed bag (the Hundred is about a minute of arm pumping, and no feathers are involved in the Swan later), but the movements themselves are straightforward once you break them down.
Pelvic Curl and the Hundred
These two exercises ask the abdominals to work while the spine and pelvis stay organized. Take the easier version of each on days when your energy is low; the benefit comes from clean repetitions rather than heroic ones.
Pelvic curl into bridge, six reps
Lie on your back with feet hip-width apart and knees bent. Exhale and tilt the pelvis so the tailbone curls off the mat, then peel the spine up one segment at a time until you reach a long diagonal from knees to shoulders. Inhale to pause at the top without pushing the ribs forward or arching the lower back, then exhale and roll down from the upper back to the tailbone. Keep the knees pointing forward and the neck relaxed. Six slow repetitions prepare the hips and spine for what comes next.
The Hundred, in three levels
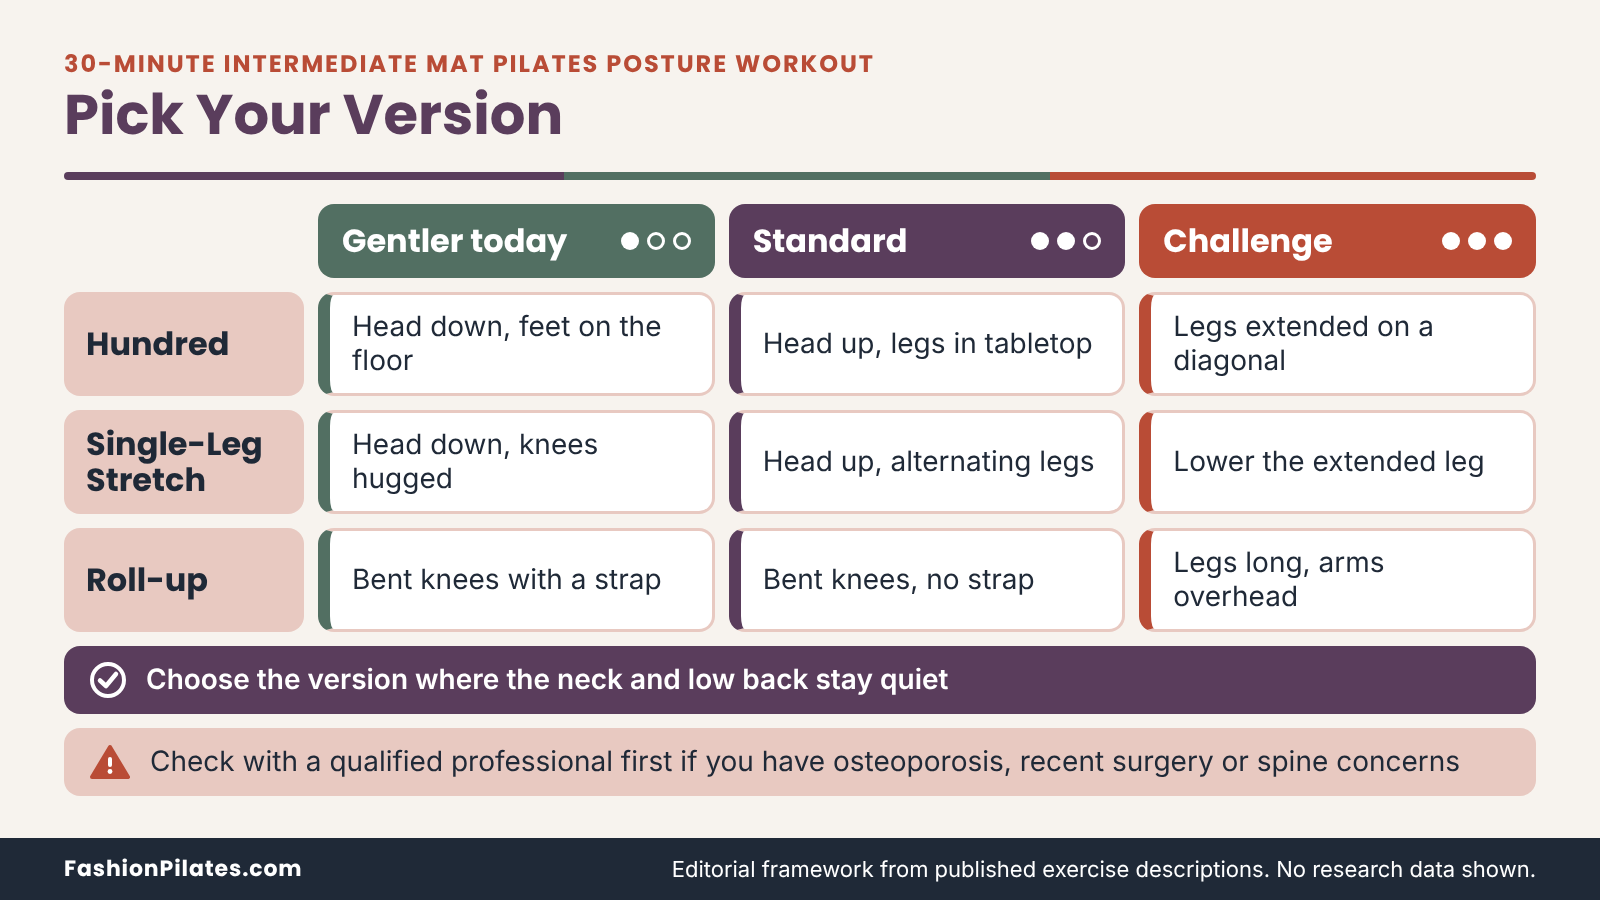
Level one: keep the head down, feet on the floor, and pump the arms in small, firm beats beside the hips for five counts of inhale and five counts of exhale. Level two: exhale to curl the head and shoulders up and lift the legs to a tabletop position with shins parallel to the floor, continuing the pumping. Level three: extend the legs toward a diagonal while keeping the lower back controlled. Aim for five breath cycles (50 beats) at first and build toward ten (100 beats). Lower the head any time the neck strains.
Single-Leg Stretch and Roll-Up
These two keep the abdominals working through a bigger range. Together they form the part of the session where posture work and classical Mat Pilates overlap most obviously.
Single-Leg Stretch, eight per side
Start with the head and shoulders curled up and one knee hugged toward the chest, the outside hand on the ankle and the inside hand on the knee. Extend the other leg long on a gentle diagonal, then switch legs and hands in a smooth rhythm, exhaling on each switch. Keep the pelvis steady, the ribs soft and the gaze toward the thighs. Eight on each side is enough; if the low back lifts as the leg extends, raise the extended leg higher or keep the head down.
Roll-up, five reps with options
Lie flat with legs long and arms overhead. Inhale to bring the arms to the ceiling, then exhale as the chin drops, the head and shoulders curl up and the spine peels off the mat one segment at a time while the arms reach toward the toes. Inhale at the top, then exhale to roll down slowly, keeping the feet heavy and avoiding a slump at the end. Easier options include bending the knees, holding a strap around the feet or rolling only partway up and back. Five good reps beat ten rushed ones.
Minutes 15 to 21: Back-Body Strength
If the front-body block is the part of Pilates everyone expects, this is the part posture-minded exercisers need. Lying face down, you work the muscles that run along the spine and behind the shoulders, and you do it with small, controlled lifts rather than big arches. Some trembling in the lift is normal effort and simply the muscles filing a polite complaint.
Swan Prep and Alternating Lifts
Both exercises ask for extension through the upper back. Keep the focus on the chest and shoulder area and let the lower back stay long.
Swan prep, five reps
Lie face down with the legs hip-width apart, the forehead on a towel or just above the mat, the hands under the shoulders and the elbows close to the ribs. As described in a clinical Pilates provider’s guide to the Pilates Swan, inhale to prepare, then exhale as the pubic bone presses gently into the mat and the chest lifts in an upward arc, keeping the tailbone pointing down. Avoid extending mainly from the lower back; spread the movement through the upper spine. Lift only as high as the ribs stay quiet, pause, and lower slowly. A Peak Pilates exercise spotlight echoes the focus on thoracic extension rather than a push-up.
Alternating arm and leg lifts, eight to ten per side
This is a gentle preparation for the classical Swimming exercise. Lie face down with the arms long overhead and the legs hip-width apart, forehead resting. Lift the right arm and left leg a few inches, lower, and switch, moving slowly and keeping the abdomen lifting slightly away from the mat so the lower back stays long. Breathe in a steady pattern. Eight to ten lifts per side are plenty. If the lower back pinches or the neck cranes, lift only the arms or only the legs.
Shoulder-Blade Lifts and a Reset
This pair gives the upper back the endurance work that posture-related complaints most often point to, then lets the spine rest before the side-body work.
Prone Y, T and W lifts, five of each
These are borrowed from general strength and rehab-style programming rather than the classical Pilates repertoire, but they fit the goal. Lie face down with the forehead resting. With the arms in a Y overhead and thumbs up, lift the arms just an inch or two, hold briefly, and lower. Repeat with the arms straight out to the sides in a T, then bent in a W with the elbows pointing down. Slide the shoulder blades toward the opposite back pockets and keep the neck relaxed. Five per shape is enough; lift only as high as you can without shrugging.
Child’s pose reset
Press back into a child’s pose, sitting the hips toward the heels with the knees together or wide, whichever is comfortable, and the forehead on the mat or a stack of fists. Breathe into the back ribs for about a minute, noticing the gentle stretch through the spine after the extension work. If your knees dislike this position, place a folded towel behind them or rest on all fours with a small pillow under the chest instead. This pause also lets your heart rate settle before the side-body work.
Minutes 21 to 30: Side Body, Rotation and Cool-Down
The final nine minutes bring in the parts of the trunk that forward-and-back exercises tend to skip. Side-lying work trains the waist and hips, rotation teaches the ribs to turn independently of the pelvis, and the cool-down returns you to standing, which is where posture actually lives.
Side-Lying Work and the Side Bend
These two exercises train the sides of the trunk and the hips, which share the job of keeping you balanced over one leg or leaning toward one shoulder when you carry a bag.
Side-lying leg work, about 90 seconds per side
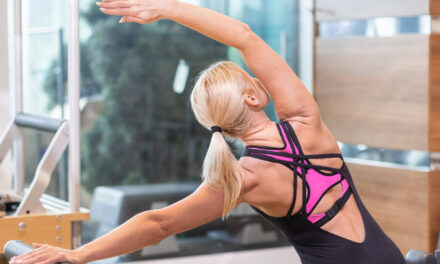
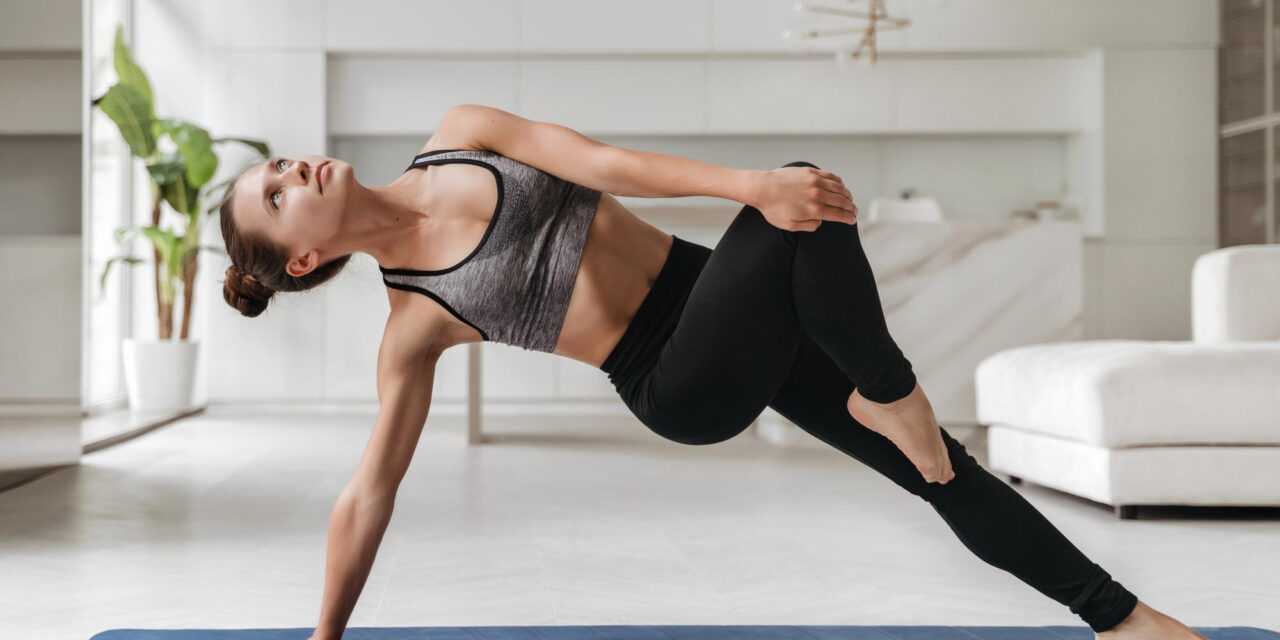
Lie on your right side in a long line with the bottom arm extended under the head or the head resting on a folded towel, and the top hand placed on the mat in front of the chest. Place both legs slightly forward of the hips. Lift the top leg to hip height, lower it with control, and repeat eight times, keeping the pelvis stacked and the waist gently lifted off the mat. Finish with five small circles in each direction, then turn over and repeat on the other side. If your shoulder complains, bend the bottom elbow and prop the head on that hand.
Side bend, four per side
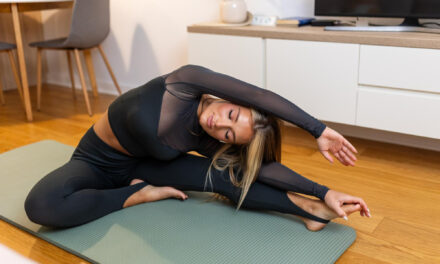
Sit in a comfortable cross-legged position or with both legs folded to one side, with the right hand on the mat beside you. Inhale to lengthen the left arm overhead, then exhale as you bend sideways over the right hand, keeping both sit bones heavy and the chest facing forward. Inhale to return to center. Repeat four times, then switch sides. Think of lengthening the side of the body, not collapsing into it. If the supporting wrist is uncomfortable, rest on the forearm instead.
Spine Twist and Cool-Down
Rotation gets one exercise and the cool-down gets the last three minutes. Both should feel calm, with the effort tapering as you go.
Spine twist, four to five per side
Sit tall with the legs extended hip-width apart, feet flexed, or sit cross-legged if the hamstrings are tight, and extend the arms out to the sides at shoulder height. Inhale to grow taller. Exhale to rotate from the ribs and mid-back toward one side while both sit bones stay heavy, then inhale back to center. Do four or five turns to each side. Keep the movement comfortable and unforced, because forceful end-range twisting is one of the things the Bone Health and Osteoporosis Foundation asks people with low bone density to avoid.
Standing stack check and closing breaths
Stand with your feet hip-width apart and let the arms hang. Take three slow breaths while sensing the feet, the pelvis, the ribs, the shoulders and the head, using the five checkpoints from earlier as a mental checklist. If you like, roll down through the spine to hang forward and then stack back up slowly; skip this if forward bending bothers you. A quick back-to-the-wall check, with the heels near the wall and the hips and upper back resting lightly against it, can show whether the session has changed how upright you feel. That feeling is information, not a grade.
Mistakes, Modifications and Progressions
Even a well-designed session can go sideways in small, fixable ways. This section covers the usual culprits, then shows how to scale the routine down on tired days and up when you are ready for more.
Common Mistakes and Fixes
Most errors fall into two families: effort going to the wrong place, and range or speed outrunning control. The table below pairs each with a remedy you can apply on the spot.
| What you notice | Where it usually shows up | What to try |
|---|---|---|
| Neck tension or chin jutting | Hundred, Single-Leg Stretch, roll-up | Lower the head, shorten the lever, and keep a small gap between chin and chest |
| Ribs flaring upward | Arm arcs, Hundred, bridge | Reduce the range and exhale to let the ribs settle toward the pelvis |
| Shoulders creeping toward ears | Y, T and W lifts, swan prep | Lift less, slide the shoulder blades down the back first, and relax the jaw |
| Lower back pinching | Swan prep, alternating lifts | Press the pubic bone down, reduce the lift, and reach through the crown of the head |
| Rushing through reps | Everywhere | Slow the count and rest between exercises instead of cutting them short |
| Holding the breath | Hundred, roll-up, side-lying work | Use an easier version until you can speak a short sentence during the effort |
Neck, ribs and shoulders
The upper body is where most people accumulate tension, especially after a day at a screen. When the neck takes over in a curl-up, the abdominals are not working hard enough, and when the ribs flare the trunk is borrowing stability from the lower back. In both cases, make the exercise smaller instead of forcing it. Shorten the lever, lower the head or reduce the range, and build back up over the next few weeks. A calm neck and quiet ribs are better markers of progress than a bigger movement.
Speed, range and the lower back
Momentum disguises weakness. If a roll-up is a lurch, a swan prep is a back arch or a leg lift is a swing, slow it down and make it smaller. Chasing range in the lower back is also a common trap in extension, because that region moves easily and tempts you to take the movement from there. Spread extension through the upper back and keep the abdomen lifting slightly. If you feel pinching or compression in the low back, back off and ask an instructor to watch your form.
Modifications and Progressions
The same 30 minutes should work on a stiff Monday and a strong Friday. A short, honest menu of easier and harder options does that without rewriting the whole session.
Easier options by block
On low-energy days, keep the order but choose simpler versions. In block 3, do the Hundred with the head down and feet on the floor, hug the knees in the Single-Leg Stretch, and use bent knees or a strap in the roll-up. In block 4, lift the chest only an inch in swan prep and do arms-only lifts. In block 5, stay in the side-lying work with the bottom elbow propped. Easier does not mean less valuable; consistent low-demand sessions often beat sporadic heroic ones. A simple way to choose is to match the version to your situation today.
| Version | Best for | Not ideal if |
|---|---|---|
| Gentler | Stiff or tired days, returning after a break, building confidence | You already move through every exercise without effort and want more challenge |
| Standard | Regular practice with good technique and no pain | Neck, back or shoulder symptoms flare during the curl-up or extension blocks |
| Challenge | Experienced exercisers with solid control and an instructor to check form | You are working around an injury, recent surgery, pregnancy or low bone density |
Harder options when you are ready
Progress one variable at a time. Move toward a full ten breath cycles in the Hundred, extend the legs in the Single-Leg Stretch, or roll up with straight legs and arms overhead. In block 4, add a second set of Y, T and W lifts or lengthen the holds by two seconds. You are ready for a harder option when the easier one feels smooth for two or three consecutive sessions with no neck strain, rib flare or low-back pinching. For an upper-body focus on a different day, try the 20-minute intermediate Mat Pilates upper body workout.
Fitting It Into Your Week
A single excellent session does little if it never happens again. This section turns the routine into a schedule you can keep, with markers that tell you whether it is working.
A Realistic Weekly Schedule
The right frequency depends on your other training, your recovery and how the session feels the next morning. Start modestly and add only when the routine feels easy to complete.
How often to practice
For most people, two or three sessions a week is a sensible starting point. The CDC’s adult activity guidelines recommend muscle-strengthening activity on at least two days a week that works all the major muscle groups, in addition to aerobic activity, and a bodyweight Mat Pilates session may count toward that if it genuinely challenges the muscles involved. The same guidelines suggest 150 minutes of moderate aerobic activity a week, so treat this routine as one piece of a broader week, not a replacement for walking or other cardio.
| Day | Plan | Notes |
|---|---|---|
| Monday | Full 30-minute routine | Use the gentler version if the weekend left you stiff |
| Tuesday | Walk or other easy cardio | Ten minutes of cat-cow and arm arcs is enough if you want movement |
| Wednesday | Full 30-minute routine | Aim for the standard version |
| Thursday | Rest or light mobility | Stretch only what feels good |
| Friday | Optional third session | Try one harder option, such as the full Hundred |
| Weekend | Active recovery | Walking, easy cycling or a gentle class |
Pairing with desk breaks and other training
Short breaks matter as much as the main session when your day involves a lot of sitting. Standing up, taking a few ribcage breaths and doing a few arm arcs every hour costs almost nothing and reinforces the same skills. If you travel often, the principles carry over to Pilates travel posture routines, and the shoulder mobility Pilates guide offers a gentler shoulder-focused option for off days. On heavy strength days, keep this session lighter so you are not stacking fatigue on top of fatigue.
Tracking Progress and Getting Help
Because posture is slow to change, if it changes at all in a measurable way, you need markers that show progress without relying on a mirror.
Progress markers that matter
Look for changes you can feel and repeat: holding the curled-up position for longer without neck strain, completing the roll-up with fewer adjustments, lifting the chest in swan prep without a low-back pinch, or finding the position more comfortable after a long meeting. The Cleveland Clinic guide mentioned earlier notes that exercise needs consistent practice and that holding a better position can feel uncomfortable at first while the muscles adapt. Write down one observation after each session; a month of notes is more honest than any photograph.
When to book an instructor
If a particular exercise never feels right, if you have symptoms that persist, or if you want to progress beyond the options here, a session with a qualified instructor is worth the cost. The Pilates Method Alliance describes itself as a professional body that sets standards for Pilates instruction and education, which makes it a reasonable starting point for learning what credentials to look for. Bring this routine along and ask them to watch your Hundred, roll-up and swan prep. For a broader foundation, the Pilates for beginners guide and the Mat Pilates workouts hub are good next stops.
Frequently Asked Questions
Can a 30-minute Mat Pilates workout really improve my posture?
It may help, but the evidence is mixed and the word “improve” needs care. Reviews of Pilates and posture report some encouraging results alongside small, varied studies and calls for better research. A session like this trains breathing, mobility and the endurance of the muscles that support an upright position, which can make good positions easier to hold. It does not promise a particular shape. Think of it as practice for body awareness and strength.
How many times a week should I do this routine?
Two or three sessions a week suits most people who are already comfortable with intermediate Mat Pilates. Spacing them with at least one day between lets muscles recover and keeps technique sharp. If you feel sore in the neck or lower back the next day, reduce the range or choose the gentler versions. You can add short movement breaks on other days without doing the full routine.
Is this routine safe if I have back or neck pain?
That depends on the cause, so check with a clinician or qualified Pilates professional before starting. Several exercises involve curling forward, extending the spine and twisting, which can aggravate some conditions. Stop any exercise that causes sharp pain, tingling, numbness or pain that travels into an arm or leg. A professional can show you which movements to keep, modify or skip. This article is general fitness education and cannot replace that advice.
What makes this workout intermediate rather than beginner?
The main differences are pace, the number of positions and the demands on control. You move between curled-up, face-down, side-lying and seated work in quick succession, and exercises such as the Hundred and the roll-up expect steady abdominal strength. A beginner routine usually gives you more rest, simpler versions and fewer transitions. Each exercise here has a gentler option so you can build toward the standard version. If the basics still feel new, spend a few more weeks there first.
Do I need a special Pilates mat to follow this routine?
You can follow it on any mat that is non-slip, comfortable for the spine and knees, and long enough for your head and tailbone to stay on it with your arms overhead. A very thin mat may be uncomfortable for the roll-up and kneeling work. A very soft surface can make balance and wrist work harder. Choose a firm, even floor and a mat that suits your body.
Should I do the routine before or after other workouts?
Either can work, depending on your goals. Doing it before a strength session turns the early blocks into a warm-up, though the Hundred and roll-up may fatigue the abdominals you want for heavy lifts. Doing it afterward is fine if you still have energy for careful form. On days when you are tired, keep the routine separate and choose the gentler versions. The most reliable time is whenever you will actually do it.
How long before I notice a difference?
Timing varies a lot and no one can promise a date. Some people feel more comfortable with the movements within a few weeks, since coordination and confidence often improve before strength does. A 2016 review of Pilates and women’s posture described changes after programs lasting many weeks, but its authors judged the overall evidence insufficient. Track how exercises feel rather than waiting for a visible change. If something feels worse, stop and seek advice.
What if I cannot do the roll-up yet?
Most people cannot do a smooth roll-up at first, and that is normal. Bend the knees, loop a strap or towel around the feet, or roll only partway up and back down. You can also practice the abdominal curl with the head and shoulders only until you feel steady. Add range gradually and stop short of the point where your neck or low back takes over. An instructor can watch for the small adjustments that make the exercise work.