
Direct answer: Pilates for beginners comes down to three decisions: a format (mat, reformer or a private session), an instructor who teaches real modifications, and a schedule you can actually keep, usually two or three short sessions a week. Start with slow, well-taught basics such as breathing, pelvis and spine position, and simple abdominal and hip work, and let the harder variations wait. If you have a medical condition, are pregnant or postpartum, or are recovering from surgery, check with your clinician before you begin.
This guide is written for adults in the United States who are curious about Pilates but unsure where to start, what to buy, how to choose a class, or whether the hype is earned. It covers the history and ideas behind the method, an honest summary of what research does and does not show, the main formats, a first-class walkthrough, a home start, a vocabulary table, nine foundational exercises with precise cues, and a four-to-eight-week plan. It is a research-based, expert-informed overview built on public health agencies, published studies and professional organizations. We did not do hands-on testing of studios, classes or equipment, and nothing here is individualized medical advice; it is general fitness education.
What Pilates Is and Where It Came From
Pilates is one of those words everybody recognizes and few people can define without waving a hand toward “core strength.” A clear definition, plus a little history, makes every later decision easier, from which class to book to how to read a bold claim on a studio website.
A plain-English definition of Pilates
At its simplest, Pilates is a system of controlled, low-impact exercises built around breathing, alignment and the muscles of the trunk and hips. It can be done on a mat or on specialized equipment, and it can be gentle or surprisingly demanding without ever involving jumping or heavy weights.
The method in one paragraph
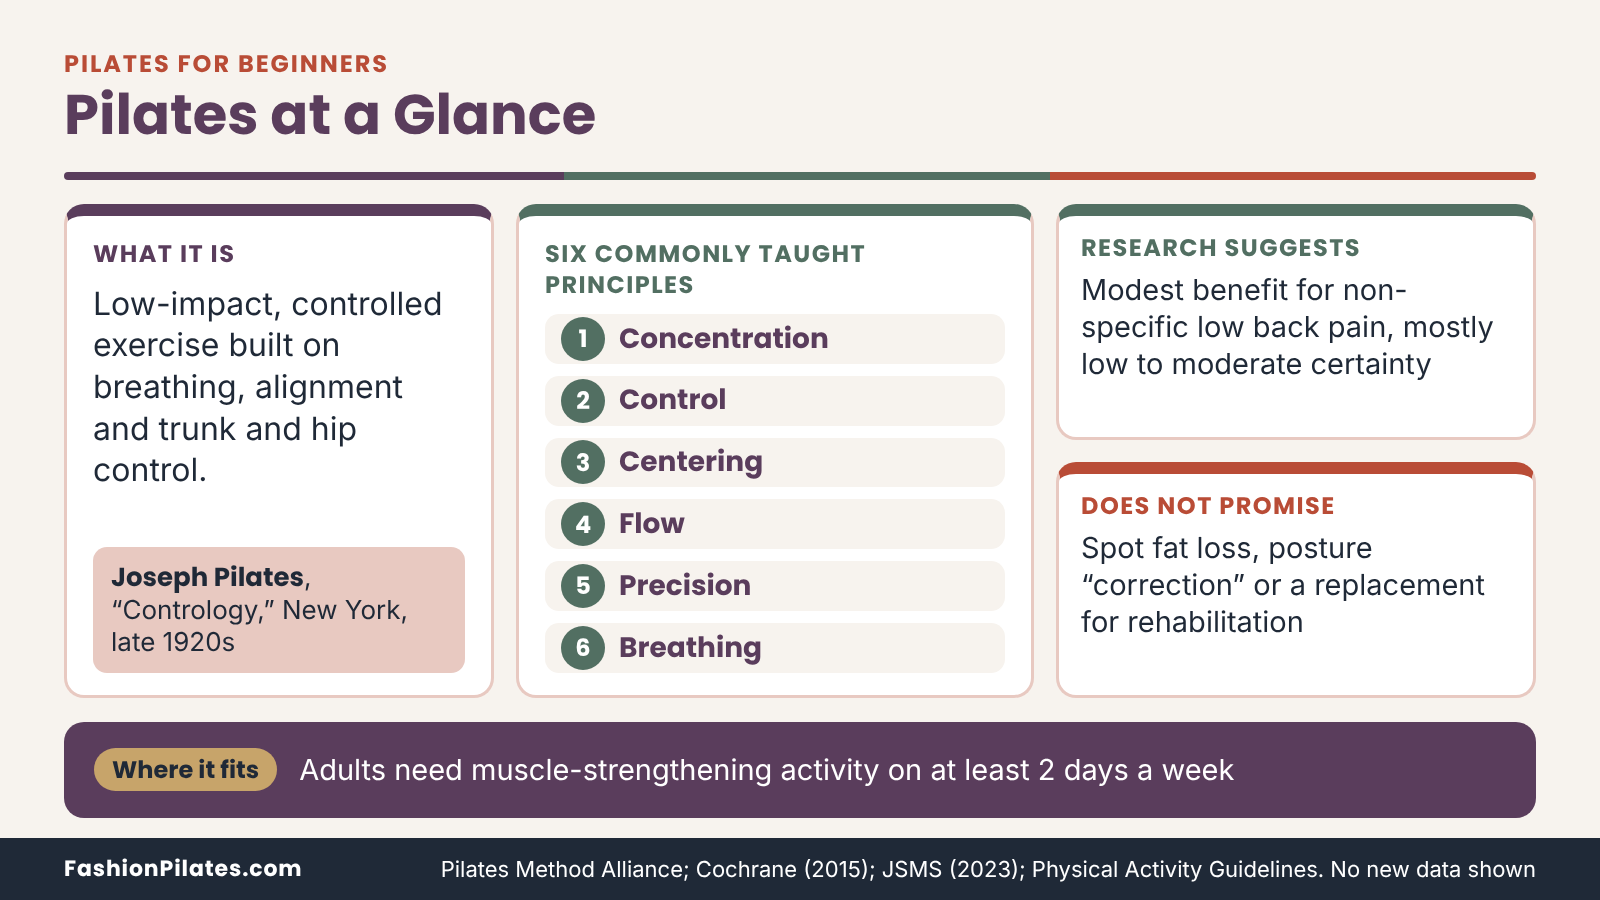
The Pilates Method Alliance, a professional organization for the field, describes Pilates as a method of exercise and physical movement meant to stretch, strengthen and balance the body through specific exercises paired with focused breathing patterns. In practice, that means you do a modest number of repetitions of each movement, slowly, while paying attention to what your ribs, pelvis, spine and shoulders are doing. The emphasis is on how a movement is performed rather than how many you can finish. A good beginner session feels more like learning a skill than surviving a workout, and that is by design. You are building a vocabulary of movement that later classes will assume you already speak.
How Pilates differs from yoga, barre and general core workouts
People often lump Pilates in with other studio staples, so a quick sorting helps. Yoga traditionally centers on held postures, flexibility and a broader contemplative tradition; Pilates leans toward sequenced strengthening and trunk control, with far more lying down and far less standing. Barre borrows from ballet, dance and Pilates, and usually works the legs and seat in small pulsing movements at a ballet-style bar.
A generic “core workout” is a list of abdominal exercises, while Pilates is a method with its own order, vocabulary and teaching traditions. The overlap is real, and good teachers borrow ideas freely, but the labels are not interchangeable. If you want a closer side-by-side, Pilates vs yoga comparison covers it in detail.
Joseph Pilates and the story of Contrology
The method has a named founder and a documented history, which is rarer than you might expect in the fitness world. The details below come from the Pilates Method Alliance history pages, and the story is worth knowing because it explains why the method looks the way it does.
From Mönchengladbach to Manhattan
Joseph Pilates was born in Mönchengladbach, Germany, in December 1883, and worked in physical pursuits that included circus tumbling before he moved to England in 1913. According to the Pilates Method Alliance history page, he was interned on the Isle of Man during the First World War, where he developed and taught conditioning ideas to fellow internees. He later brought his system to the United States and introduced it to the American market in the late 1920s, teaching from a studio in Manhattan with his wife, Clara, who taught alongside him and continued the work afterward. He wrote Your Health in 1934 and Return to Life Through Contrology in 1945, and he died in 1967. He called his approach Contrology, a name that points to disciplined control of the body, and the word survives in the title of his 1945 book.
How a niche method became a mainstream studio category
For decades, Pilates passed from teacher to student, first within a small New York circle and then, according to the same organization, through “second generation” teachers who built practices across the country. Formal teacher training programs appeared in the 1980s. From there the method moved into dance studios, physical therapy clinics and boutique fitness, which is why today you will see Pilates taught in very different ways under the same name.
That variety is a feature and a hazard. It means a class labeled “Pilates” might be gentle and precise or fast and athletic. It also means the label alone tells you little, so the later sections of this guide teach you to judge a class by its structure, its instructor and how it treats beginners.
The Core Principles in Plain English
Pilates teachers often talk in principles: short ideas that organize how every exercise is performed. Different schools list them in slightly different ways, and some add or rename one or two, so treat the list below as the commonly taught set rather than a single official canon. What matters for a beginner is how the ideas translate into what you feel on the mat.
The six commonly taught principles
Most lists include concentration, control, centering, flow, precision and breathing. They sound abstract until you attach each to something you can observe in the first ten minutes of a class.
Concentration, control and precision
Concentration means keeping your attention on the movement rather than on the clock, your phone or your to-do list. Control means you decide the speed and range of each motion instead of letting momentum or gravity do the work, which is why a leg lowering slowly is harder than a leg that drops. Precision means placing the movement where it is meant to go: the knee tracks over the second toe, the ribs stay settled, the pelvis stays where the cue says it should.
For a beginner, these three principles produce one useful habit. Do fewer repetitions and do each one on purpose. If your form falls apart, the useful response is to stop, reset or shrink the movement, not to push through the rest of the set.
Centering, flow and breathing
Centering is the idea that movement starts from the middle of the body, the trunk and hips that teachers sometimes call the powerhouse, and radiates out to the arms and legs. Flow means moving smoothly between positions with an even rhythm instead of jerking from one to the next. Breathing is the connective tissue: instructors cue an inhale and exhale for each movement so that breath sets the tempo and keeps you from holding your breath during effort.
If breathing cues feel confusing at first, that is normal. Many people hold their breath when they concentrate, and learning to keep air moving while the abdominals work is a skill like any other. You will practice it directly in the foundational moves later in this guide.
How the principles show up in a real class
Principles are easy to nod along to and surprisingly easy to forget the moment an instructor says “ten more.” Here is how they tend to appear in an actual beginner session.
What quality over quantity looks like
In a well-run beginner class, you will see small ranges of motion, frequent pauses for the instructor to adjust the group, and a lot of verbal cues about position before anyone moves. You may do five to eight repetitions of an exercise instead of twenty. You will probably be told to stop short of your full range if your form changes, and a good teacher will name an easier option right alongside the standard one. If you leave a first class mildly challenged but still sure you could describe what you did, that is a reasonable outcome. Soreness in the trunk or hips the next day can be normal for a new stimulus, but sharp or joint-centered pain is a signal to stop and tell your instructor.
Why slow feels harder, and the shaking question
Slow, controlled movement removes the help that momentum normally provides, so your muscles carry the load for the full duration of each repetition. That is why a plank-like hold or a slow leg lowering can make your abdominals tremble within seconds. Brief shaking in a muscle that is working near its limit is common and is not, by itself, a sign that something is wrong, though it is useful information: you are close to the end of your control for that movement.
Reduce the range, bend a knee, shorten the lever or take a rest. And yes, every beginner is quietly checking whether everyone else is shaking too. Most of them are.
What Pilates Can and Cannot Do
Pilates attracts big claims, from “stronger core in a week” to “fixes your posture.” Some of what is said about it is supported by research, some is plausible but unproven, and some is simply marketing. The honest picture is more useful than either hype or cynicism, so this section separates what studies suggest from what they do not, and explains why the difference matters when you decide how to spend your time and money.
What the research suggests
Pilates has been studied enough to support cautious conclusions, mostly in the form of small trials that are later pooled into systematic reviews. The headline pattern is encouraging but modest, and the certainty behind it is usually low to moderate.
Low back pain and the Cochrane review
The best-known evidence concerns non-specific low back pain, meaning pain without an identifiable structural cause. A Cochrane systematic review of Pilates for low back pain, published in 2015, pooled ten randomized trials. Pilates produced better results for pain and disability than minimal intervention at short and intermediate follow-up, but showed no clear advantage over other forms of exercise.
The reviewers rated the certainty of the evidence as low to moderate, noted that the individual trials were small, and reported minor or no adverse events. In plain English: Pilates looks like a reasonable exercise option for people with this kind of back pain, not a uniquely powerful one, and the review predates newer trials. If you have back pain, treat this as a reason to talk with a clinician, not as treatment advice.
Beyond back pain: an umbrella review with an honest caveat
An umbrella review in the Journal of Science and Medicine in Sport (a review of reviews) gathered 27 systematic reviews with meta-analyses, searched through February 2023. It reported that Pilates was associated with lower body mass index and body fat percentage, less pain and disability, and better sleep quality and balance compared with inactive or alternative interventions. The same authors found that only one of the included reviews was rated high quality, that the certainty of evidence ranged from very low to moderate, and that more rigorous trials are needed. That caveat is the whole point: the direction of the findings is favorable, but the confidence level is not high enough to promise any individual outcome. The summary table below pulls the threads together.
| Area | What the research suggests | Main limits to keep in mind |
|---|---|---|
| Non-specific low back pain | Better pain and disability outcomes than minimal intervention in a Cochrane review of ten trials | No clear edge over other exercise; small trials; low to moderate certainty; review published in 2015 |
| Balance and sleep quality | Reported as improved versus control interventions in an umbrella review of 27 meta-analyses | Most included reviews were low or critically low quality; certainty mostly low |
| Body mass index and body fat | Reported as lower in the umbrella review; a separate mat Pilates meta-analysis found no advantage over other exercise or control conditions | Results differ by comparison group, population and review quality; not a weight-loss method |
| Neck pain and scoliosis | Listed among areas with reported benefit in the umbrella review | Condition-specific care belongs with a clinician; evidence quality varies |
| Everyday strength and body awareness | Plausible given the movements trained, and a common reason people stay with the method | Hard to separate from general exercise effects; individual results vary |
What Pilates does not promise
Knowing the limits protects you from disappointment and from paying for outcomes nobody can guarantee. Three claims come up often enough to deserve their own look.
Weight loss and body composition
A systematic review with meta-analysis of mat Pilates and body composition, published in the Journal of Physical Activity and Health in 2020, pooled ten eligible studies. It found that mat Pilates was not more effective than traditional exercise or control conditions for body mass index, lean mass, body fat percentage or abdominal circumference. That does not mean Pilates is useless for people who want to change their bodies; it means it is not special.
Any regular activity you enjoy enough to continue is more likely to matter than the brand name on it. No exercise can target fat loss in one body area, and this guide will not suggest that Pilates can reshape a specific part of you. If weight or body composition is your main goal, bring in a clinician or registered dietitian and treat Pilates as one useful ingredient.
Pain relief, posture and rehabilitation
Pilates is sometimes marketed as a fix for back pain, rounded shoulders or old injuries. The research above supports modest, cautious statements for certain kinds of back pain, and nothing more sweeping. Posture is a similar story: strengthening and body awareness may help some people feel more comfortable in how they sit and stand, but no exercise method reliably “corrects” posture, and there is no single ideal posture to correct to. For anything that looks like rehabilitation, such as recovery from surgery, a diagnosed spinal condition or persistent pain, the right starting point is a physician or physical therapist, who can tell you whether Pilates is appropriate and in what form. A Pilates instructor can complement that care but is not a substitute for it.
Where Pilates fits in your weekly activity
Even if Pilates is not a miracle, it can fit neatly into a healthy routine. The trick is to understand what a Pilates class covers and what it leaves to other activities.
What national guidance asks of adults
The Physical Activity Guidelines for Americans advise adults to aim for 150 to 300 minutes of moderate-intensity aerobic activity each week, plus muscle-strengthening activity on at least two days. The guidelines also state that any amount of activity has some health benefit, and that you do not need to complete it in one session. The Centers for Disease Control and Prevention summary for adults repeats these targets and offers a vigorous-intensity alternative of 75 minutes a week. These are general public health targets, not Pilates rules, but they are a useful frame: a few short Pilates sessions can contribute to the strength side of the picture, and most beginner classes are not designed to deliver the aerobic side.
Popularity is not proof
You will see Pilates described as the fitness trend of the moment, and the numbers back up the popularity. According to ClassPass’s own 2025 Look Back Report, Pilates was the most popular workout category on its platform for a third straight year, with reservations up 66 percent from 2024, and it was the class new users were most likely to book first. Those figures describe booking behavior among one company’s members, not health outcomes, and they should not be read as proof that Pilates works better than other exercise. What they do suggest is practical: beginner-friendly Pilates is easy to find in most large cities, and you are far from the only newcomer in the room.
Myths and facts, sorted
Some of the most persistent ideas about Pilates are half-true, which makes them harder to shake than outright falsehoods. The table below pairs common myths with what the evidence and good teaching practice say, and the two short sections after it add context.
| Common myth | What is closer to the truth |
|---|---|
| You have to be flexible to start. | Flexibility is something Pilates can build over time, not an entry requirement. Good instructors offer options for tight hamstrings, stiff hips and limited range. |
| Real Pilates needs a reformer. | Mat work is a foundation of the method, and the reformer is one piece of apparatus among several. Many people begin on the mat and add equipment later, or the other way around. |
| Pilates melts fat or reshapes one body area. | Spot reduction is not supported, and mat Pilates was not shown to beat other exercise for body composition in the review above. |
| If it does not burn or shake, it is not working. | Precision and control matter more than fatigue. Some of the best-taught moves look small from the outside. |
| Pilates counts as your cardio. | Most beginner classes are paced for control, not for raising your heart rate for sustained periods. Pair them with walking, cycling or other aerobic activity. |
| Beginner means easy. | Beginner means slower and simpler to learn. The control the moves demand can challenge people who are very fit in other ways. |
| It is safe for everyone with no changes. | Many people exercise safely with modifications, but some conditions call for clinician input first. See the safety section later in this guide. |
Myths about who Pilates is for
The idea that Pilates is for dancers, the already-flexible or a narrow type of person is more about branding than reality. Studios fill with office workers, runners, new parents, retirees and people returning to exercise, and the better beginner classes are built to suit mixed abilities in the same room. If a studio website leans heavily on one body type or one lifestyle in its photos, that tells you about the marketing department, not the method. The question to ask is practical: does this class description mention modifications, beginner pacing and small enough groups for the teacher to see you? If yes, you are probably welcome.
Myths about results
Results talk is where most of the exaggeration lives. Reasonable expectations after a few weeks of consistent practice are things like better breath control during effort, a stronger sense of where your pelvis and ribs are, and moves that felt impossible on day one feeling more organized by week four. Those are modest and real. Promises of dramatic physical change in a fixed number of weeks are not something this guide can support, and you can safely ignore them. A separate guide on signs your Pilates practice is working covers realistic markers of progress so you can track what matters.
Mat, Reformer and Other Formats
Walk into a studio schedule and you may meet five or six class names before you find one you understand. This section keeps the format question short: what the main options are, how to choose between them as a beginner, and where to go for the full story on each. Mat Pilates here means the workout method done on the floor; physical mats as products come up later in the home-start section.
The main formats beginners meet
For pilates for beginners, two formats account for most of what is on offer, with a handful of other apparatus appearing in more advanced or private settings.
Mat Pilates: the method’s foundation
Mat Pilates is done on the floor, using your body weight for resistance and sometimes small props such as a light band, a soft ball or a ring. It is the most accessible way in, because it needs little space and almost no equipment, and because the exercises you learn on the mat transfer to everything else. The tradeoff is that gravity is your only built-in resistance and you get no mechanical feedback, so your own awareness has to do more of the work. That makes a good instructor especially valuable early on. For a full introduction to the workout itself, see beginner Mat Pilates workout, which expands on the format at a deeper level than this overview can.
Reformer and other apparatus
The reformer is a low frame with a sliding carriage, adjustable springs, a footbar and straps. Springs add resistance while also providing support in some positions, which is why reformer work can feel easier to learn for some people and harder for others. Spring tension is not standardized across brands, so a “light” or “medium” setting on one machine may feel different on another; the sensible approach is to follow your instructor’s setup and the manufacturer’s manual rather than copying someone else’s numbers.
Beyond the reformer, traditional studios may also have a trapeze table (often called the Cadillac), a Wunda chair, a ladder barrel, a spine corrector and a magic circle, which together read like a furniture catalog from a very strict aunt. A beginner rarely needs more than a general sense of what each is for. For the equipment-specific view, reformer Pilates for beginners is the next stop.
How to choose between them
You do not have to pick a permanent side. Most people try more than one format over their first year, and the skills overlap. A few decision criteria help you pick a starting point without agonizing.
Start with the format your goals and logistics support
Think about three things: your space and schedule, your budget and the kind of guidance you want. If you live near a studio with a well-regarded beginner mat class, that may be the lowest-friction start. If you want mechanical support and enjoy variety, a reformer intro series can be appealing, though availability and cost vary widely by studio and city.
If your schedule is unpredictable or your budget is tight, online mat classes or a short block of private sessions followed by home practice can work well. None of these paths is the correct one. The better question is which one you will repeat three times in the next month, because consistency is what builds familiarity.
Reading class names and labels
Studios invent names freely: “sculpt,” “flow,” “fusion,” “burn,” “jump” and “high-intensity” can all be attached to a Pilates label, and they tell you the vibe more than the content. ClassPass’s 2025 report lists reformer Pilates, high-intensity Pilates and mat Pilates as the three most-booked Pilates variations on its platform that year, with mat showing the fastest year-over-year growth of the three, according to the company’s own figures. The takeaway for you is that the same word covers very different experiences. Read the class description, check whether it says “beginner,” “foundations” or “level 1,” and ask the studio how an intro class differs from the rest of the schedule. When in doubt, a foundations or intro class is almost always the safer first booking.
| Format | What it involves | Good fit if | Trade-offs |
|---|---|---|---|
| Mat Pilates | Floor-based exercises using body weight, sometimes with small props | You want a low-cost, low-equipment start or plan to practice at home | Less mechanical feedback; relies more on instructor cues and your own awareness |
| Reformer Pilates | Sliding carriage, springs, straps and a footbar; spring tension varies by brand | You like structured, equipment-led sessions and have a nearby studio | Usually requires a studio; class sizes and access vary; setup differs between machines |
| Other apparatus (chair, trapeze table, barrel) | Springs and platforms that add support or resistance in specific ways | You are working with a private teacher or a full classical or comprehensive studio | Less common in group beginner schedules; more to learn at once |
| Hybrid or high-intensity labels | Pilates ideas mixed with cardio, strength or dance styles | You already have a base of control and want a faster pace | Pace can outrun technique; ask whether the class suits first-timers |
Choosing and Preparing for Your First Class
The first class is where Pilates stops being a concept and becomes something you do with your own body. A little preparation turns it from a leap of faith into a reasonable experiment. This section covers where to take that first class, what to ask before you book, what the hour tends to look like, and what to wear and bring. If your main concern is nerves rather than logistics, what to expect in your first Pilates class is the better companion piece.
Studio, online or private: which first step fits
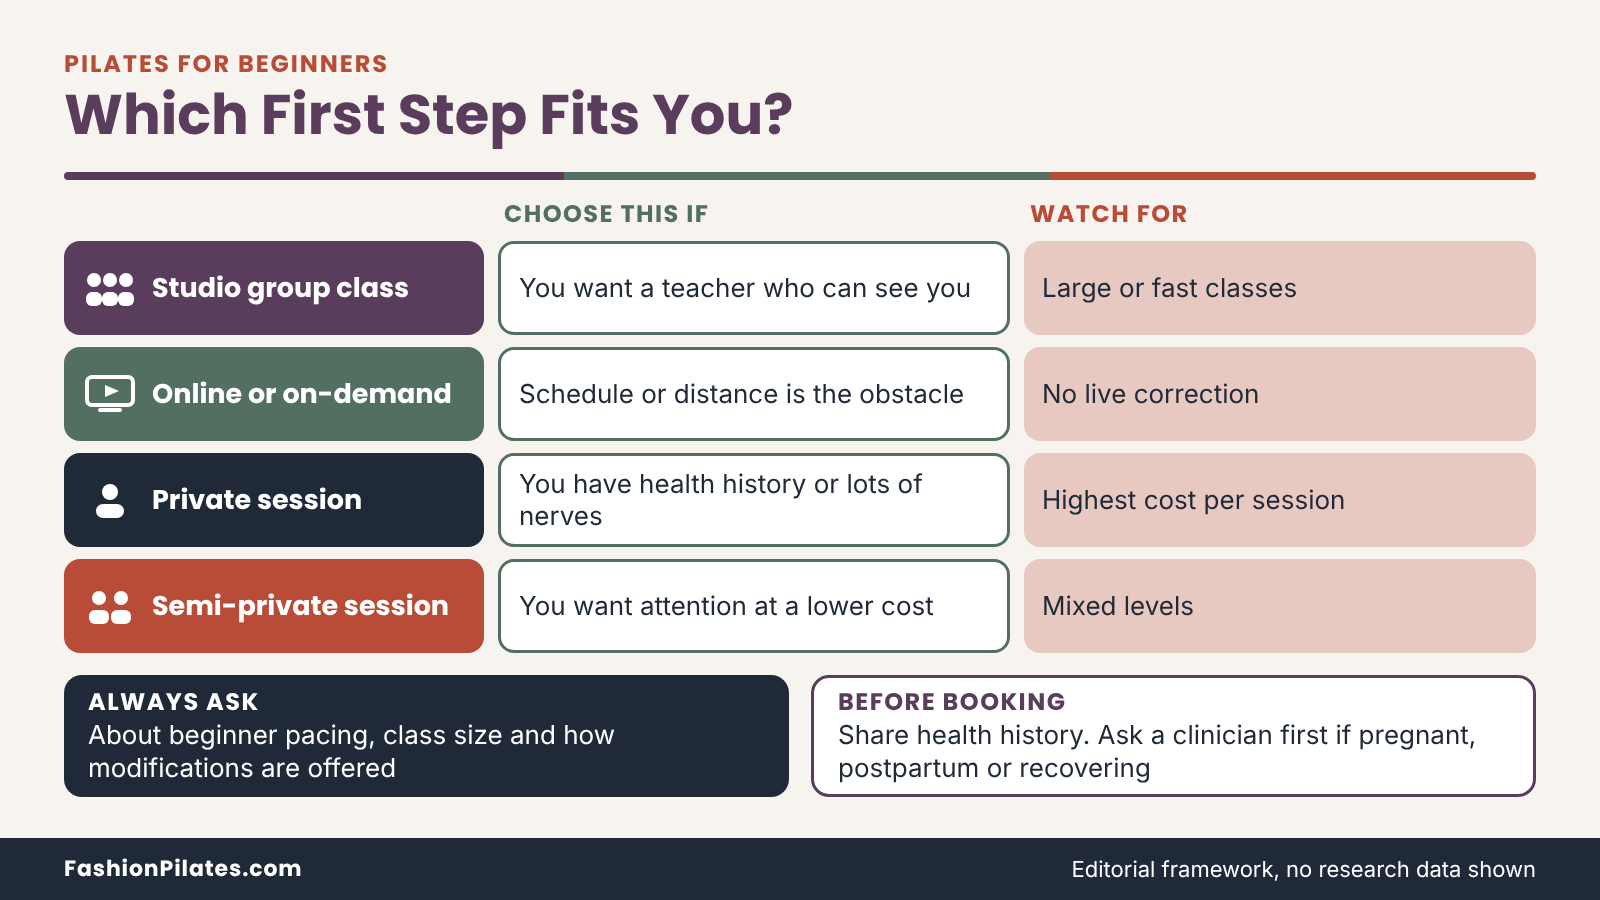
There are three common entry points, and each solves a different problem. The right choice depends less on which is best in general than on which removes the biggest obstacle in your particular week.
In-studio group classes
A group class in a studio gives you a teacher who can see you, a room that signals “this is the time for Pilates,” and equipment you do not have to buy. It is also the best way to find out whether you like the atmosphere. The tradeoff is that the teacher’s attention is divided, so a large or fast class can leave a first-timer guessing.
Look for classes labeled for beginners or foundations, and read the studio’s description of class size and level before you commit. Many studios offer a trial class or an intro package, which is a sensible way to test a teacher without committing to a full membership. If a studio cannot tell you how it treats first-timers, that is useful information.
Online and on-demand classes
Online classes win on convenience and cost flexibility: you can practice at home, repeat a session as often as you like and move on your own schedule. They suit people who live far from a studio, have caregiving or shift-work constraints, or want to build confidence before walking into a room. The limits are real, though.
No one can see your alignment, so errors can go uncorrected, and it is easy to follow along without understanding why a cue matters. Choose programs where the instructor explains position clearly, speaks at an unhurried pace and offers modifications on screen, and consider pairing them with an occasional in-person or live session to check your form. Pilates at home guide covers the practical setup in more depth.
Private and semi-private sessions
A private session means a teacher working with you alone, and a semi-private session usually means two or three people. It is the fastest route to personalized feedback, which makes it especially useful if you have a health condition, a past injury or a lot of anxiety about getting it wrong. It also tends to be the most expensive per session, which is why many people use a short block of privates to learn the foundations and then move into group classes or home practice. Be specific when you book: tell the teacher about any medical issues, surgeries or pregnancy status, and what you hope to be able to do in a few weeks. A good instructor will adjust the plan and, where appropriate, suggest that you check with your clinician first.
| Option | Best for | Watch out for | What drives the cost |
|---|---|---|---|
| Group class in a studio | People who like structure, equipment access and a teacher who can see them | Large or fast classes where beginners get little attention | Class format, location, intro offers versus memberships, equipment type |
| Online or on-demand | Flexible schedules, travel, caregiving, or building confidence at home | No live correction; easy to follow without understanding the cues | Subscription versus single class, live versus recorded, whether props are needed |
| Private session | Health conditions, injury history, or wanting a personalized foundation | Highest cost per session; quality depends entirely on the teacher | Teacher experience, session length, location, package size |
| Semi-private session | Wanting personal attention with a lower cost, or starting with a friend | Mixed levels in the same session can dilute individual feedback | Group size, equipment, teacher experience |
Questions to ask before you book
Most studios welcome questions, and the answers tell you more than the website does. Asking is also a quiet way of showing the studio that you are paying attention, which tends to get you better service.
Questions about the class
Ask whether the class is truly beginner-appropriate or simply open to all levels, and what that means in practice. Ask how many people it usually holds and whether the teacher moves around the room to correct form. Ask what equipment you will use and whether you need to bring anything.
Ask how modifications are offered, because “we always show options” is a very different answer from “advanced students will tell you what to do.” Ask about the cancellation and late-arrival policy so you are not surprised by a fee. If you have a health condition, ask whether the teacher is comfortable with it and mention it before class, not in the middle of an exercise.
Questions about the teacher and the studio
Ask what training the teacher has completed, how long they have taught, and whether they regularly teach beginners. A confident instructor will answer plainly. You can also ask about their approach to hands-on adjustments, since many people prefer to opt in or out, and a professional teacher will respect that.
Ask what the studio does when a client reports pain, dizziness or a health issue during a session, and whether it has a process for pregnancy, postpartum or post-surgery clients. The goal is not to quiz anyone but to find out whether the studio treats safety as a system rather than as an afterthought. The next section on instructors covers certification in more detail.
What to expect, minute by minute
Class structures vary by studio, format and teacher, so treat the timeline below as a typical shape rather than a standard. A beginner mat or reformer class generally moves from arrival and setup to warm-up, then to the main sequence, then to a cool-down and a few minutes to collect yourself.
Before class: arrival, forms and setup
Plan to arrive early on your first visit, since most studios need time for check-in and a short health or waiver form. This is the moment to tell the teacher about anything relevant, such as an injury, pregnancy, joint issue or recent surgery, and to ask where to put your bag. On a reformer, the teacher will usually walk you through the equipment, including the footbar, straps and springs, and may set the spring tension for you.
Take that setup seriously, since it differs from machine to machine. If anything feels unstable or confusing, say so before the class begins. Nobody expects a first-timer to know the parts of a reformer, and teachers prefer a question at minute two over a mistake at minute twenty.
During class: the shape of a typical hour
The table below shows a typical flow for a roughly 50-to-55-minute beginner class. Real classes shift the times around, and some are shorter, but the order of arrival, warm-up, strengthening work and wind-down is fairly consistent. You will probably spend more time than expected on breathing and positioning early on, and that is not wasted time; it is the foundation for everything after it.
Expect to be asked to try variations, to pause and reset, and to hear the same alignment cues more than once. If you fall behind, that is fine. Quiet repetition at your own pace beats keeping up with the teacher’s demonstration and compromising your form.
| Approximate time | What happens | What you do |
|---|---|---|
| Before class (10 to 15 minutes early) | Check-in, waiver or health form, brief chat with the teacher | Share relevant health information; ask any setup questions; settle your gear |
| Minutes 0 to 5 | Welcome, short introduction, breathing and position basics | Learn the breathing pattern and how the teacher describes neutral and imprint |
| Minutes 5 to 15 | Warm-up for the spine, hips and shoulders | Move slowly through small ranges; notice any area that feels tight or uncomfortable |
| Minutes 15 to 40 | Main sequence of foundational exercises, often in a set order | Do each move with the options offered; rest when form slips; ask for a modification if needed |
| Minutes 40 to 50 | Stretching or gentle cool-down, sometimes a final integration move | Slow your breathing; note which exercises felt easier or harder |
| Final minutes | Wrap-up, questions, studio announcements | Mention anything unusual you felt; ask what to practice before the next class |
What to wear and bring
This can be short because the requirements are modest. The full wardrobe conversation, including fabric choices and fit, lives in its own guide, so here is only what you need to get through a first class comfortably.
Clothing basics
Choose clothes that let you move freely and stay put when you are upside down or stretching, such as fitted layers that will not ride up over your face when you roll, and bottoms that are not see-through when you bend. Avoid anything that needs constant adjusting, since you will want your attention on your breathing. Skip heavy zippers, buttons or hard buckles that can dig in while you lie down. A teacher needs to see your joints and the line of your spine, which is a good reason to avoid very loose tops. The complete breakdown, including what to look for in leggings and layers, is in what to wear to Pilates class.
What to bring and what to leave at home
Bring water, a small towel if you tend to sweat, a hair tie and any health information the studio asked for. Many studios, especially reformer studios, ask for grip socks, so check the policy when you book and ask whether you can buy or borrow a pair on site. Ask whether the studio provides mats, props and towels before you buy anything. Leave jewelry that can snag, large bags and your phone ringer at home or in a cubby.
Everything else is optional, and gym-bag chaos is the enemy of calm. If you are tempted to buy a pile of accessories before class one, do not. You will know what you actually need after a few sessions.
Instructors, Certification and Budget
Two decisions shape your first few months more than any exercise: who teaches you and what it costs you in money and time. Neither is mysterious, but both are muddied by marketing. This section gives you criteria for judging an instructor, a plain account of what certification does and does not tell you, and a way to think about total cost that works without anyone quoting you a price.
How to pick an instructor
For a beginner, the teacher matters more than the equipment, the studio’s décor or the playlist. A skilled instructor can make a mat class feel safe and clear, and a rushed one can make a pricey reformer studio feel like a guessing game.
What to look for in a beginner teacher
Good beginner teaching has a recognizable shape. The instructor explains a position before asking you to move, describes each exercise in simple language, offers at least one easier option and one harder one, and watches the room instead of staring at a screen or demonstrating nonstop. They give you reasons, not just commands, so you understand why the ribs stay settled or the pelvis stays still.
They are comfortable saying “skip that one today” and they respond calmly if you report discomfort. If a teacher pushes through your hesitation, ignores a stated injury or leaves you unsure where to put your hands, that is a sign to keep looking. A free trial class or an intro offer is a low-risk way to audition someone before you commit.
What certification means, and what it does not
Pilates teaching in the United States is typically credentialed by professional organizations and training schools rather than by a government license, so credentials vary a great deal. The Pilates Method Alliance, a not-for-profit professional organization founded in 2001, says it works to establish standards for instruction and for teacher education. One credential in the field is offered through the National Pilates Certification Program. According to the program’s requirements page, comprehensive certification requires candidates to be at least 18, to have completed a comprehensive education program of at least 450 hours covering the mat and six pieces of apparatus, and to pass an exam; separate mat-focused credentials also exist.
Those details change over time, so check the current page. Other schools offer their own training and credentials, some of them excellent. A credential tells you someone met a training standard. It does not guarantee they will be a good fit for you, so ask about both training and experience with beginners.
A total-cost framework without the sticker shock
Prices for Pilates vary enormously by city, studio, format and teacher, and they change often enough that any number printed here would go stale. What stays stable is the logic for comparing options. You can evaluate any studio’s pricing by looking at a handful of factors and doing a little arithmetic.
The cost factors that actually matter
The sticker price per class is only one input. The table below lists the factors that change what you really pay, and what you can do about each. A recurring theme: the cheapest-looking option on paper is not always the cheapest per class you actually attend. If a membership requires four visits a month to break even and you realistically manage two, the effective price per visit is not what the poster says. Time matters too, because a studio that is a long commute away will quietly lose to one you can reach in ten minutes.
| Cost factor | How it changes your total | How to keep it in check |
|---|---|---|
| Pricing structure (single class, pack, membership) | Packs and memberships lower the per-class rate only if you attend often enough | Start with an intro offer or small pack; commit to a membership after you know your habits |
| Format and equipment | Equipment-based and small-group formats usually cost more than mat or online classes | Begin with mat or online options, then add reformer sessions as a deliberate upgrade |
| Private or semi-private sessions | Higher cost per session, but fewer sessions may be needed to learn the basics | Use a short block to learn foundations, then continue in groups or at home |
| Cancellation and no-show rules | Fees or lost credits add up if your schedule is unpredictable | Read the policy before you book; choose studios with rules that match your routine |
| Gear (mat, grip socks, props) | One-time or occasional expenses that can balloon if you buy before you need | Ask what the studio provides; buy basics only after a few sessions |
| Travel and time | Commute time and parking can outweigh a lower class rate | Favor locations that fit your existing route; consider online classes on busy weeks |
A four-step way to decide
First, set a monthly ceiling that you can sustain without stress, because a plan you resent is a plan you will abandon. Second, estimate how many sessions you will honestly attend each week for the next two months, and use a conservative number. Third, divide the cost of each option by the number of sessions you will really use, which gives you a fair comparison between a membership, a pack and pay-as-you-go. Fourth, decide what you are paying for beyond the class itself, such as teacher quality, convenience or atmosphere.
If an option wins on cost per attended session and passes the teacher test from earlier, book the shortest commitment available. You can always extend it later. If you want a tour of equipment spending, Pilates equipment and gear guide lays out what to buy and in what order.
Starting at Home
You do not need a studio to begin, and you do not need a corner full of equipment. A home start works best when it is modest: a clear patch of floor, a decent surface to lie on and a beginner-friendly source of instruction. This section covers how to set up, what to improvise, how to think about a mat, and how to practice without a teacher watching you.
Setting up a space that works
The ideal home Pilates space is boring in the best way. It is quiet enough to hear a teacher’s cues, clear enough that you will not hit a table leg, and consistent enough that you do not have to think about it each time.
Space, surface and safety
Aim for an area where you can lie down with your arms overhead and legs extended, with a little clearance on every side, which in most homes means a rectangle a bit longer than your height with room to spread your arms. Measure it, since mat lengths vary and the listing should state the dimensions. A flat, stable floor is best.
Hardwood and low-pile carpet both work, but a surface that slides under your mat or a thick shag rug that wobbles can make balance exercises harder than they need to be. Keep sharp furniture corners out of your swing range, put your phone on silent, and keep a wall or sturdy surface nearby for orientation. If you have pets or small children, plan for visitors, because a dog sitting on your mat mid-sequence is not a technical error.
Props you can improvise
Many early exercises call for a prop, and most can be improvised. A folded towel under the head can make a supine position more comfortable if your chin lifts toward the ceiling. A firm pillow or rolled towel can support the lower back or sit between the knees for certain exercises. A long towel or a non-stretchy strap can replace a band in some stretches, though a proper light band is inexpensive and works better.
Ask your teacher before you improvise anything heavy or unstable. If a prop makes a move feel precarious or changes how it feels in a way the instructor did not describe, set it aside. The point of props is support and feedback, not novelty.
Choosing a mat and starting equipment
Equipment questions can swallow a lot of time that is better spent practicing. This section is a bridge to the detailed buying advice elsewhere on the site, not a replacement for it.
What a beginner should expect from a mat
A Pilates mat, as a product, has different priorities than a mat you might use for other activities. You are often lying on your back, rolling through the spine and kneeling, so cushioning for the spine, hips and knees matters, along with a surface that stays put on your floor. Thickness is usually listed in millimeters on the product page, and very soft mats can feel unstable in standing or kneeling positions, so thicker is not automatically better.
Check the listed dimensions against your height and floor space. For a criteria-led walkthrough that compares thickness, density and grip, see how to choose a Pilates mat. A mat is the one purchase worth considering early, and everything else can wait until you have been practicing for a few weeks.
Practicing safely without a teacher in the room
Self-guided practice can be steady and enjoyable if you set it up deliberately. Choose one beginner program and stick with it for several weeks, instead of hopping between styles that contradict each other. Keep sessions short at first, since twenty focused minutes is better than forty that drift. Pause a video if you need to read a cue again.
Use a mirror or the front-facing camera on your phone occasionally to check that your shoulders are down and your pelvis is not rocking, if that does not distract you. If something hurts in a sharp or pinching way, stop that move instead of searching the internet for a workaround. A single in-person or live session every so often can correct habits that video cannot see.
The Beginner Vocabulary
Pilates teachers speak a shorthand that can sound like another language in your first week. “Imprint,” “scoop,” “articulate” and “powerhouse” are common examples. The vocabulary matters because it is how cues are delivered, and cues are how you learn without someone moving your limbs for you. Teachers and schools use some terms differently, so treat the definitions below as common meanings and let your own instructor’s usage win.
Alignment words
Alignment terms describe where your bones should be relative to one another. They are the vocabulary of setup, and getting them right before the movement begins is most of the battle.
Neutral spine and imprint
Neutral spine means keeping the natural curves of your spine instead of flattening or exaggerating them, and neutral pelvis refers to the pelvis position that matches it. An alignment excerpt from Human Kinetics, a fitness-education publisher, notes that neutral is a more modern emphasis than the original method and is valued for how well it transfers to everyday movements that do not involve rounding the spine. Imprint is the other option: you gently draw the abdominal wall in so that the lower back moves toward or touches the mat, with a small posterior pelvic tilt. Teachers often use imprint when your legs lift and the lower back might arch. Which one you use depends on the exercise and your teacher’s instructions.
Ribs, shoulders, head and neck
Ribs, shoulders and neck often get cues of their own. “Ribs down” or “ribs settled” refers to preventing the front of the rib cage from flaring forward as your back arches, usually by engaging the upper abdominals gently. Keeping the shoulder blades down and wide, rather than shrugged toward the ears, supports the neck and helps arm movements feel free. For the head and neck, the typical cue is to keep the chin slightly tucked, as though holding a small orange between chin and chest, so the neck stays long when you lift your head. If your neck tires before your abdominals do, a hand behind the head or a lower lift is usually the right fix.
Movement and breathing words
The second set of terms describes how to move and breathe, and they tend to be more variable between teachers. When a cue is unclear, ask for a different description rather than guessing.
Scoop, powerhouse and articulation
“Scoop” or “draw in” usually asks you to gently pull the lower abdomen inward and slightly upward, as though zipping a pair of tight jeans, without sucking in so hard that you stop breathing. The “powerhouse” is the Pilates name for the center of the body, the trunk and hips from which movement is meant to start. “Articulation” means moving the spine one segment at a time, like peeling a string of beads off the floor, instead of lifting in one stiff piece.
A “prep” version of a move is an easier preparatory version used before the full exercise. None of these words is mystical. Each one is a quick way to ask for a specific muscle action or sequence.
Breathing and positions
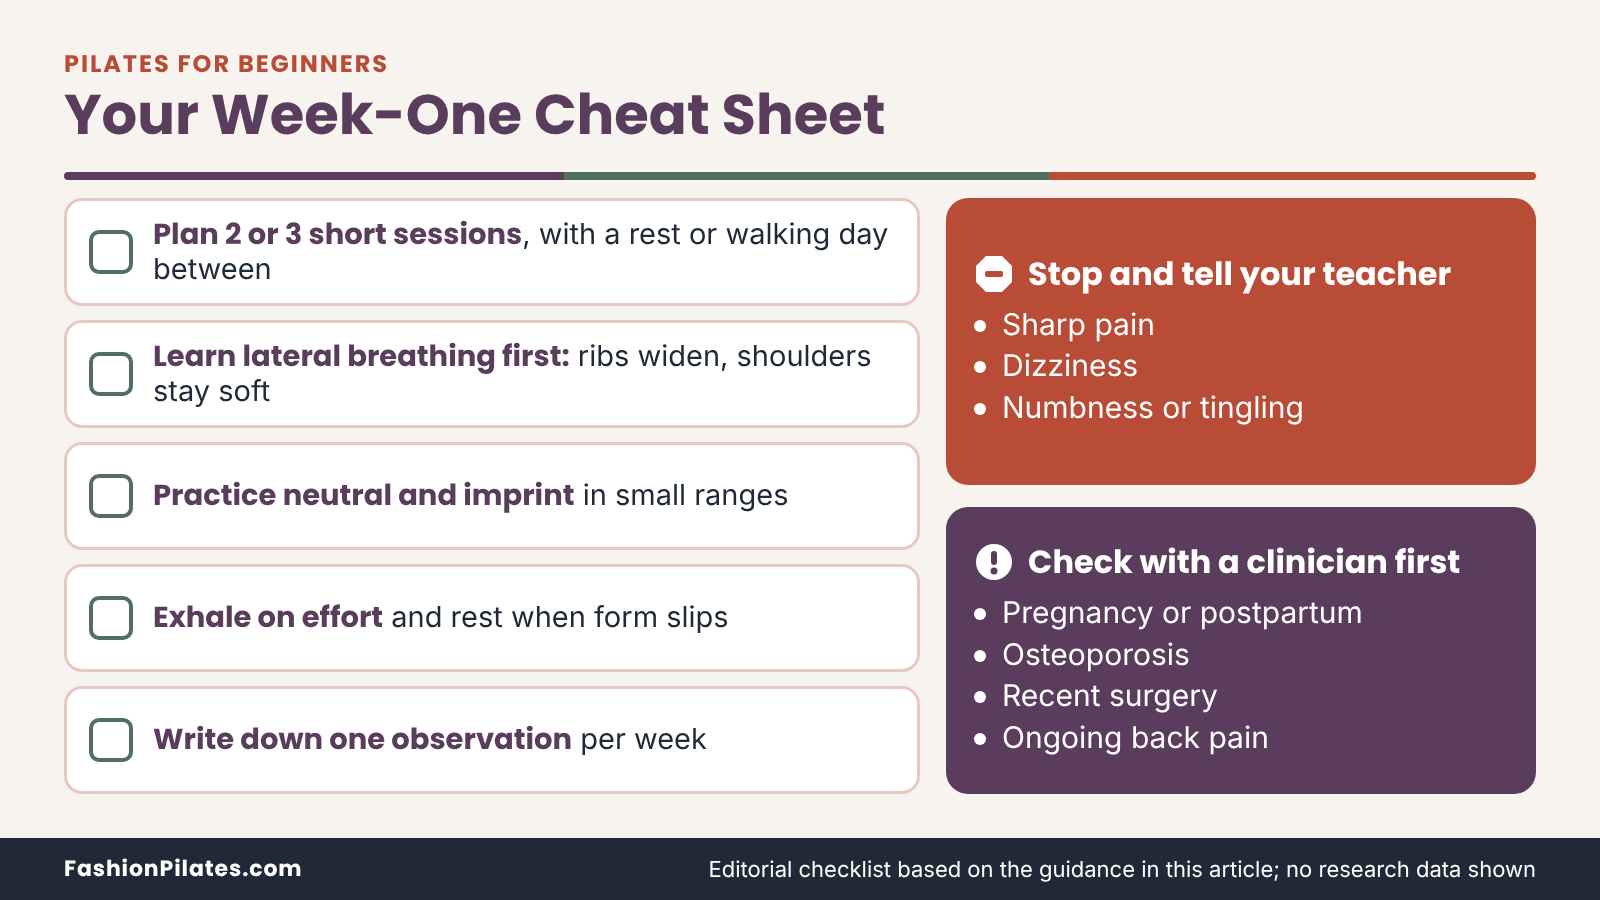
Breathing cues vary by teacher, but a common one is to breathe so the ribs widen to the sides and back, sometimes called lateral or thoracic breathing, instead of lifting the shoulders. Inhale usually prepares the movement and exhale usually accompanies the effort, though some exercises reverse this. “Tabletop” describes lying on your back with knees bent over hips and shins parallel to the floor, a position that feels easy to describe and hard to hold. A “C-curve” refers to the rounded shape of the spine in rolling or seated exercises. You will hear all of these quickly, so the table below is worth bookmarking for your first few classes.
| Term | Plain-English meaning | A cue you might hear | Common mix-up |
|---|---|---|---|
| Neutral spine | Natural curves of the spine maintained, not flattened or exaggerated | “Find your neutral” | Believing neutral means flat or rigid |
| Imprint | Lower back gently moves toward the mat with a slight pelvic tilt | “Imprint your spine” | Pressing the back hard into the floor |
| Scoop | Drawing the lower abdomen in and slightly up | “Scoop the belly” | Sucking in so hard breathing stops |
| Powerhouse | The trunk and hips, where movement is meant to begin | “Move from your powerhouse” | Thinking it means only the abdominals |
| Articulation | Moving the spine one segment at a time | “Peel down, one vertebra at a time” | Lifting in one stiff piece |
| Lateral breathing | Breathing so the ribs widen to the sides and back | “Breathe into your back and sides” | Lifting the shoulders on inhale |
| Tabletop | On your back, knees over hips, shins parallel to the floor | “Bring your legs to tabletop” | Letting the knees drift toward the chest |
| C-curve | A rounded, supported shape of the spine | “Round into a C” | Collapsing the chest instead of lengthening |
| Prep or preparatory version | An easier, shorter version used before the full exercise | “We will do the prep today” | Treating prep as a lesser exercise |
Nine Foundational Moves With Precise Cues
These nine mat exercises are the ones beginner classes return to again and again, because they teach the building blocks: breathing, pelvic and spinal control, abdominal work, hip stability and coordinated reaching. They are a primer for learning the ideas, not a complete workout and not a substitute for a teacher who can see you. Work through them slowly, one action at a time, and stop any move if you feel sharp pain, pinching, dizziness, numbness or tingling. This is general fitness education, not individualized medical advice, so if you are pregnant or postpartum, have osteoporosis, back or neck pain, or are recovering from surgery, read the safety section later in this guide and check with your clinician before trying them.
A few ground rules apply to all nine. Use a comfortable mat on a stable floor. Move at the pace of your breath, which usually means three to five seconds per phase.
Start with the smaller number of repetitions listed and add only when the move feels organized and unhurried. If form slips, shorten the range or rest, since extra repetitions done badly teach your body the wrong pattern. The moves are grouped in the order a teacher might introduce them: foundations first, then abdominal work, then back, hips and whole-body control.
Foundations: breath, pelvis and spine
These first three moves are about learning your own alignment. They look modest and they are, but they set up everything that follows, and many experienced practitioners still return to them as a warm-up.
Move 1: Lateral breathing
Starting position: lie on your back with knees bent, feet flat about hip-width apart, and place your hands lightly on the sides of your lower ribs. Action:
- Inhale slowly through your nose and feel your ribs widen into your hands, without lifting your shoulders or arching your lower back.
- Exhale slowly through your mouth as the ribs soften and the lower abdomen gently draws in.
- Repeat for five to eight full breaths, keeping your jaw, neck and shoulders loose.
Cue to remember: the belly stays quiet and the sides of the rib cage do the traveling. If this feels awkward, you are in good company, since many people breathe into the chest or belly only. For a modification, place a small folded towel under your head, or practice sitting in a supportive chair. Stop if you feel lightheaded and return to your normal breathing.
Move 2: Pelvic tilt and imprint
Starting position: lie on your back with knees bent and feet hip-width apart, arms by your sides, with your spine in a comfortable neutral position that keeps a small natural curve in your lower back. Action:
- Inhale to prepare, keeping the pelvis still.
- Exhale and gently tilt your pelvis so your lower back moves toward the mat, as if the tailbone were curling slightly toward the ceiling, to find imprint.
- Inhale and let the pelvis return to neutral.
- Repeat six to eight slow repetitions.
Cues to remember: the motion is small, the thighs and buttocks stay relaxed, and the feet do not push into the floor to force the tilt. This move teaches you the difference between neutral and imprint, which the vocabulary table described earlier. If tilting the pelvis causes pain, reduce the range or skip it and tell your teacher. Some people find it easier to feel the movement when they rest their fingertips on the front hip bones.
Move 3: Pelvic curl
Starting position: lie on your back with knees bent, feet flat, hip-width apart and parallel, arms long by your sides with palms pressing lightly down. Action:
- Inhale to prepare.
- Exhale, tilt the pelvis into imprint, and peel the tailbone and then the spine off the mat one segment at a time until your body forms a diagonal line from shoulders to knees.
- Inhale and hold briefly, without arching the lower back higher.
- Exhale and roll down slowly, upper back first and tailbone last, until you reach neutral again.
- Repeat five or six times.
Cues to remember: weight stays in the feet and upper back, not the neck; ribs stay settled; knees stay hip-width instead of splaying or squeezing. Modification: lift only a few vertebrae and lower again. Skip or modify this move with your clinician’s guidance if you have a recent back or pelvic procedure.
Abdominal work: chest lift, leg folds and single leg stretch
This group introduces the abdominal strengthening that Pilates is known for. The key theme is stability: your pelvis and ribs should stay still while something else moves.
Move 4: Chest lift
Starting position: lie on your back with knees bent, feet flat, and rest your fingertips or both hands lightly behind the head to support its weight, elbows wide. Action:
- Inhale to prepare, keeping your ribs settled and your neck long.
- Exhale and nod your chin slightly, then curl your head, neck and the top of your shoulder blades off the mat, keeping your gaze toward your thighs.
- Inhale and hold the lift without letting the ribs flare.
- Exhale and lower slowly, one body part at a time.
- Repeat six to eight times.
Cues to remember: keep a small space between chin and chest, and let the abdominals, not the hands, do the lifting. Modification: keep the head down and practice only the breath and the abdominal draw, or lower the lift height. This move rounds the upper spine, so people with osteoporosis, neck pain or those in later pregnancy should get clinician guidance before trying it.
Move 5: Knee folds
Starting position: lie on your back with knees bent and feet flat, spine in neutral or gentle imprint as your teacher directs, arms long by your sides. Action:
- Inhale to prepare, keeping the pelvis steady.
- Exhale and lift one foot off the floor, folding the knee until it sits above the hip with the shin parallel to the floor.
- Inhale and lower that foot with control until the toes touch the mat.
- Alternate sides for six to eight repetitions each.
Cues to remember: the pelvis should not rock or tip toward the lifted leg, and the ribs should stay settled. If you feel the lower back arching or the hip flexors gripping, reduce the lift. Modification: slide the heel along the mat to bend the knee instead of lifting the foot. Progress slowly by lifting both feet to tabletop only when single-leg control feels easy.
Move 6: Single leg stretch, head down
Starting position: lie on your back with one foot flat on the mat and the other knee folded to tabletop, with both hands resting on the shin of the lifted leg, head down. Action:
- Inhale to prepare, keeping the pelvis steady.
- Exhale, switch the legs by lowering the folded foot to the mat while folding the opposite knee up, and move your hands to the new shin.
- Continue alternating with a smooth rhythm for four to six switches on each side.
Cues to remember: let the exhale set the rhythm, keep elbows wide, and let the lower back stay still instead of arching when the leg changes. This is a beginner-friendly version of a classic exercise that is normally taught with the head and chest lifted, and your teacher may add that later. Modification: keep the standing foot lower to the floor. Stop if you feel strain in the neck or lower back.
Back, hips and whole-body control
The last group trains the hips, the back and the way the trunk holds steady while arms and legs reach. These are the exercises that start to feel like coordination, not just strength.
Move 7: Side-lying leg lifts
Starting position: lie on your side with your body in one long line, hips stacked, bottom arm extended under your head or head resting on your arm, top hand on the mat in front of your chest, and your legs slightly forward of your body. Action:
- Inhale to prepare, lengthening through the waist.
- Exhale and lift the top leg to about hip height, no higher.
- Inhale and lower the leg slowly, with the hips still stacked.
- Repeat six to eight times, then change sides.
Cues to remember: keep the pelvis from rolling backward, let the waist lift slightly off the floor and keep the top foot in line with the knee. Modification: bend the bottom knee for stability or place a folded towel under your head. If you feel pinching at the hip, lower the lift height or ask your teacher to check your setup, since small changes in leg position matter a great deal.
Move 8: Cat stretch on hands and knees
Starting position: kneel on all fours with hands under shoulders, knees under hips and a long, neutral spine. Pad your knees if needed. Action:
- Inhale to prepare, lengthening the crown of the head away from the tailbone.
- Exhale and round the spine from the tailbone through to the head in a gentle C-curve, drawing the abdomen in and up.
- Inhale and return to a long, neutral spine without sinking the belly toward the floor.
- Repeat five or six slow rounds.
Cues to remember: initiate from the center of the body, keep shoulders away from the ears and avoid pushing hard through the hands. Modification: reduce the range of motion, or do the movement standing with hands on a counter. This exercise rounds and then extends the spine, so people with osteoporosis or a recent spine issue should clear it with their clinician first.
Move 9: Hand-and-knee leg slide and reach
Starting position: kneel on all fours in neutral spine, hands under shoulders and knees under hips. Action:
- Inhale to prepare, and settle your ribs so the trunk feels like a steady table.
- Exhale and slide one leg straight back along the floor, keeping the hips level.
- If that feels stable, lift the leg to hip height and reach the opposite arm forward, no higher than shoulder height.
- Inhale and return to the start, then repeat on the other side for four to six repetitions each.
Cues to remember: imagine carrying a tray on your lower back, so the pelvis does not tip. The neck stays in line with the spine, and the lifted leg stops at hip height. Modification: do only the leg slide, or only the arm reach, until balance is steady. If wrists complain, make fists or use forearms on the mat. A teacher can show you how these early reaches grow into more demanding exercises as your control improves.
Your First Four to Eight Weeks
A beginner plan has two jobs: to build the habit and to build the skill, in that order. The habit comes from showing up on a schedule that fits your life. The skill comes from repeating the basics until they feel organized. Nothing here is a prescription, and your instructor or clinician can adjust it for your body and history. Think of it as a sensible default you can bend.
How often to practice
There is no research-backed single frequency for beginner Pilates, so the sensible approach is to borrow from general public health guidance and adjust for how your body responds.
A realistic weekly rhythm
The Physical Activity Guidelines for Americans recommend muscle-strengthening activity on at least two days a week for adults, along with a weekly total of moderate-intensity aerobic activity. For most beginners, two or three Pilates sessions a week is a manageable way to cover the strengthening side without running into fatigue or soreness that derails the next session. Spread them out, with a rest or an easy walking day between sessions when you can.
If you can only do one session some weeks, that still counts, since the guidelines point out that some activity beats none. Notice how you feel the next morning. Mild muscle tiredness is normal, but sharp pain, joint pain or lingering soreness that changes how you move is a signal to scale back or check in with your teacher.
Session length, order and rest
At home, twenty to thirty minutes is plenty for a beginner session. A coherent order mirrors a studio class: begin with two or three minutes of breathing and gentle pelvic movement, then do the supine foundations (pelvic tilt, pelvic curl), the abdominal work (chest lift, knee folds, single leg stretch), and then hands-and-knees and side-lying work. Rest for about thirty seconds between exercises and as long as you need when form slips.
Transitions matter, so roll to your side to get up instead of sitting straight up from lying flat. Finish with a minute of quiet breathing. If you only have ten minutes, do the breathing, the pelvic curl and one abdominal move and call it a win.
Pilates for beginners: a week-by-week plan
The table below sketches an eight-week start. Weeks and sessions are suggestions, and you should repeat any week that still feels unclear. A common mistake is advancing because the calendar says so, not because the movements feel familiar.
| Weeks | Sessions per week | Focus | What a session looks like | Check-in question |
|---|---|---|---|---|
| Week 1 | 2 | Breathing, neutral spine and imprint | 15 to 20 minutes: lateral breathing, pelvic tilt, pelvic curl, a few chest-lift preps | Can I describe where my ribs and pelvis are during each move? |
| Weeks 2 to 3 | 2 to 3 | Adding abdominal work | 20 to 25 minutes: Week 1 moves plus chest lift and knee folds | Can I keep the pelvis still while a leg moves? |
| Week 4 | 2 to 3 | Hip and back control | 20 to 30 minutes: add side-lying leg lifts and the cat stretch | Do I feel supported and organized, or am I rushing? |
| Weeks 5 to 6 | 2 to 3 | Coordination | 25 to 30 minutes: add single leg stretch and the hand-and-knee reach | Does breath set my tempo? |
| Weeks 7 to 8 | 3, including one class if possible | Consistency and a form check | Full nine-move sequence, plus one studio or live class for feedback | What did the teacher correct, and does it make sense now? |
Weeks 1 to 4: learn the basics
The first month is about familiarity. Practice the same few movements often enough that they stop feeling like homework, and resist the urge to add new ones every session. Keep the ranges small and the pace unhurried, and use the first week to simply learn what neutral and imprint feel like in your own body.
If you are taking a studio class, let those sessions replace some home sessions instead of adding to them. By week four, the goal is that you can describe in your own words what each exercise is meant to do. If you cannot yet, repeat the week; there is no prize for finishing early.
Weeks 5 to 8: build consistency and add gentle progression
In the second month, add variety and a bit of challenge only where the basics feel solid. That might mean adding a repetition or two, slowing the tempo or trying the next progression your teacher recommends. Use at least one live or in-person class during this period, because a trained eye will catch habits that you cannot feel from the inside.
Keep a short note after each session about what felt clear and what did not, which gives you something specific to ask about. Avoid piling on every progression at once. Steady and slightly boring beats ambitious and sporadic, because a routine you can keep is worth more than an impressive one you drop in week three.
After week eight: where to go next
By week eight you will have enough experience to know what you like. The next step is a short list of options based on what you learned about yourself.
Mapping your next step
If you enjoyed the floor work and want more structure, a continuing beginner mat class is a sensible path. If you were curious about equipment, a reformer intro series is a natural step, ideally with the same teacher who taught you the foundations. If you liked working at home, a mat and a few props are worth a thoughtful look. The table below pairs common goals with the next place to explore. For the complete library of beginner resources, start from the Learn Pilates hub.
| If you want to | Go next to | Why |
|---|---|---|
| Keep building floor skills | Intermediate Mat Pilates progression | Adds new exercises on the same foundations |
| Try equipment-based classes | Reformer class etiquette and setup | Helps you prepare for spring-based work |
| Set up a better home practice | Pilates equipment hub | Covers mats, props and what to buy in what order |
| Look for what to wear as you progress | Pilates activewear hub | Clothing criteria for movement, coverage and comfort |
Tracking progress without obsessing
Progress in Pilates is subtle and easy to miss if you only look for visible change. Better markers include being able to feel your ribs and pelvis without being told, holding a position with less shaking, breathing more evenly through effort, and having a favorite move you did not like at first. Write down one observation per week, and compare month to month instead of day to day.
Bad days happen, and one off session says nothing about your trajectory. The goal is not to look a certain way but to move with more awareness and less strain. If that is happening, you are on track, whatever the scale or mirror says.
Common Beginner Mistakes and Fixes
Almost every beginner makes the same handful of mistakes, which is good news, because it means the fixes are well worn. None of these are failures. They are the normal friction of learning a movement method, and a good teacher will have seen each of them many times. Knowing the pattern lets you correct it faster, whether you are in a studio or on your living room floor.
Technique mistakes
Technique errors tend to cluster around breath, the neck and shoulders, and the way the pelvis and ribs move. They are usually the result of trying hard, not of doing something wrong on purpose.
Holding your breath and gripping the neck and shoulders
Concentration makes people hold their breath and lift their shoulders toward their ears. Both habits reduce your control and make the neck work harder than the abdominals. The fix is to treat the breath as part of the exercise: breathe out on the effort, keep the jaw soft and let the shoulders drop away from the ears before every repetition.
If your neck is tired before your abdominals are, lower the lift or support your head with your hands. Resetting between repetitions costs a few seconds and saves your form. It also helps to remember that a smaller, calmer version of a move is a legitimate version, not a consolation prize.
Letting the ribs flare, the pelvis rock or the lower back arch
Many early exercises ask you to keep the trunk still while a limb moves. Beginners often compensate by flaring the ribs, rocking the pelvis or letting the lower back arch away from the mat, which shifts work to the hip flexors or the back. The fix is to shrink the range until the trunk stays quiet, and then grow the range gradually.
Use the cues you learned earlier: ribs settled, pelvis steady, breath moving into the sides of the rib cage. A teacher or a mirror can help, as can placing a hand on the hip bones to feel whether they move. If the lower back complains, treat that as information and go back to an easier option.
Habit and mindset mistakes
Beyond technique, most trouble comes from how people structure their first weeks. The common patterns below are easy to spot once you know them.
Doing too much, too fast, or comparing yourself
Enthusiasm leads people to book five classes in a week, add repetitions every session or compare themselves to the person on the next mat. Soreness and frustration usually follow. Start with two or three sessions, add volume only when the basics feel organized, and keep your attention on your own mat.
Someone who looks effortless may have years of practice or an easier option that you cannot see. A teacher’s progression is a guide, not a race. If you leave a class feeling that you could have done more with good form, that is a better outcome than leaving exhausted with sloppy form.
Buying before learning, hopping between programs and ignoring pain
Gear can feel like progress, but a cart full of props will not replace practice, so wait until you know what you need. Switching between several programs every week can also confuse your cues, since different teachers use the same word to mean slightly different things. Pick one beginner pathway and give it a month. Most importantly, do not ignore pain.
Normal effort feels like muscular tiredness or mild shaking. Pinching, sharp, burning or joint-centered pain is a reason to stop that move, tell your teacher and, if it persists, speak with a clinician. Working through it is not toughness; it is how small problems turn into long ones.
| Mistake | What it looks like | Why it happens | Fix |
|---|---|---|---|
| Holding the breath | Face and chest tighten during effort; no audible exhale | Concentration and fear of getting it wrong | Exhale on effort; count a slow breath for each phase |
| Shrugged shoulders | Shoulders drift toward ears; neck tires early | Trying hard; weak shoulder awareness | Reset before each rep; lower the lift; support the head |
| Rib flare or back arch | Front ribs poke up when a leg lowers | Moving too far before control is ready | Shrink the range; use imprint when the teacher cues it |
| Rushing the tempo | Moves feel like a race; momentum does the work | Wanting to feel productive or keep up | Match movement to breath; slow down by half |
| Too much too soon | Soreness, fatigue, skipped sessions | Enthusiasm and comparison | Start with two sessions a week; add gradually |
| Ignoring pain | Pushing through pinching or sharp sensations | Belief that discomfort means progress | Stop the move, tell your teacher, speak with a clinician if it persists |
Safety and Who Should Talk to a Clinician First
For most healthy adults, a beginner Pilates class is low impact and well tolerated, and the research cited earlier reported minor or no adverse events in the trials it reviewed. That does not mean it suits everyone in every circumstance. Some situations call for a conversation with a physician, physical therapist or other qualified clinician before you start, and an instructor with relevant training can help you apply their advice. Everything in this guide is general fitness education and not individualized medical advice.
Who should check with a clinician first
The groups below are not a complete list, and “check first” does not mean “never.” It means that your clinician knows your history and can tell you which movements, positions and intensities make sense for you.
Pregnancy and postpartum
The Centers for Disease Control and Prevention’s guidance for pregnant and postpartum women advises at least 150 minutes of moderate-intensity aerobic activity a week for healthy people, notes that activity can be spread through the week, and says to talk with your doctor about adjusting activity during and after pregnancy. It also suggests avoiding activities that require lying flat on your back after the first trimester, which matters because many Pilates exercises, including several in this guide, begin on the back. If you are pregnant or recently gave birth, tell any teacher and look for instruction designed for that stage, such as prenatal and postpartum Pilates guide, and get your clinician’s go-ahead first.
Osteoporosis and low bone density
The Bone Health and Osteoporosis Foundation notes that correct body position matters especially when fracture risk is higher, and recommends working with a healthcare provider or an exercise specialist to find safe positions. The organization also publishes guidance acknowledging that popular activities such as Pilates and yoga need modifications, with some movements best avoided to protect the spine. In this guide, the exercises that round the spine, such as the chest lift and the cat stretch, are examples of the type of movement people with osteoporosis commonly need to clear first. Read the foundation’s exercise and safe movement page, then ask your clinician which positions are right for you.
Back pain, joint problems, recent surgery and chronic conditions
If you have ongoing back or neck pain, a recent surgery, a diagnosed spinal condition, joint instability, high blood pressure, heart or lung conditions, or any condition that affects balance, speak with your clinician before starting and let your teacher know. Pilates may be a sensible option for some people with these conditions, as the low back pain evidence suggests, but timing, positions and intensity matter, and recovery from surgery usually has its own protocol. A physical therapist can often translate general exercise ideas into a plan that fits your situation. Do not use a Pilates class as a replacement for rehabilitation prescribed by your care team.
| Situation | Why it matters | What to do first |
|---|---|---|
| Pregnancy | Position and intensity guidance changes as pregnancy progresses; lying flat on the back is typically advised against after the first trimester | Ask your obstetric clinician; seek prenatal-specific instruction |
| Postpartum | Recovery timelines differ by person and by type of delivery | Get clearance from your clinician; start gently with a trained teacher |
| Osteoporosis or low bone density | Some spinal movements can raise fracture risk and need modification | Ask your clinician which positions to avoid; look for an instructor with relevant training |
| Back or neck pain, especially with numbness or weakness | Underlying causes vary, and some need evaluation before exercise | Seek a medical or physical therapy assessment first |
| Recent surgery or injury | Healing tissues need protocol-specific loading | Follow your surgeon or therapist’s timeline before any class |
| Heart, lung, blood pressure or balance conditions | Effort and position changes can affect symptoms | Discuss exercise intensity and positions with your clinician |
Stop signs and smart modifications
Even without a medical condition, your body can tell you when something is not right. Learning to listen is part of what the method is training.
When to stop
Stop an exercise if you feel sharp, pinching or burning pain, dizziness or lightheadedness, numbness or tingling, or pain that travels into an arm or leg. Stop and seek prompt medical attention for chest pain, difficulty breathing that is unusual for you, fainting, or, during pregnancy, bleeding or fluid leaking. Tell your teacher about any of these during class instead of staying quiet to avoid a fuss. Mild muscle tiredness, light shaking in a working muscle and gentle stretching sensations are normal for new exercisers. Pain that lingers, grows or changes how you move for more than a day or two is worth discussing with a clinician.
Modifications that keep you in the game
Modification is a skill, not a retreat. The most useful options are shortening the range of motion, slowing the tempo, adding a prop for support, changing the position, or doing a lower-demand version of a move. For example, you can keep your head down during abdominal work, slide a heel instead of lifting a foot, or practice the cat stretch standing at a counter. A good teacher offers these as part of the class and is glad when you use them. If you are practicing at home and an exercise does not feel right, leave it out for now and bring it up with a teacher at your next session.
Frequently Asked Questions
Do I need to be flexible or strong before I start Pilates?
No, you can start exactly as you are. Flexibility and strength are things regular practice tends to develop over time, so neither is an entry requirement. A good beginner class offers easier options for tight hamstrings, stiff hips or a weak trunk, and a good teacher expects a wide mix of abilities in the room. The only real prerequisite is willingness to move slowly and pay attention. If a studio makes you feel you must already be able to do something, try a different studio.
How often should a beginner do Pilates?
Two or three sessions a week is a realistic starting point for most healthy adults. That rhythm fits public health guidance on muscle-strengthening activity and leaves recovery time between sessions. Short home sessions of twenty to thirty minutes can work as well as a longer class if you keep them consistent. If you can only manage one session in a busy week, it still counts. Adjust the plan if you feel sharp discomfort or lingering soreness, and ask your teacher or clinician for personal guidance.
Should I start with mat Pilates or reformer Pilates?
Either can work, and the better choice is usually the one you can attend regularly. Mat classes are generally cheaper, need less equipment and teach foundations that transfer to every other format. Reformer classes add springs and a sliding carriage, which some people find supportive and engaging, though they usually require a studio. Some teachers like to introduce the basics on the mat first, but plenty of people begin on the reformer with an intro series. Ask the studio what its beginner pathway looks like and book that class.
Can I learn Pilates at home with videos?
You can build a solid habit at home, especially if you choose a program that explains position clearly and offers modifications. The main limitation is that nobody sees your alignment, so errors can go unnoticed. Pairing home practice with an occasional live class or a short block of private sessions helps close that gap. Keep sessions short, use a stable surface and stop any move that causes sharp discomfort. If you have a health condition, get clinician guidance before you rely on recorded instruction.
Will Pilates help me lose weight?
Pilates can be part of an active routine, but the research does not show it to be special for weight or body fat. A meta-analysis of mat Pilates found it was not more effective than other exercise or control conditions for several body composition measures. Any activity you enjoy and repeat will likely matter more than the label. No exercise can burn fat from one chosen body area. If weight is a priority, a physician or registered dietitian can give personalized guidance that goes beyond what a class can offer.
How long does it take to notice a difference?
There is no standard timeline, and individual experiences vary a great deal. Many people notice small changes early, such as clearer breathing during effort, a better sense of where the pelvis and ribs are, or moves that feel less confusing. Larger changes in strength or comfort, where they occur, build gradually with regular practice. Tracking things like control, steadiness and how you feel at the end of the day is more useful than chasing a date on the calendar. If you are working with a clinician for a specific goal, ask them what progress should look like for you.
Is Pilates safe if I have back pain?
For some people with non-specific low back pain, Pilates appears to be a reasonable exercise option, and a Cochrane review reported minor or no adverse events in its trials. That does not mean every move suits every back. Pain with numbness, weakness, a recent injury or a diagnosed spinal condition deserves a medical or physical therapy evaluation before you begin. Tell your teacher about your history, choose a class with plenty of modifications and stop any exercise that causes sharp or traveling discomfort. Treat any general guide, including this one, as education rather than treatment.
Can I start Pilates while pregnant or postpartum?
Many pregnant and postpartum people exercise, but you should talk with your obstetric clinician before starting or continuing Pilates. Guidance from the Centers for Disease Control and Prevention suggests avoiding activities that require lying flat on your back after the first trimester, and many Pilates exercises begin in that position. Look for a teacher with prenatal or postpartum training who can modify the sessions for you. Tell the studio about your stage of pregnancy or recovery before class. Stop and seek medical advice if you notice bleeding, leaking fluid, dizziness or unusual pain.
How do I know whether a Pilates instructor is qualified?
Start by asking about their training, how long they have taught and whether they regularly teach beginners. Credentials vary, because Pilates teaching is typically certified by professional organizations and training schools rather than by a government license. A comprehensive credential such as the National Pilates Certification Program requires a substantial amount of training and an exam, though other schools offer strong programs too. The best signals in class are clear explanations, real modifications and attention to the people in the room. A credential helps, and a trial class tells you the rest.


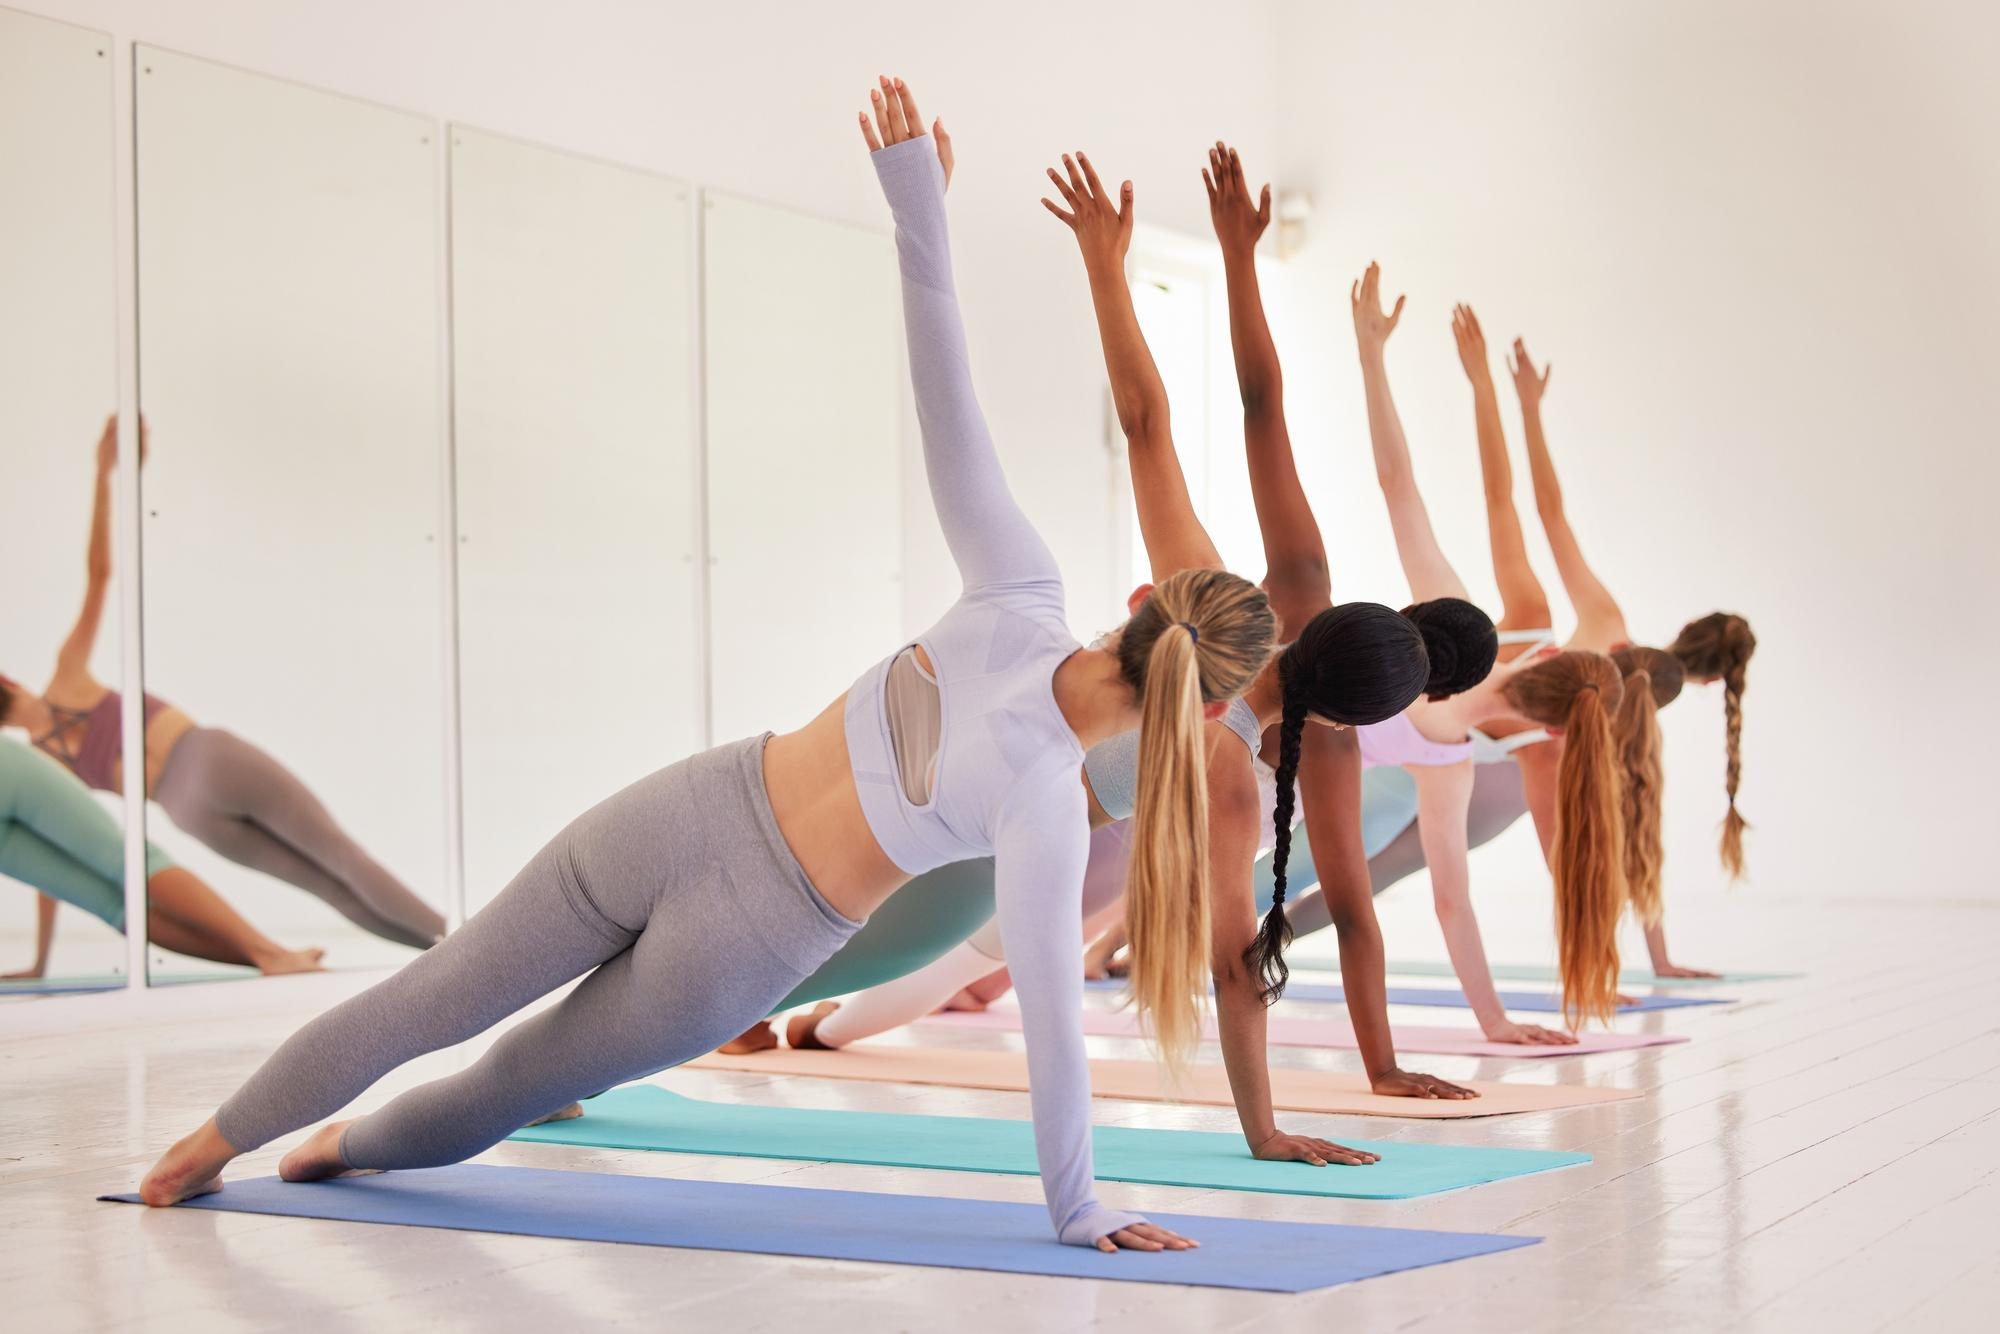
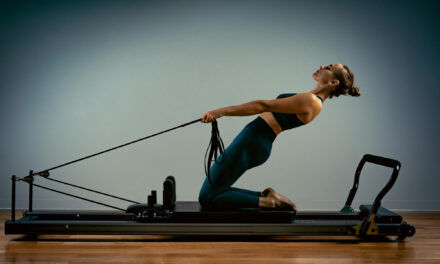

Trackbacks/Pingbacks